Bold lip

vivianmakeupartist_boldlipbold_lip_vivian

Salome is already SO NATURALLY gorgeous! Like….whoa—–right?


So here’s what I used on her skin (If I remember correctly she seemed to have just pretty normal skin, not dry, not oily.)
Laura Mercier Tinted Moisturizer
Cream contour in Walnut, Blush in Pink Grapefruit,  (you can make custom palettes, kind of cool.)
Illuminator Laura Mercier Peach Mosaic (the two lighter colors)
Brows Lancome Brun Brow Gel
-Eyeshadow on top is MAC Malt and on lower lashline it’s Makeupgeek Desert Sands(this shadow is kind of dusty but I love the color.)
-Purple eyeliner is MAC Designer Purple
-Lashes are Boudior HOL
-Lip color is e.l.f. Velvet Matte Lipstick in Vampy Violet (this is $3!!!) It went on reasonably smooth, but I had to layer it a bit to get a consistent color. It’s a great bargain lipstick. I also really love Bite Black Truffle  (this color is daaark, so slightly lighter shades would be Jam or Liquorice.)dramatic_natural_makeuppurple_eyeliner_vivianmakeupartist

Photos by Whitney Kofford

2017-07-14T15:42:57+00:00 February 13th, 2017|Makeup, Uncategorized|0 Comments

Foundation for Combination Oily Skin

My biggest issue with foundation that can endure oily skin is that most of them look like So. Much. Makeup. In all of my product trial and error I would find foundations that would stay looking more matte, but then I looked like a floating head of foundation. Not my fave.

I am still on the hunt for the perfect foundation, but til then, this ones pretty good

Double Wear Light 
-medium coverage
-Best for t-zone oily, or oily OR if you want a long-ish wear
-What I like about it—it dries and sets
-After several hours I get a little bit “radiant” but it’s tolerable. Not super flat matte, but not greaseball.

Things to note:

-Limited color options so I often have to mix them to get a match (I’m a 3 mixed with a 3.5 sometimes 4)
-I have to wash my foundation brush more often because the foundation stiffens in it. 
-For the first few hrs I feel a tiny bit makeup-ey. Not over the top, but like I’m wearing foundation. After about 3-4 hrs it looks more natural. Gets slightly shiny after 5-6 hrs.
-Also let’s not forget about blotting sheets (why do I go through phases of remembering these handy things exist!?)

Since it dries and sets, apply it in sections on your face, like the lower right side, then the lower left side, then the upper right, then upper left.   

What are your favorite foundations?

2017-02-13T12:04:07+00:00 February 13th, 2017|Makeup, Uncategorized|0 Comments

IIID Foundation Help

Hey guys, anyone remember this post? I thought I’d bring it back to life.

I often teach makeup lessons and classes and I always emphasize this one very important thing: Your skin is really important, it takes up the majority of your face. It needs to look good.

There’s a product called IIID foundation and I stole this description right off maskcaracosmetics.com: IIID Foundation is a two color foundation system that gives you skin smoothing coverage, a perfect sculpt and movie star lighting all in one speedy system!

If you haven’t seen this video, go watch. She show’s you exactly how to use it.

This product is ideal if you:

-Want to highlight and contour and need it to be fast

Real fast, I thought I’d tell you a few things about me and where I’m coming from with my little opinions 😎 (you gotta consider your source, right?)

Hi I’m Vivian 🙂 I did my first paid makeup and hair job at age 14, my first bride at 16, and I moved by myself to LA when I was 17 to go to makeup design school (yes everyone I knew freaked out, understandably.) That was 10 years ago. I’ve done makeup for celebrities, movies, music videos, advertisements, blah blah etc. etc. but MOST IMPORTANTLY on thousands of everyday people, just like me. (a more detailed and less-braggy-sounding version of my story is right here.) I’m an observant perfectionist (working on easing up on that a bit!) and I’m the friend who will lovingly tell you when you have spinach in your teeth.

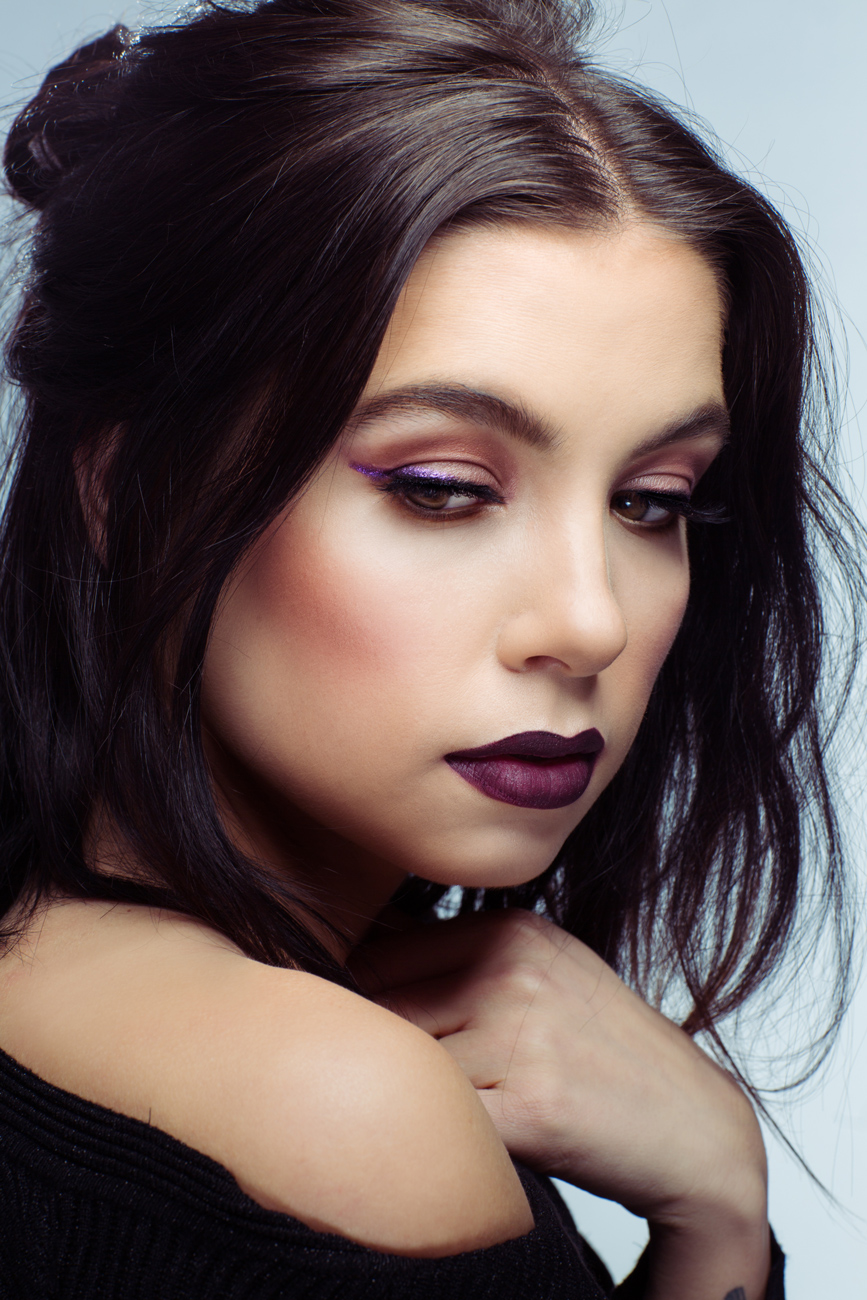
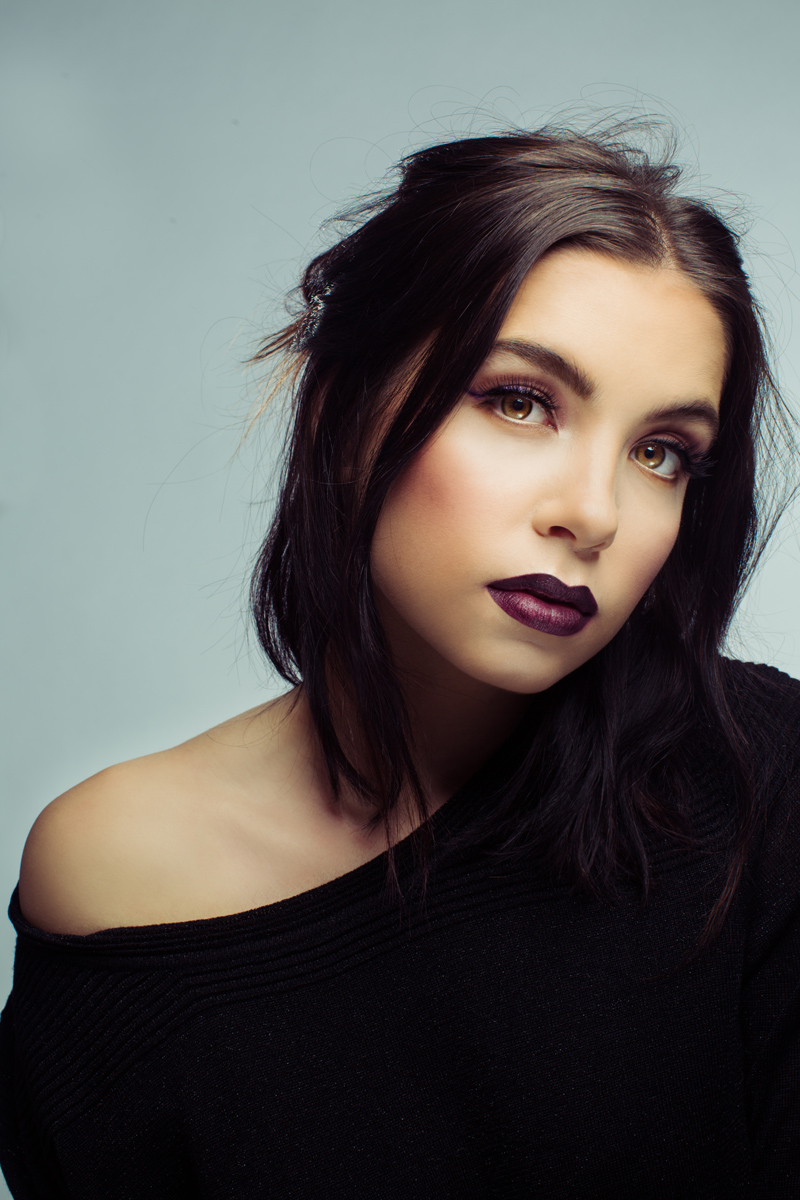
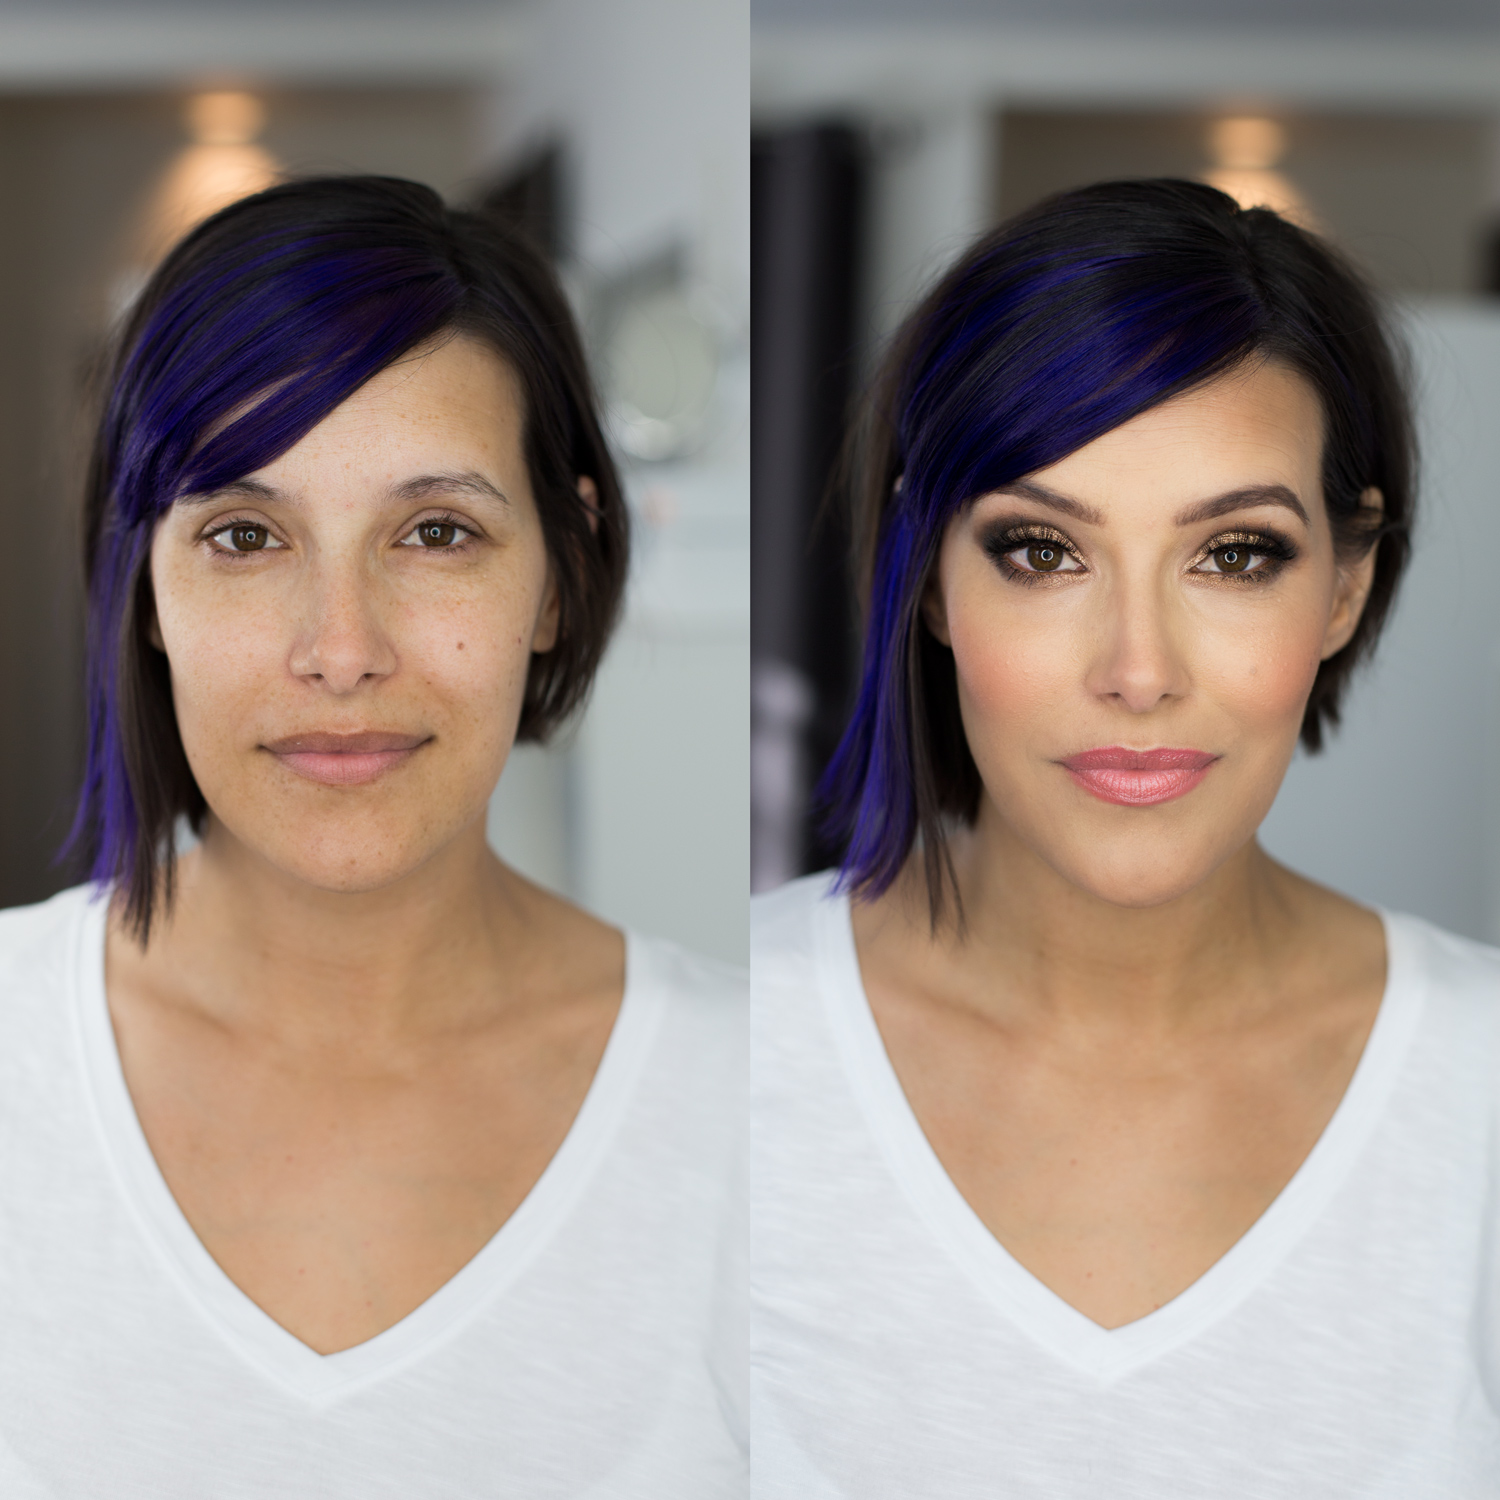
And this is me, two times.
otherfoundation_iiid_web
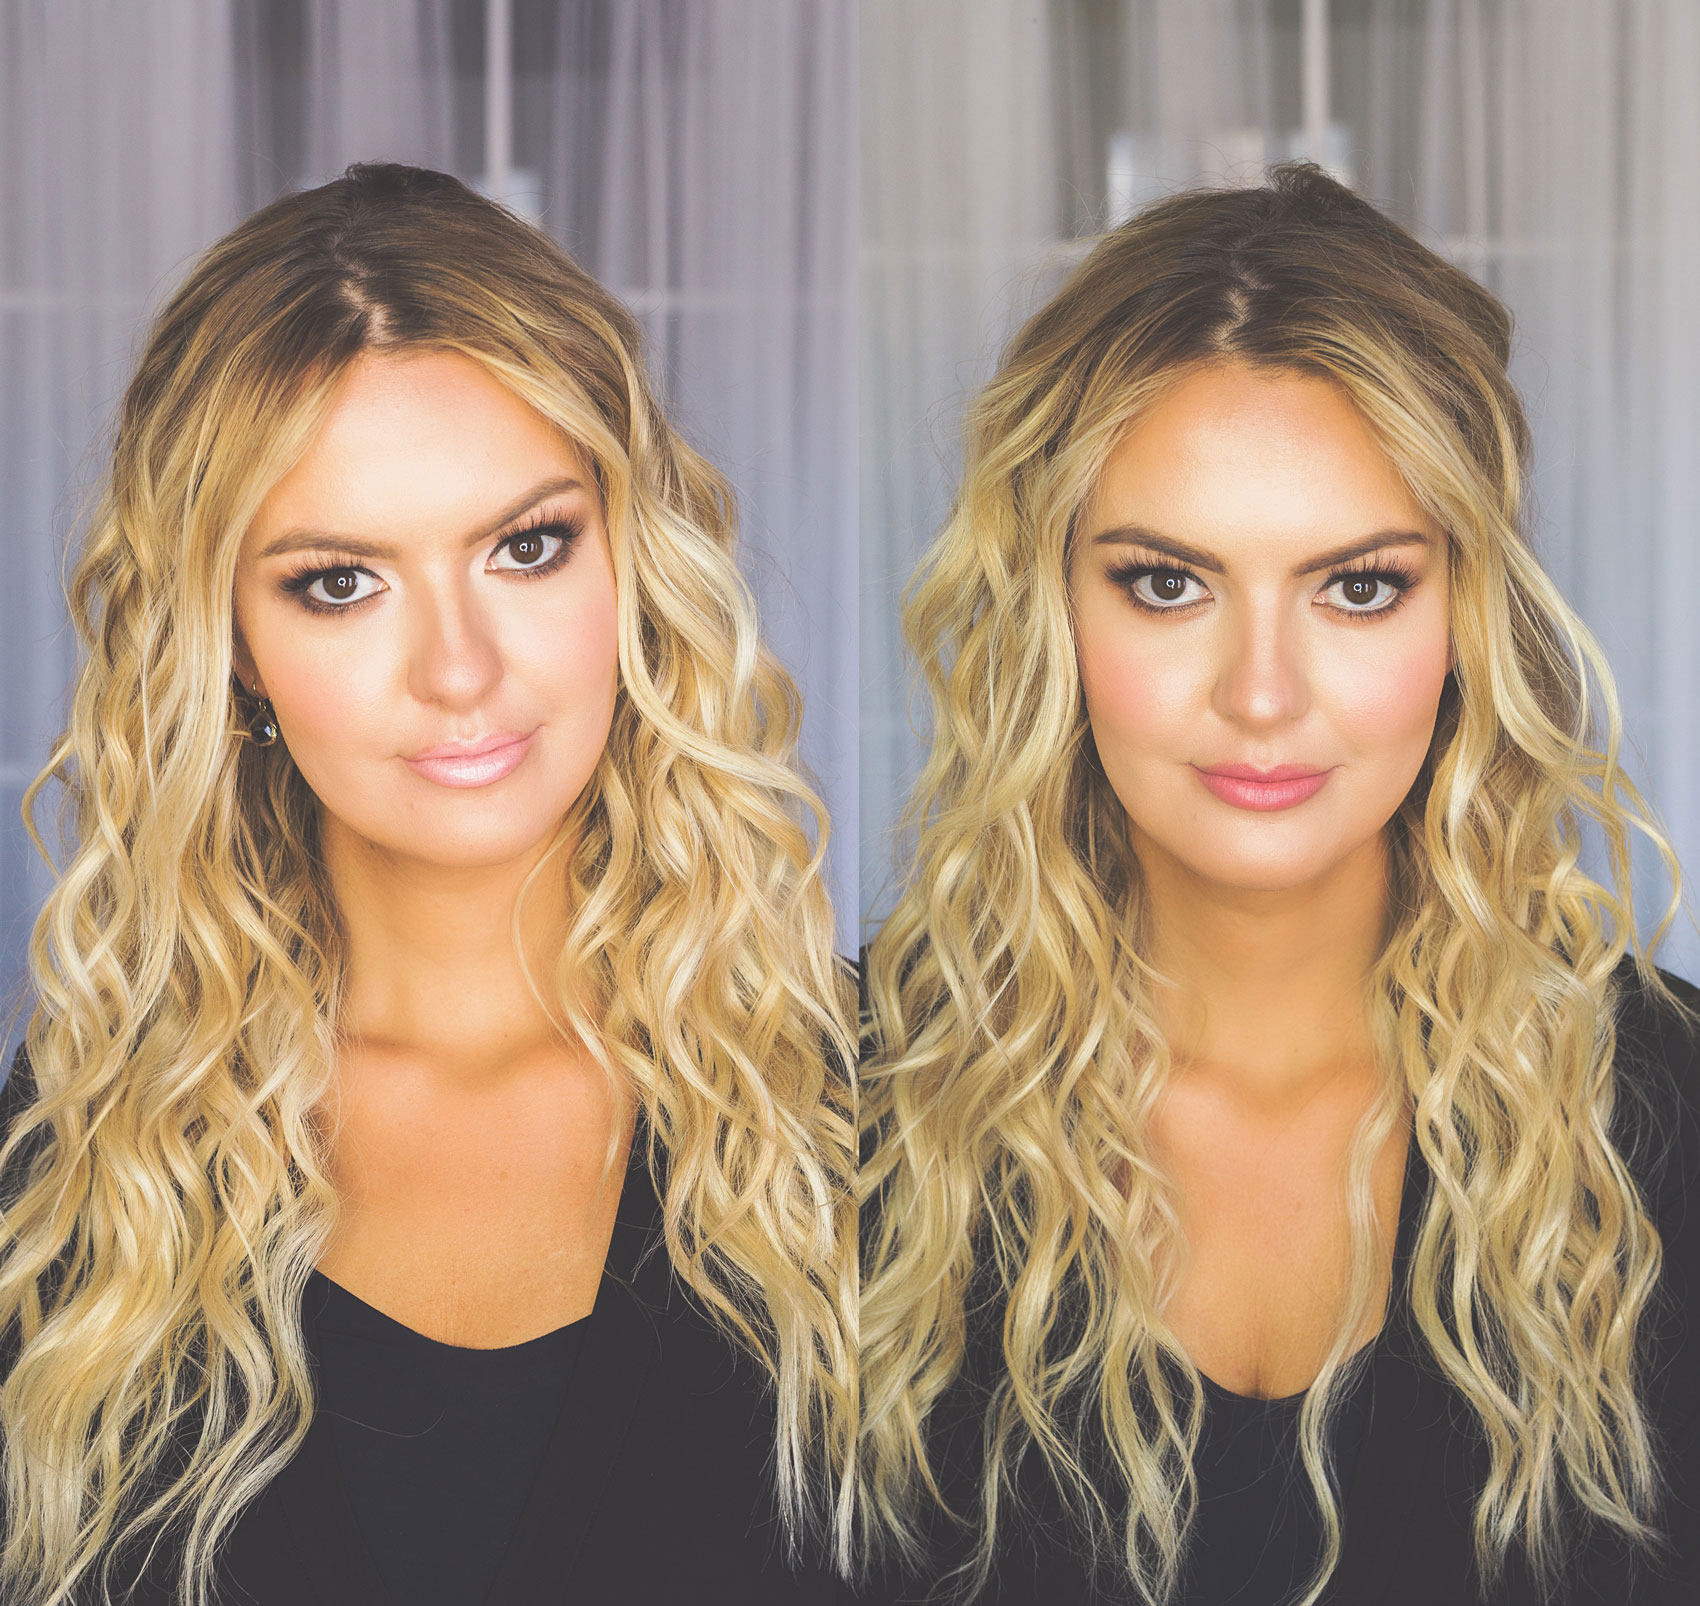
The makeup on the left took me 50 minutes to do. Five Zero. Granted I was getting ready to be on tv, but still, that’s a lot of time. The makeup on the right (using IIID) took me 20 minutes (details here.)

Anything revolutionary is bound to need some troubleshooting. Especially since we’ve all been living in the drab world of opaque flat color foundation. It’s like when you get a new phone. At first you have to think a little more about what you’re doing as you navigate it, then all of a sudden something clicks and it becomes second nature. Same with highlighting and contouring.

This is my FAQ, to add to the already rather thorough one you can find at the bottom of this page.

To streamline, I’m going to go through some typical questions/statements I get when showing someone how to use this foundation:

The dark foundation seems really dark and the light seems really light! Yep, and when they are blended nicely on your pretty little face it equals = your color.

Sometimes when I blend, I kind of blend it away. Use less pressure when you are blending or you can always add a bit more product after the first round of blending for added coverage. It’s the blend-ability and creaminess of this product that makes it both fast and easy to use. Foundations that dry and “don’t budge” require a lot more precision and take longer to apply, which is why IIID is ideal for fast everyday use. 

What is the finish of this foundation? I would call it semi-radiant. Just like healthy skin is.

If I touch and rub my face a bunch will it come off? Probably a little but should we be putting things on our face that don’t come off? My guess is probably not. Solution— don’t rub your face a bunch. If you have to blow your nose or something it takes like 4.5 seconds to touch up this foundation. 

After a few hours I always get shiny, will that happen with this makeup? If your skin produces oil throughout the day this product will not stop it from doing so. NBD just powder if you get too shiny!

So do I use the same brush to apply the blush that I use for foundation? Yes! You definitely can, just wipe off the excess when switching products. Or you can designate this brush here specifically for blush. 

So does this replace concealer? It can! And if you feel like you need more coverage in certain area’s on your face apply the IIID first, then conceal where you need it. That way you’re not piling on makeup where you don’t need the coverage. 

And that’s that.

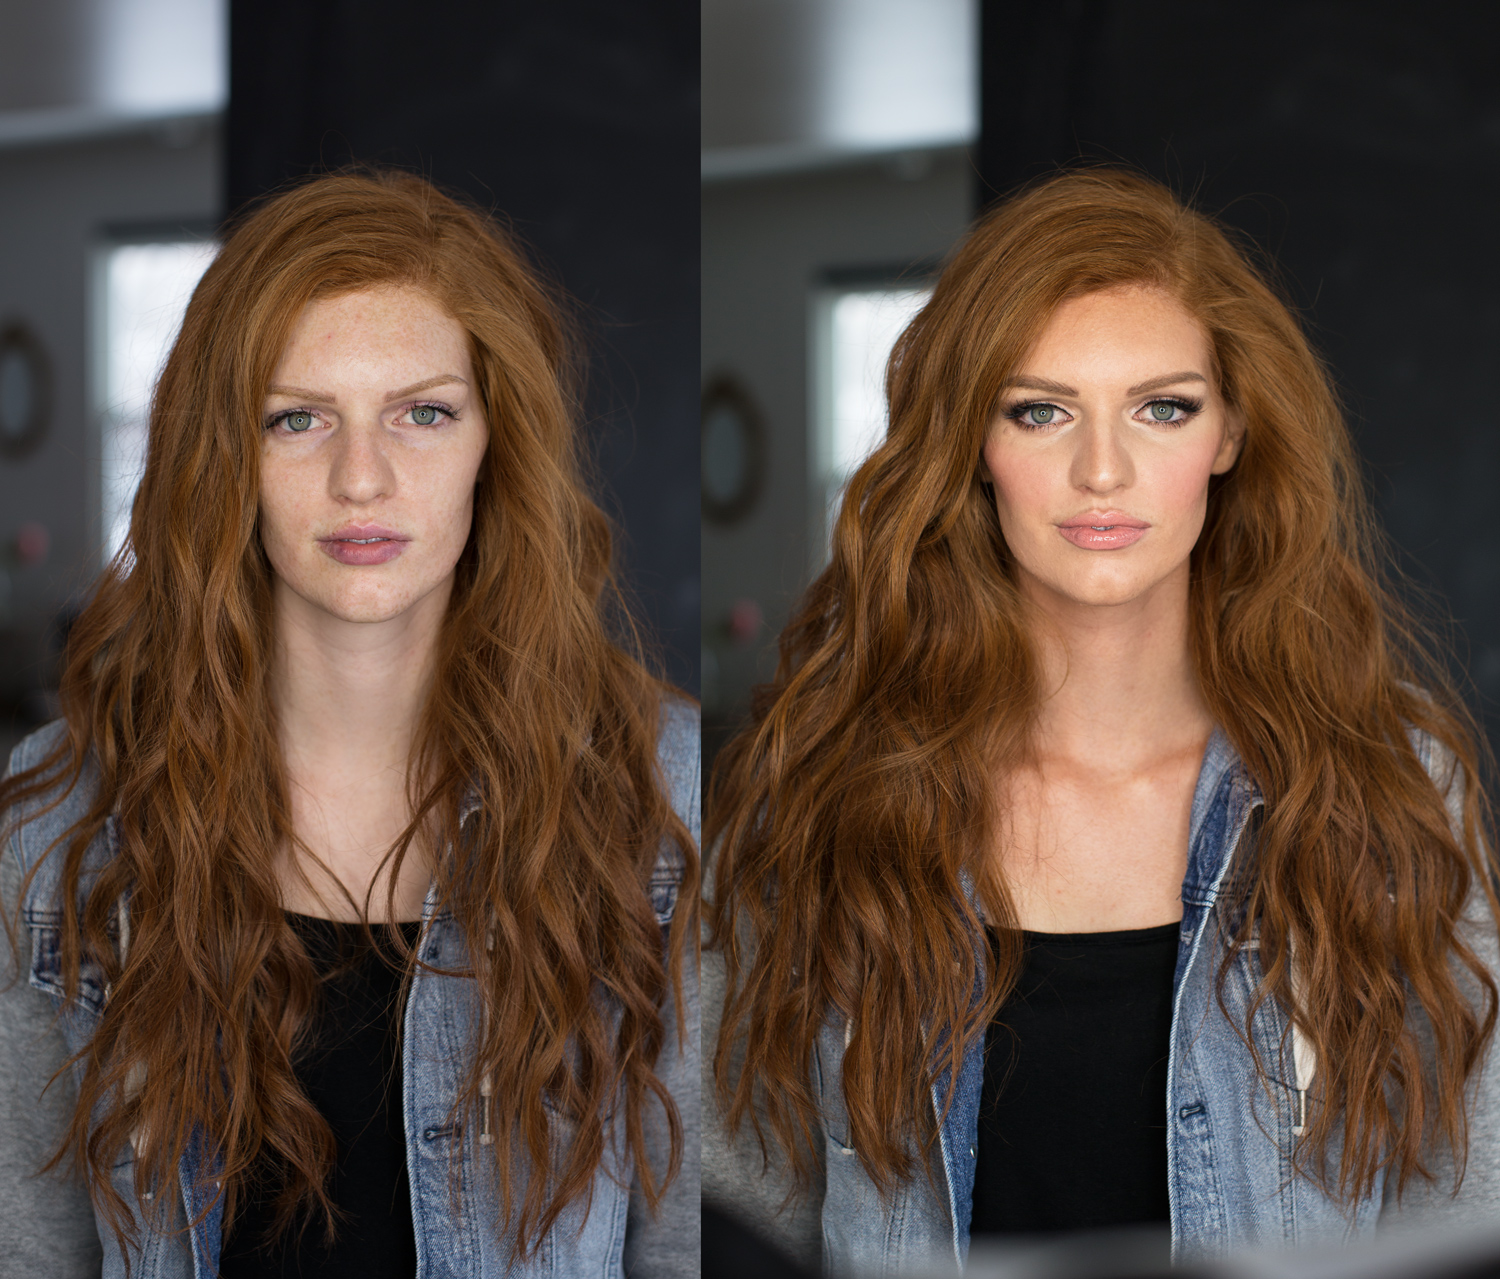
I originally planned on doing separate before and after posts for both of those photos (Took the photo on the left, washed my face, took a makeup-less photo, then did the makeup on the right) but when I got the photos I had to post both makeup looks side by side to show the….lack of difference. Well, other then my nose probably looks better in the one on the right. And a demo of the ongoing forever question I have “To line the inner rim with dark or light. Dark…..or light…..”otherfoundation_iiid_webPhotos by Keala Jarvis

Thanks so much for reading you guys xoxoxo


2017-07-14T15:42:58+00:00 January 29th, 2017|Makeup, Uncategorized|8 Comments

Victoria Secret Makeup Look

victoria_secret_makeupI spent the past week in Cabo celebrating my 5 year anniversary with my husband Jeff. It was my first time out of the country for something other than work, and it was awesome. We paid for the entire trip with points, but it still felt like such a lavish venture. Jeff loves traveling, and I love traveling when I’m with him, so it works out nicely.

I tried to ignore them. The people that were everywhere; covering the beaches and the sidewalks and restaurants, who were incessantly trying to sell us things or get us to go into their restaurant or take a water taxi. I see both sides. I understand that they are working hard to make money and since their town is often taken over by tourists, they may as well try to maximize the opportunity rather than be annoyed by all the visitors. But the inability for me to take in my surroundings, or remember what I was talking about in my conversation to my husband because they would loudly interrupt and keep pushing even after we politely declined, tainted certain parts of the trip for me.

I bring this up because I don’t want the people who read my posts on here or instagram to feel like they are being bombarded with someone trying to sell them something every second. I get asked all the time for details on the makeup looks that I do and I value that you take the time to read what I have to say so I want it to be helpful. But never want it to feel pushy.

Thanks for letting me get that off my chest 🙂 Isn’t Lacee beautiful? creameyeshadows_victoria_secret_makeup

Face: La Mer Foundation, Cle de Peau Concealer in Almond,  Laura Mercier Translucent powder,  Cover fx Custom Enhancer Drops in Celestial, Chanel Rose Bronze blush, Guerlain Terracotta Bronzing Powder 3

Eyes Marc Beauty Twinkle Pop Stick Eyeshadow Three Shakes,  Lid is Candlelight by Sense Cosmetics (can also use MAC paint pot in Painterly)  Lashes are HOL Siren,  Sephora Fine line 24 hr eyeliner,  and her brows are tattooed but I added some detail to them using ABH Brow wiz in Soft Brown. 

Lips: NYX Nude Beige liner,  and I used Rimmel London lipstick Kate Nude collection #41 but I can’t seem to find it anywhere online so it looks a lot like Tom Ford Pink Dusk.

2017-07-14T15:42:58+00:00 December 13th, 2016|Uncategorized|0 Comments

How to organize your makeup for travel

how_to_pack_makeup_for_travelAfter smooshing several brushes, causing the bristles to fray out and not work well, I decided I needed to come up with a better system for packing up my personal makeup when I travel. I tried a few different bags and containers, but I didn’t love them. I finally found one that I love and here’s why:

-Your makeup and your brushes are together in one bag.

-It protects your brushes.

-You can fit a ton of makeup but it doesn’t take up a ton of room.

-You can work out of the bag, which saves counter space. And you don’t have to dump everything out to find what you need.

-The fabric is easy to clean (it’s a super nice black velvet.) Use a drop of soap diluted with water and wipe it down with a cloth and let it air dry.

It’s called the Hold Me Bag.  If you’re a video person, I found this video that shows it pretty well.

The first bags I purchased were between $30-$60, but none of them did what I needed them to do so for me this one is totally worth the cost. Plus it seems to be made of really high quality materials and it’s going to last.Travel_makeup_organizermakeup_for_travelhold_me_bagmakeup_organizerAs you can see in the photo where I’ve filled the bag with all my stuff, I put little labels on the left side.

I realized that typically when I’m getting ready to leave for a trip, I’m more stressed than normal and am packing in a hurry. After forgetting to grab a few essential makeup items during the packing process, I decided to make a list in my phone of items I’d need. That ended up being helpful, but still taking more time because I’d have to keep checking my phone to see if I got everything.

So I decided to just put the list directly in the bag, so I always have it.

Here’s my list if you’d like to use it to make a packing list for yourself:

Foundation

Concealer

Powder

Bronzer

Contour

Eyeliners

Blush

Eyeshadow Base

Eyeshadow

Mascara

Brow Pencil

Lips

Eyelash Curler

Lashes

Lash Glue

I used my label maker to make the list ( I have this model, but it’s discontinued and there’s newer nicer models available now for cheaper.) The reason I used my label maker instead of just printing a list is if I decide to add or change the list, I can just print another label instead of having to reprint the whole thing. Also these kinds of labels are durable (which is why I finally purchased a nicer label maker, because my cheaper handheld one can only print paper labels, which get annihilated when used for makeup organizing.)

I’d recommend getting this BROTHER PRINTER PTD600VP

And I used these black labels with white writing

Here’s my brush list:

Foundation

Concealer

Bronzer

Powder

Contour

Blush

Eyeliner

Eyeshadow

Tweezers

Scissors

The products in the bag: Givenchy Eclat Matissime foundation (discontinued.) I’ve been alternating it with Estee Lauder Double Wear Light (I mix #3 and #3.5 together for my shade.) Cle de Peau Concealer in Almond. Guerlain pressed powder in 03.  Guerlain bronzer. theBalm Bahama Mama. Urban Decay Eyeshadow base.  Chanel eyeshadows in Tisse Essentiel. Lancome eyeliner in Noir. Chanel liquid eyeliner. Lancome Definicils Mascara. Tarte blush in Blissful. Lancome O so Coral lipgloss. Urban Decay lip liner in Turn On. Bite Agave Lip Mask (I packed the trial size.) House of Lashes  in Siren and adhesive. Eyelash curler. 

Brushes: Lancome Powder brush (I use for bronzer,) It Cosmetics Flawless powder, It Cosmetics dual ended foundation concealer brush (best price here, but also available at Ulta.) Makeup Forever 106 (I use it to apply cream blush.) Charlotte Tilbury Powder and Sculpt brush,  MAC Fluff Brush, MAC Mini Shader, Giorgio Armani concealer brush (I use it for eyes,) It Cosmetics Blending concealer brush,  Hourglass Large concealer brush, Hourglass Concealer brush.  MAC eyeliner brush (use with MAC creme liner.) Tweezerman tweezers (cheapest price here, but can also buy at Sephora.) Tweezerman Stork scissors. 

Hold Me Bag here

I hope this is useful! If it is, leave a comment! And let me know if you’d like tips on the best ways to pack your toiletries too!


2017-07-14T15:43:00+00:00 March 21st, 2016|Makeup, Uncategorized|4 Comments

Ashley

Miss Ashley is always a blast to be around. She was getting some photos taken and requested more of a glam look. salt_lake_city_makeup_artistComplexion: It Cosmetics CC Cream in Medium(shade guide here)Tarte Creaseless Concealer in Medium,  Maskcara contour in Stone,  Tarte Blush in Fearless,  You can’t really tell in this photo but I also used Benefit Sun Beam on the high points of her cheekbones.

Eyes: Urban Decay shadow primer, MAC eyeshadows in Bamboo, Woodwinked (shimmer), Embark and Carbon. Guerlain ‘Cils d’Enfer’ mascara, Chanel liquid eyeliner, Lancome le Stylo in Cafe on inner rim, House of Lashes in Siren and House of Lashes adhesive.  Cleaned up her brows with my favorite tweezers.

Lips: Urban Decay lip liner in Streak, Lipstick Queen Cool Gin (I’ve been wearing this lipstick like everyday, love the color and texture. They describe it as a pink nude. I’d describe it as a rosy coral, medium brightness.)  And a little bit of Tom Ford Luca lipstick in the center to highlight. (shade guide here)

2017-07-14T15:43:01+00:00 March 6th, 2016|Makeup, Uncategorized|1 Comment

Spray Tanner

Hey guys! I’m so excited to be blogging! Today I want to talk about one of my favorite things, self tanner.

Janae (an amazing videographer) wanted to have a little more color for her engagement photos (she felt like after they’re edited and brightened it would look better, especially since her fiance is so tan.)makeup_for_red_headsNot gonna lie, I kind of love her natural skin tone. I feel like the contrast with her hair looks drop dead gorgeous and striking. But I do like her tan as well, it gives kind of a warm sexy vibe.

My favorite self tanner lately has been the Rodial Airbrush Tan . It’s a self tanner and it also gives a lot of color instantly. It comes out as a fine mist spray.

Just a pointer, be aware of your surroundings when you spray this. If you want to do a few coats you can either spray it in the shower or throw on a tank top and endure the frigid outdoors for 30 seconds while you spray it. I also like the Tomas spray tan but the last couple of cans I’ve gotten have kind of splattered when I spray it. It still works you just have to blend it out with a tanning mit or big buffing brush.

I LOVE spray tans and self tanners. The only things I don’t love about them is the after-the-tan-starts-to-develop smell (the Rodial however, doesn’t get this really) and when the self tan get’s messed up.

Please excuse the awkwardness (and low quality) of this photo, it was taken on my phone. But I HAD to show it. tan_handsThis was taken on the same day (I think the black-ness of my skirt threw off the coloring of my hand in the left photo. Believe me, my hand was tan and the messed up thumb area, was even worse and darker in person!)  I had gotten a professional spray tan and then gone to sleep, only to discover when I woke up that I had badly messed up my hand (I think I laid my hand on my chest? Or maybe coated my thumb when I was getting dressed right after the tan. Either way, it was bad.) The photo on the left was after soaking and scrubbing all morning! It would NOT come off.

The photo on the right, was after using a damp Magic Eraser to remove the self tanner stain! (don’t rub TOO aggressively, it will give you like a baby rug burn if you get too excited!) After I tried everything to get it off, I finally contacted Amanda from Bella Airbrush Tanning. She came to the rescue with this self tanning mess up fix it trick!

Last but not least, if you like self tanners but can’t handle the smell, definitely try Xen Tan Scent Secure. I’ve gone through 3 bottles over the last couple of years and LOVE it.


2017-07-14T15:43:03+00:00 January 4th, 2016|Uncategorized|3 Comments