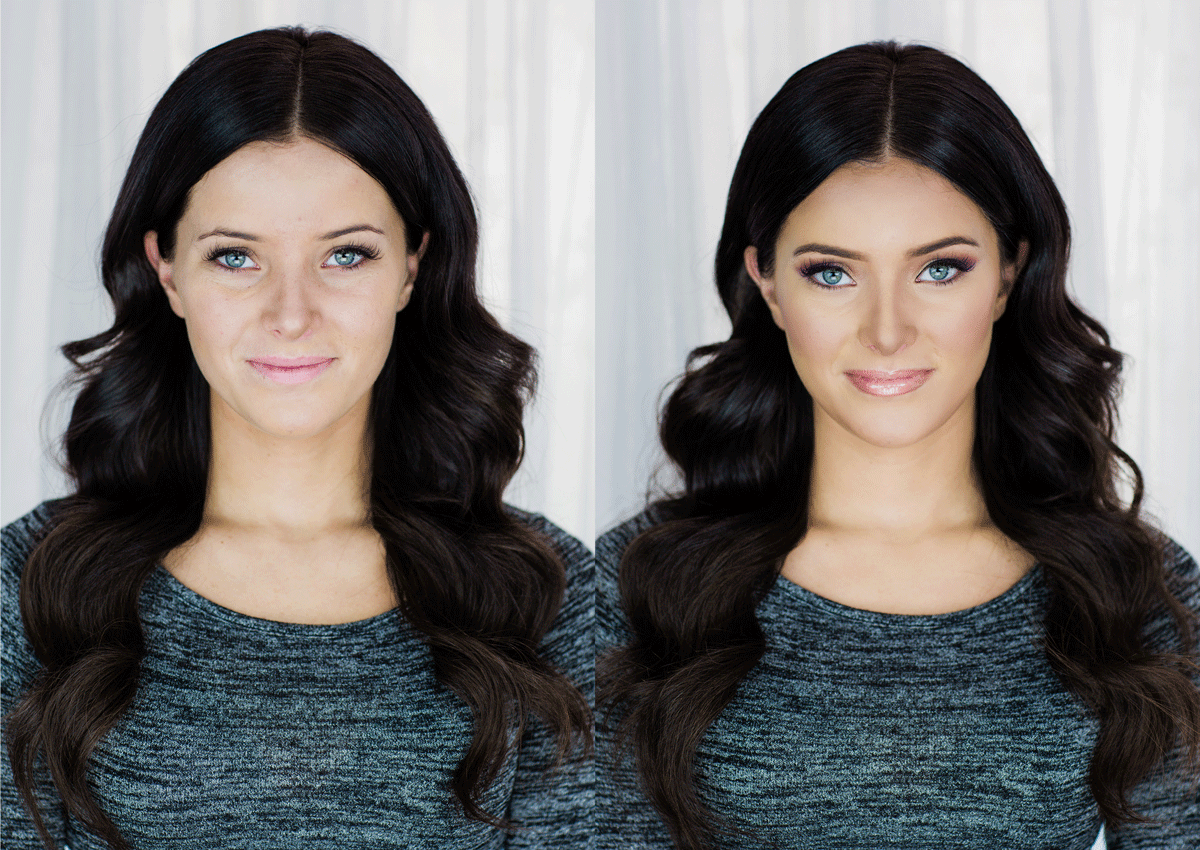
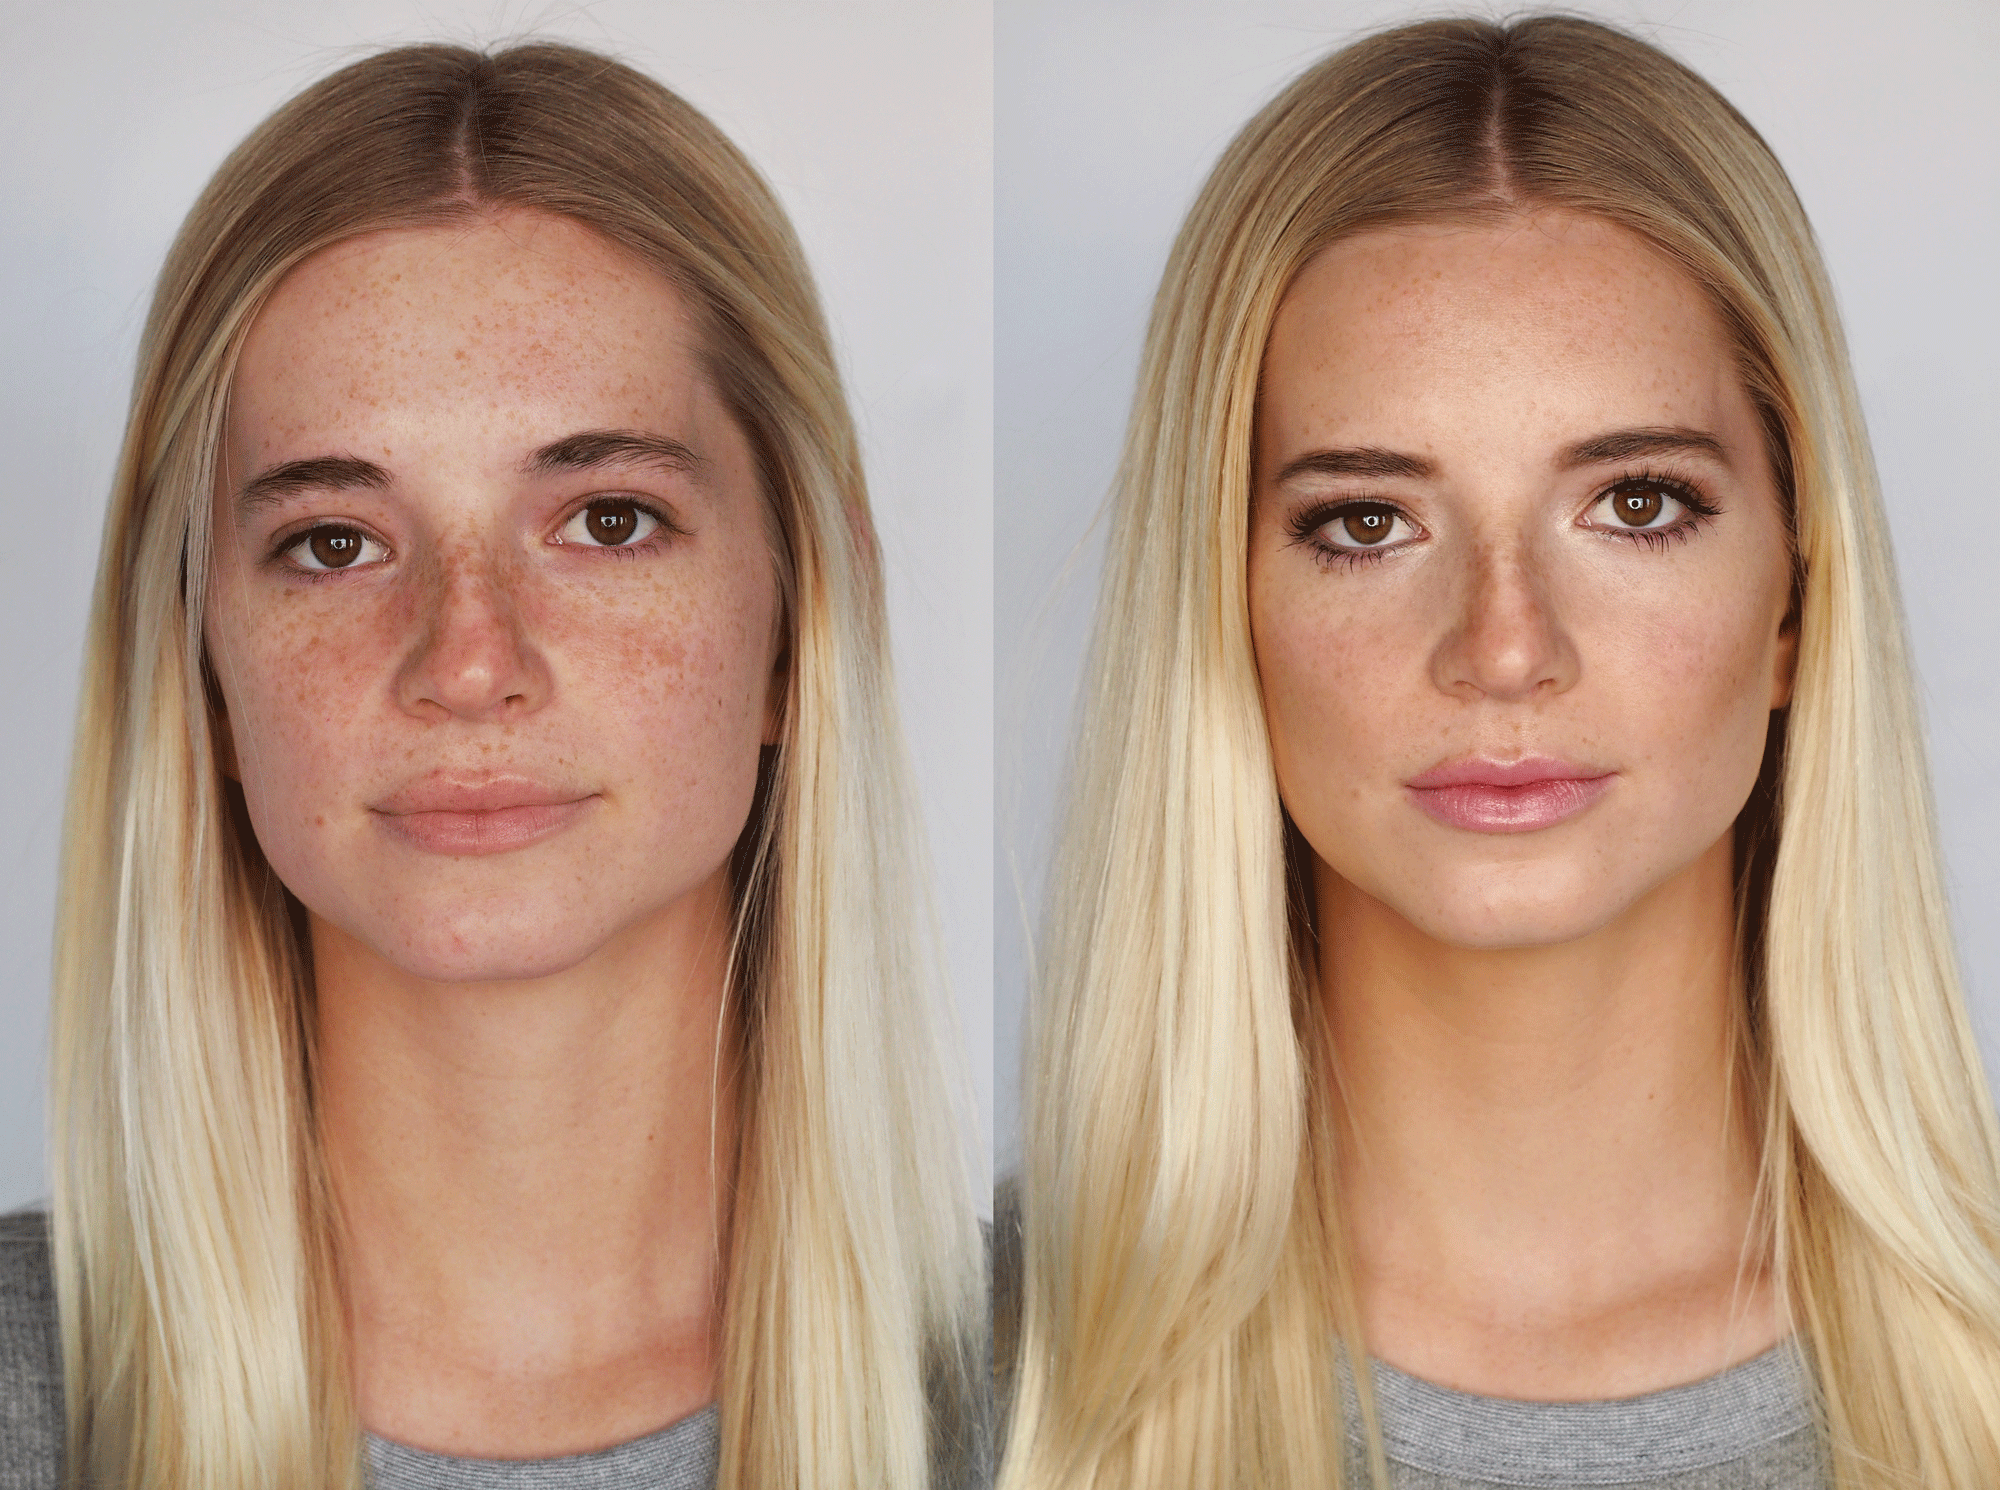
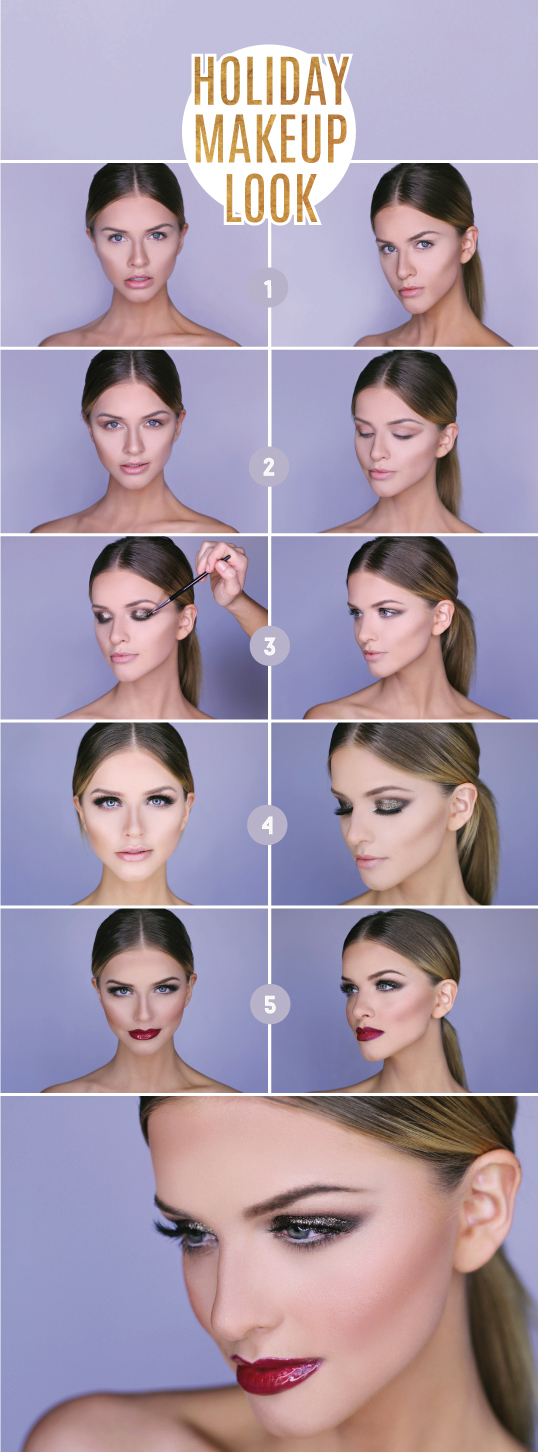
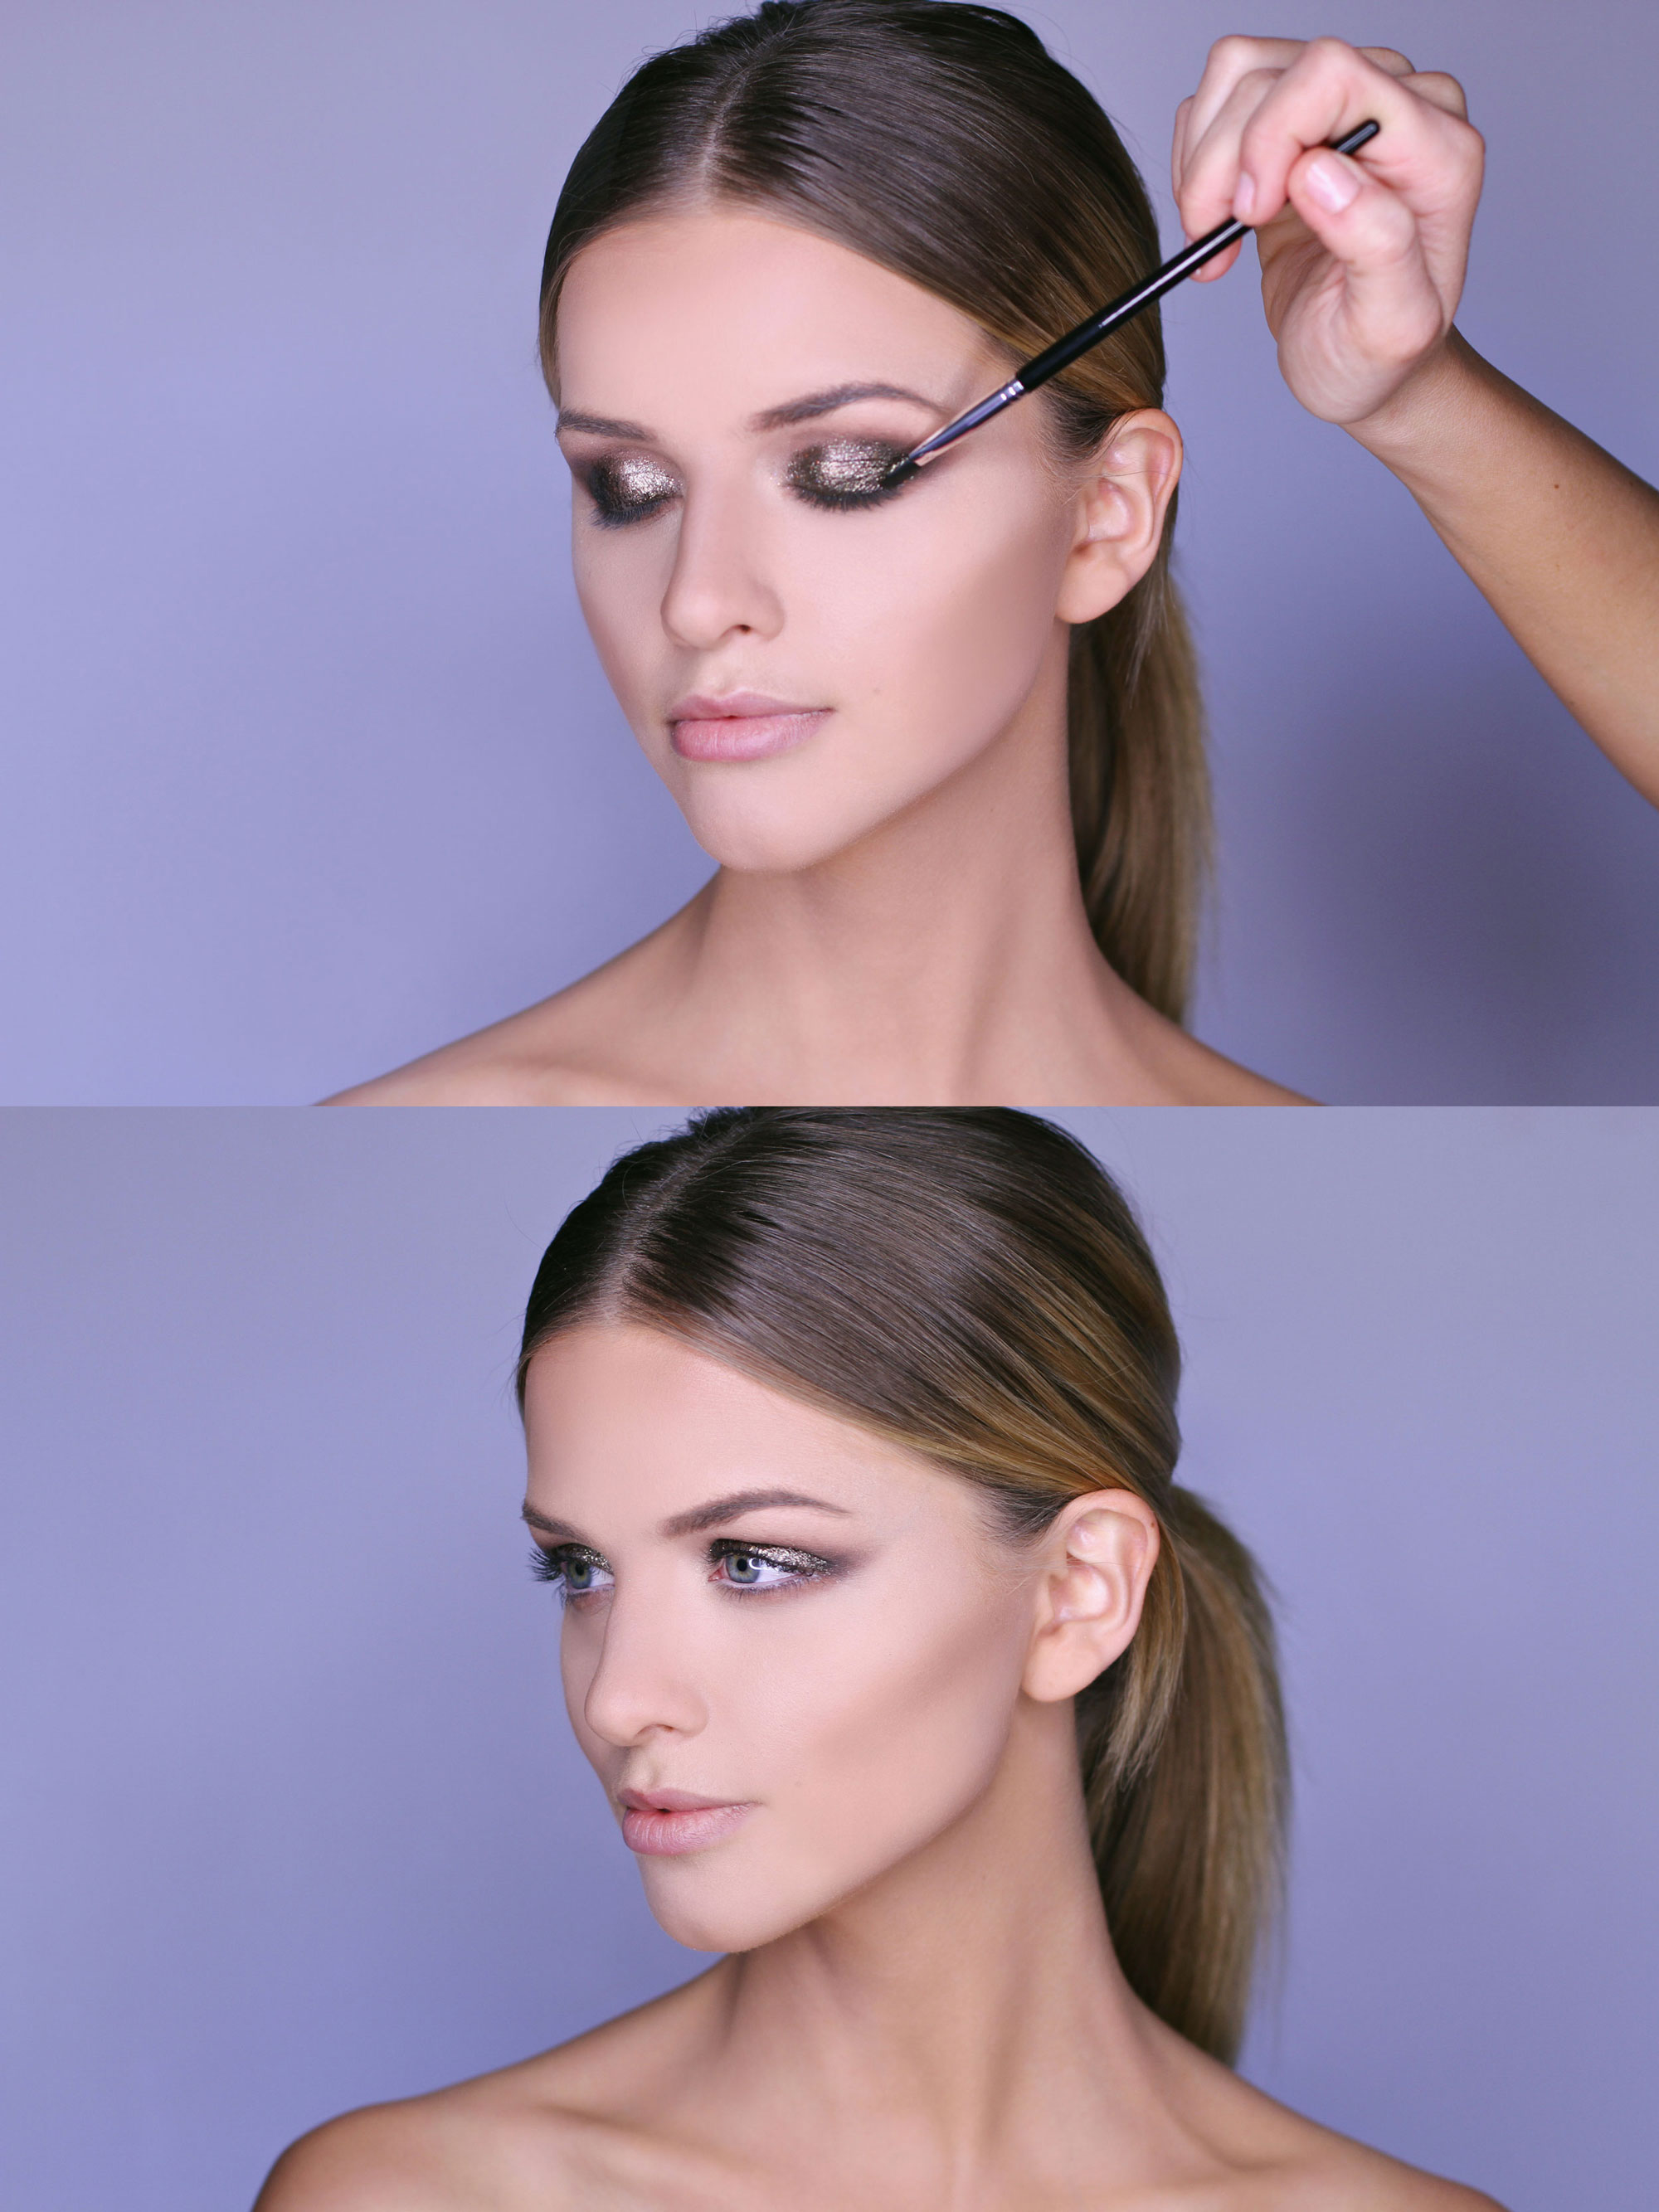
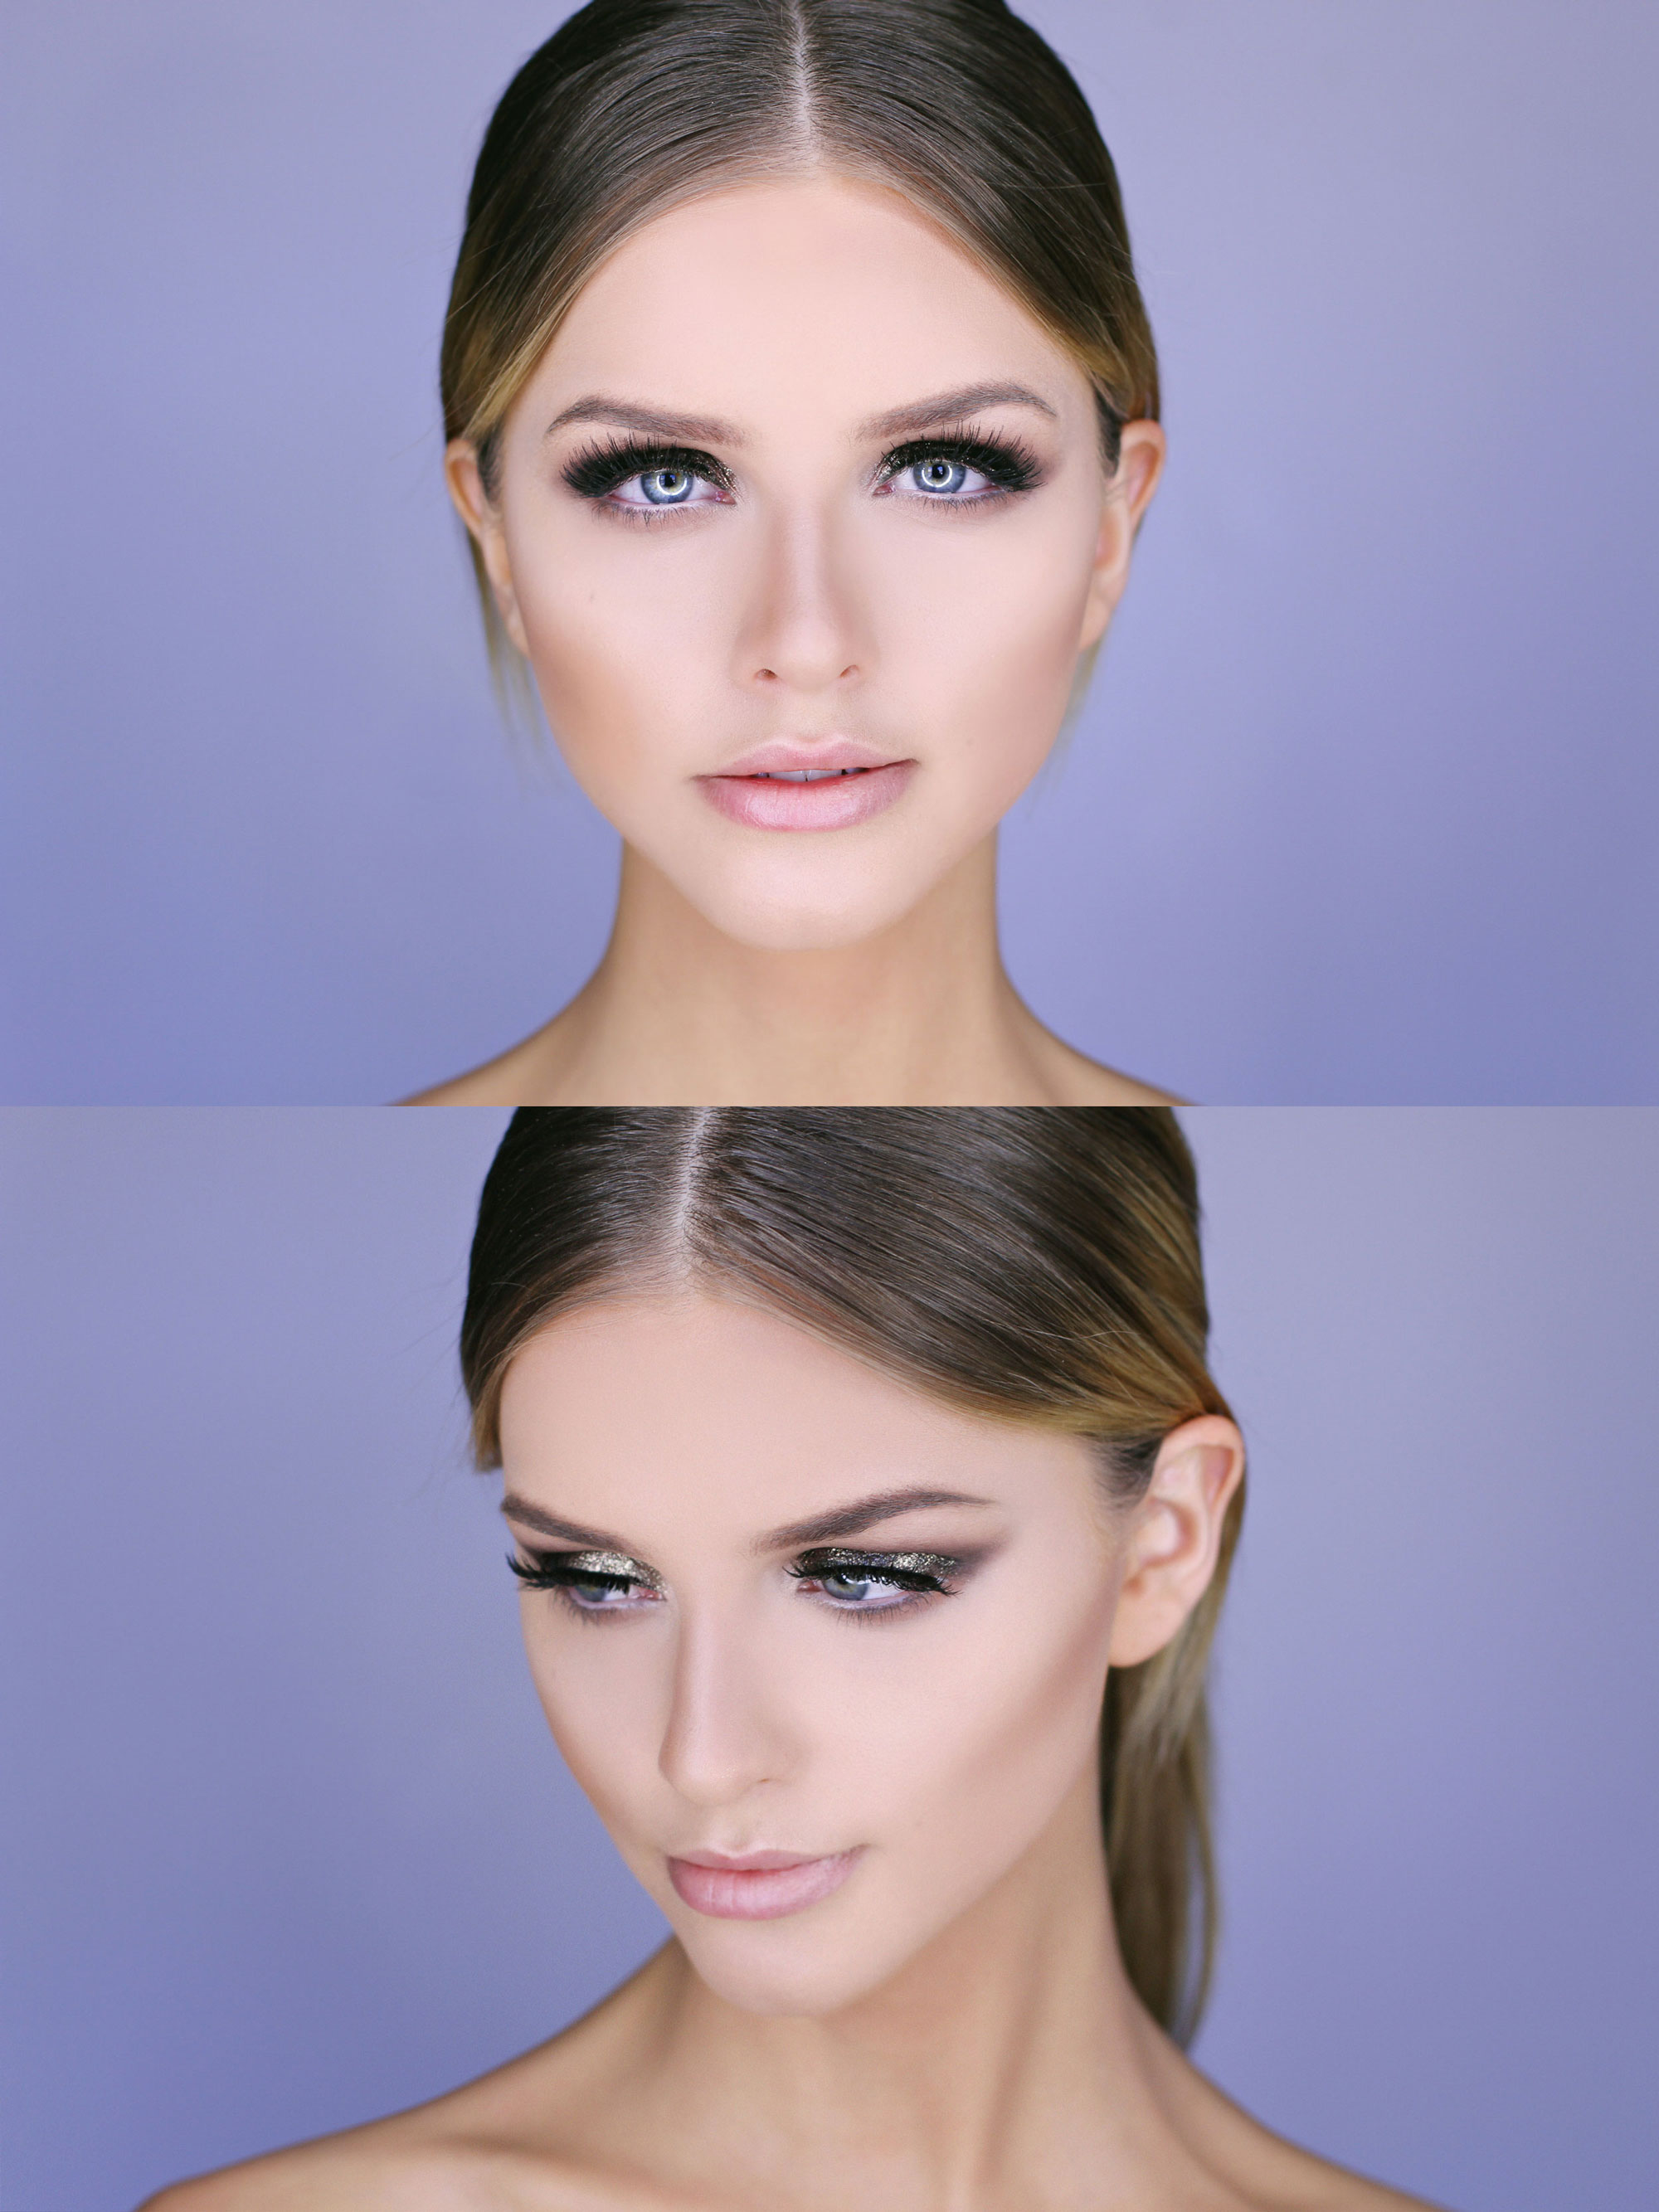
Winging it

Winged eyeliner is all the rage right now! I’m seeing it everywhere!
vivianmakeupartist_wingedlinerAnd it’s the first thing on the list of The Best Makeup Trends For Spring 2015 along with several other spring makeup trends. My personal fav’s are the Brown-Eyed Girls (brown eyeshadow trend) and the Bare Minimum (barely wearing any makeup, makeup look.) What’s your favorite makeup look right now?

And of course, the winged eyeliner look. 
vivianmakeupartist.com
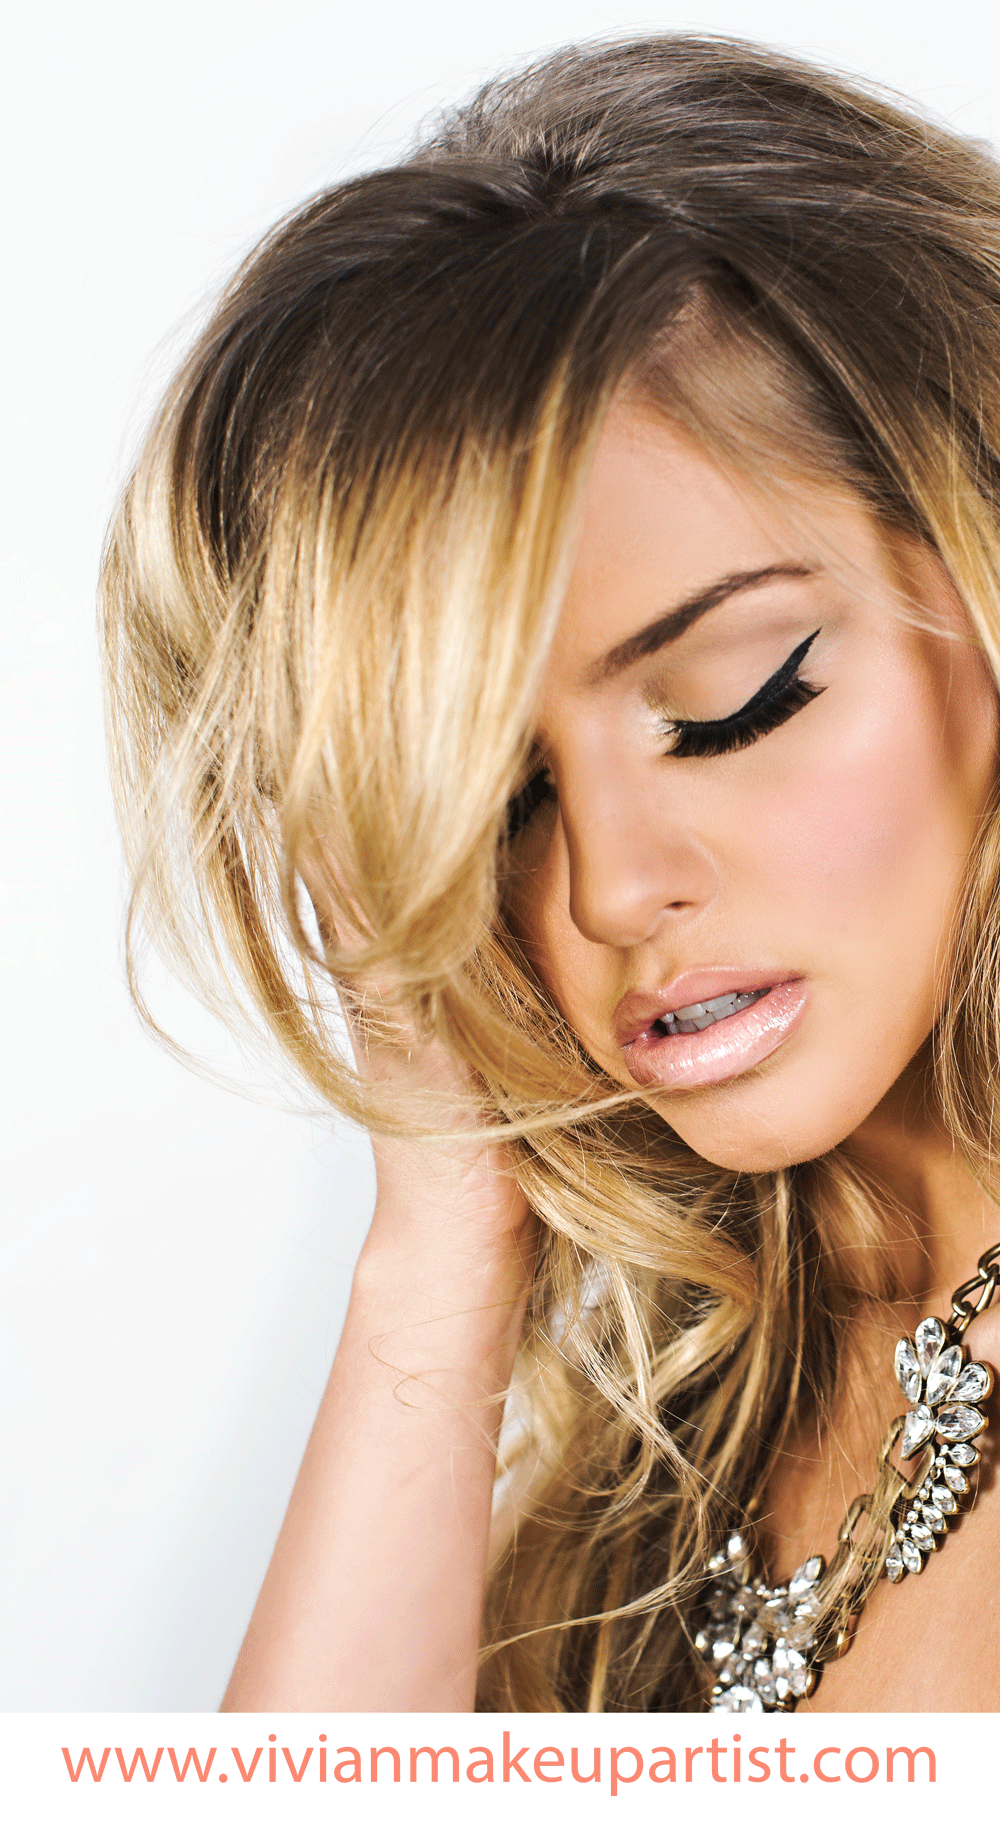
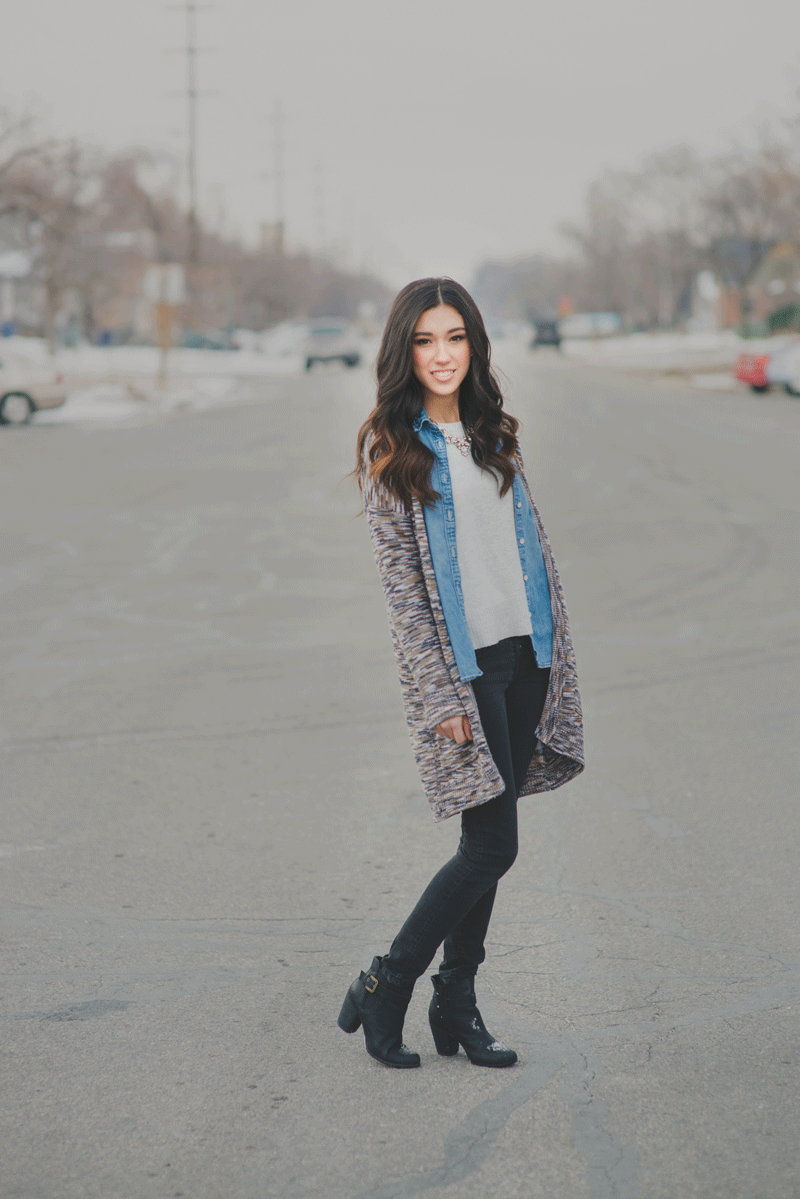
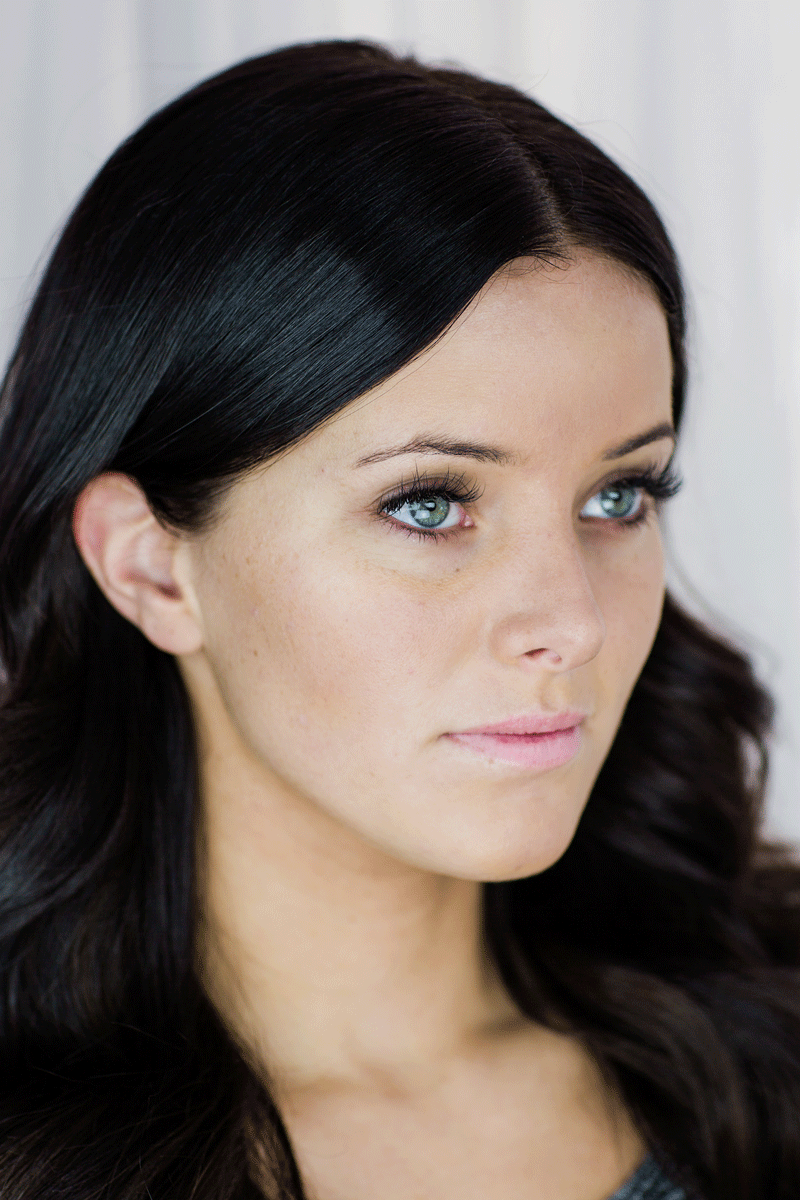
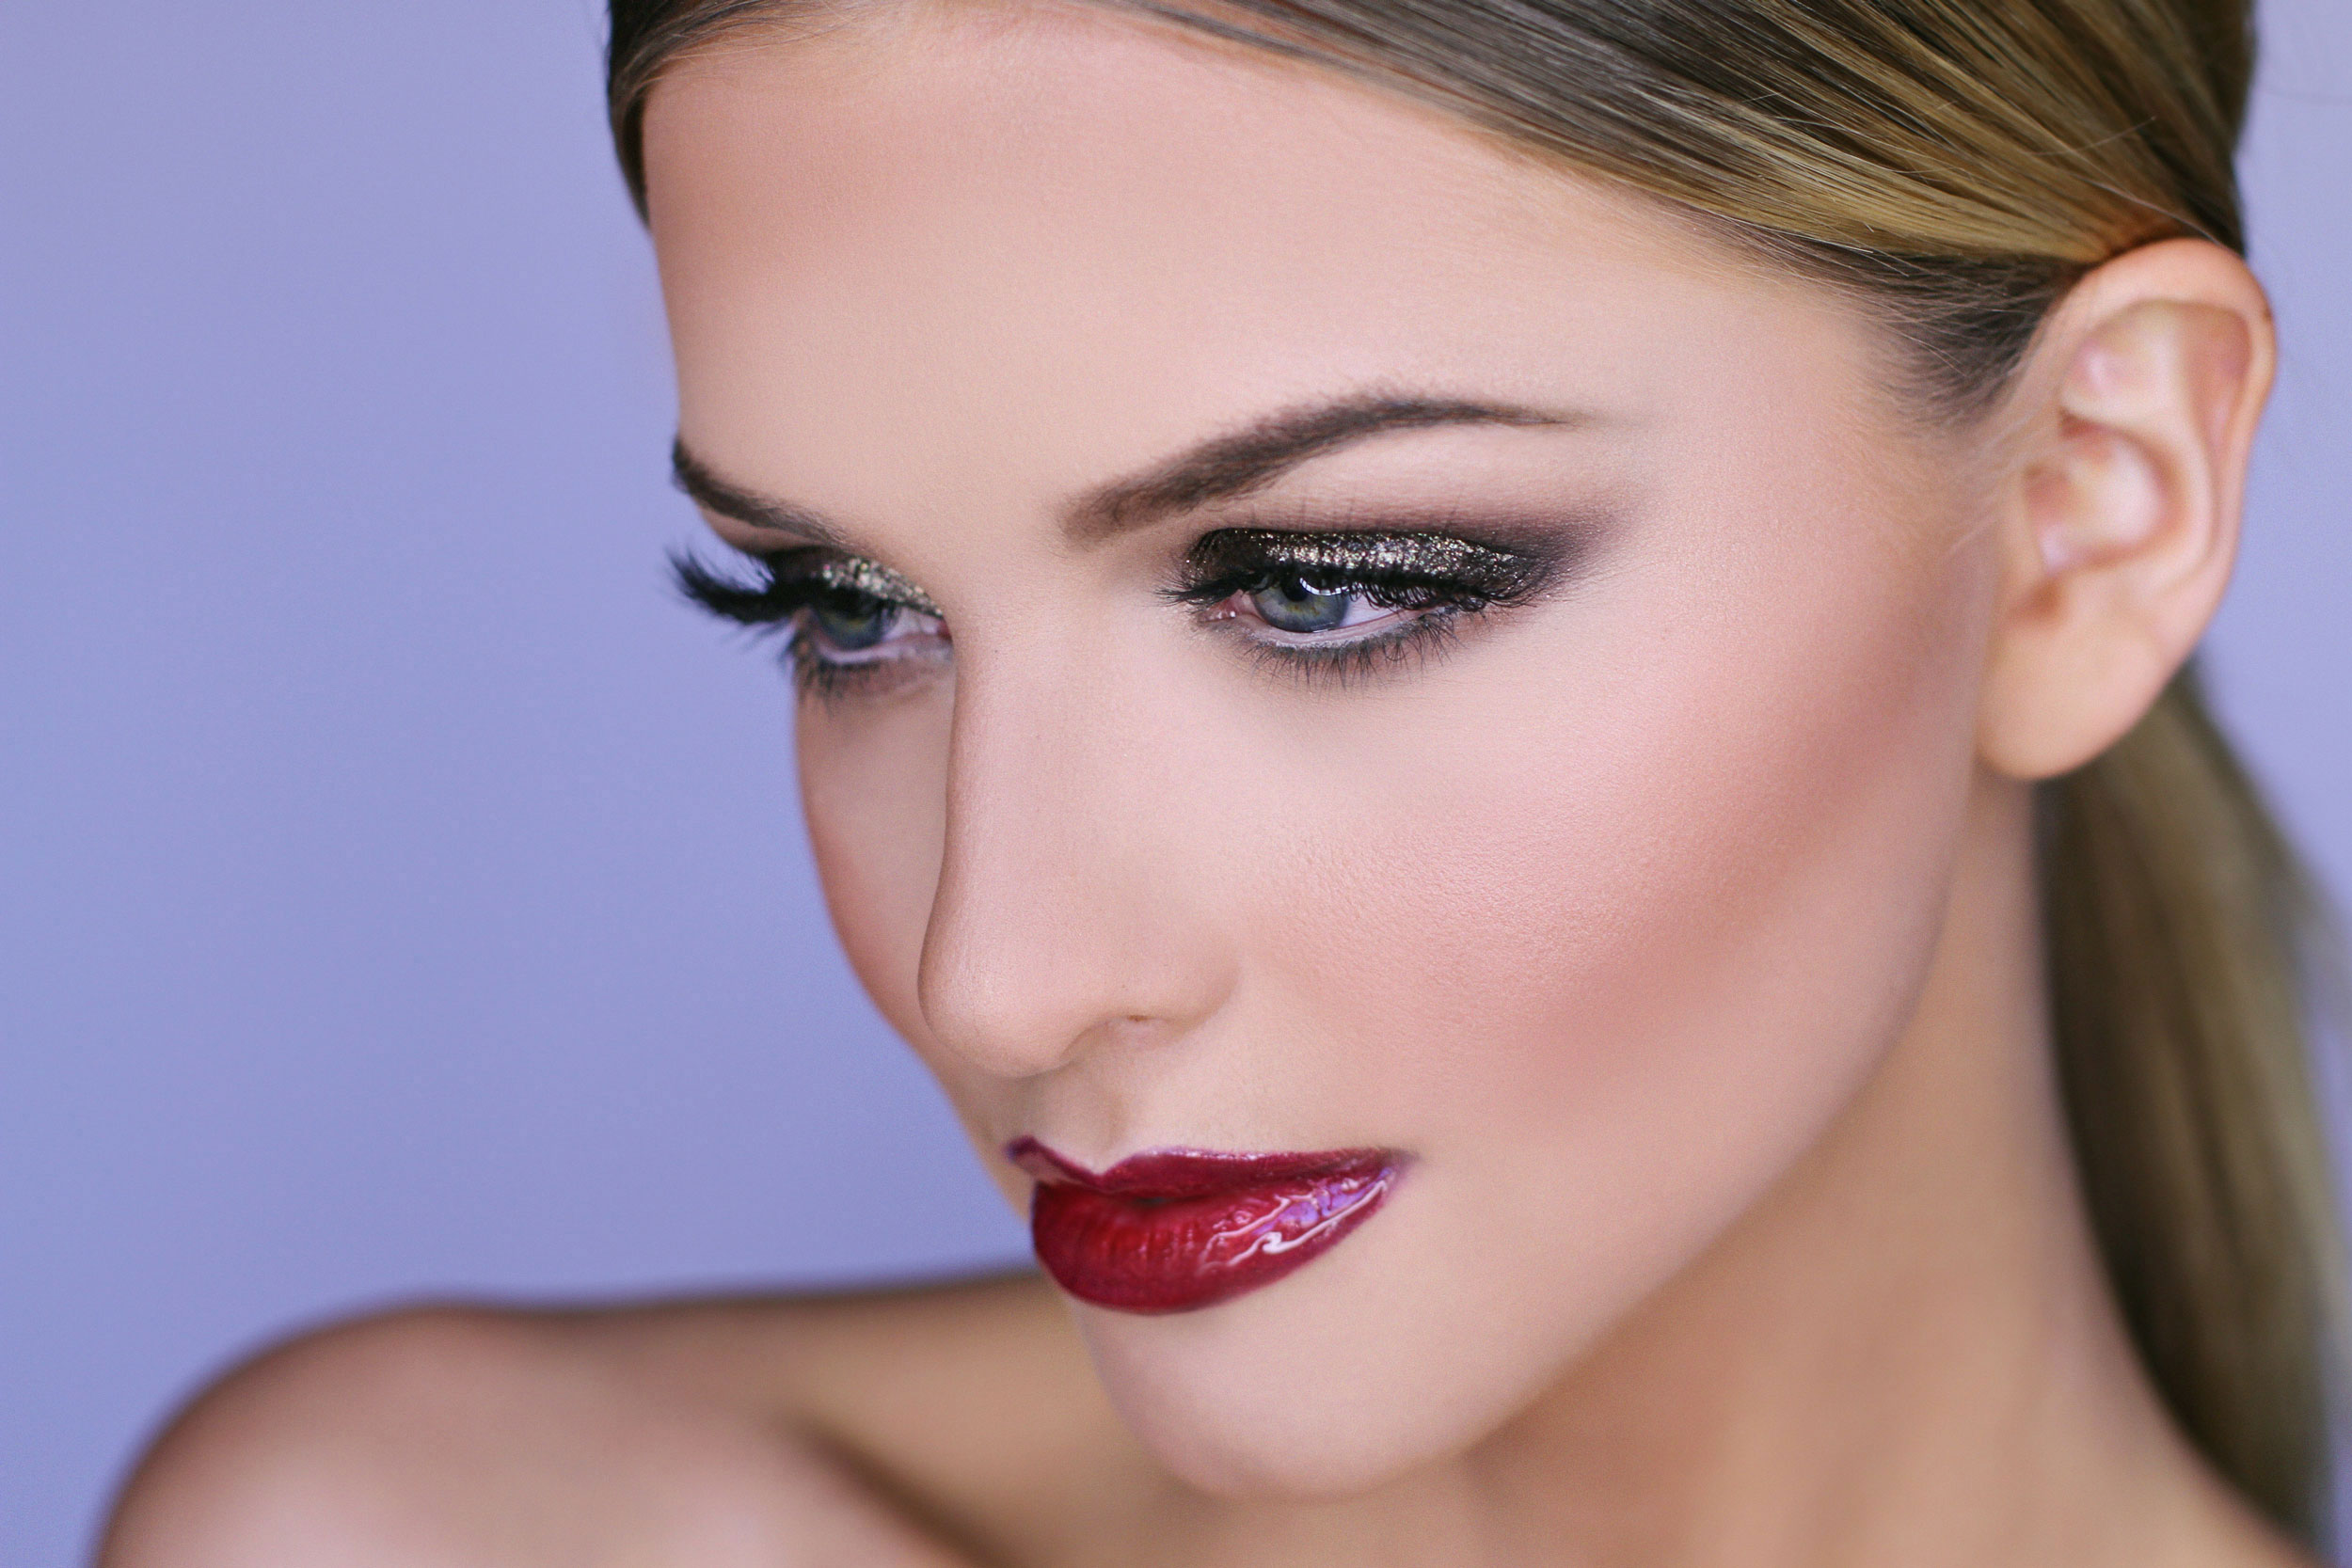
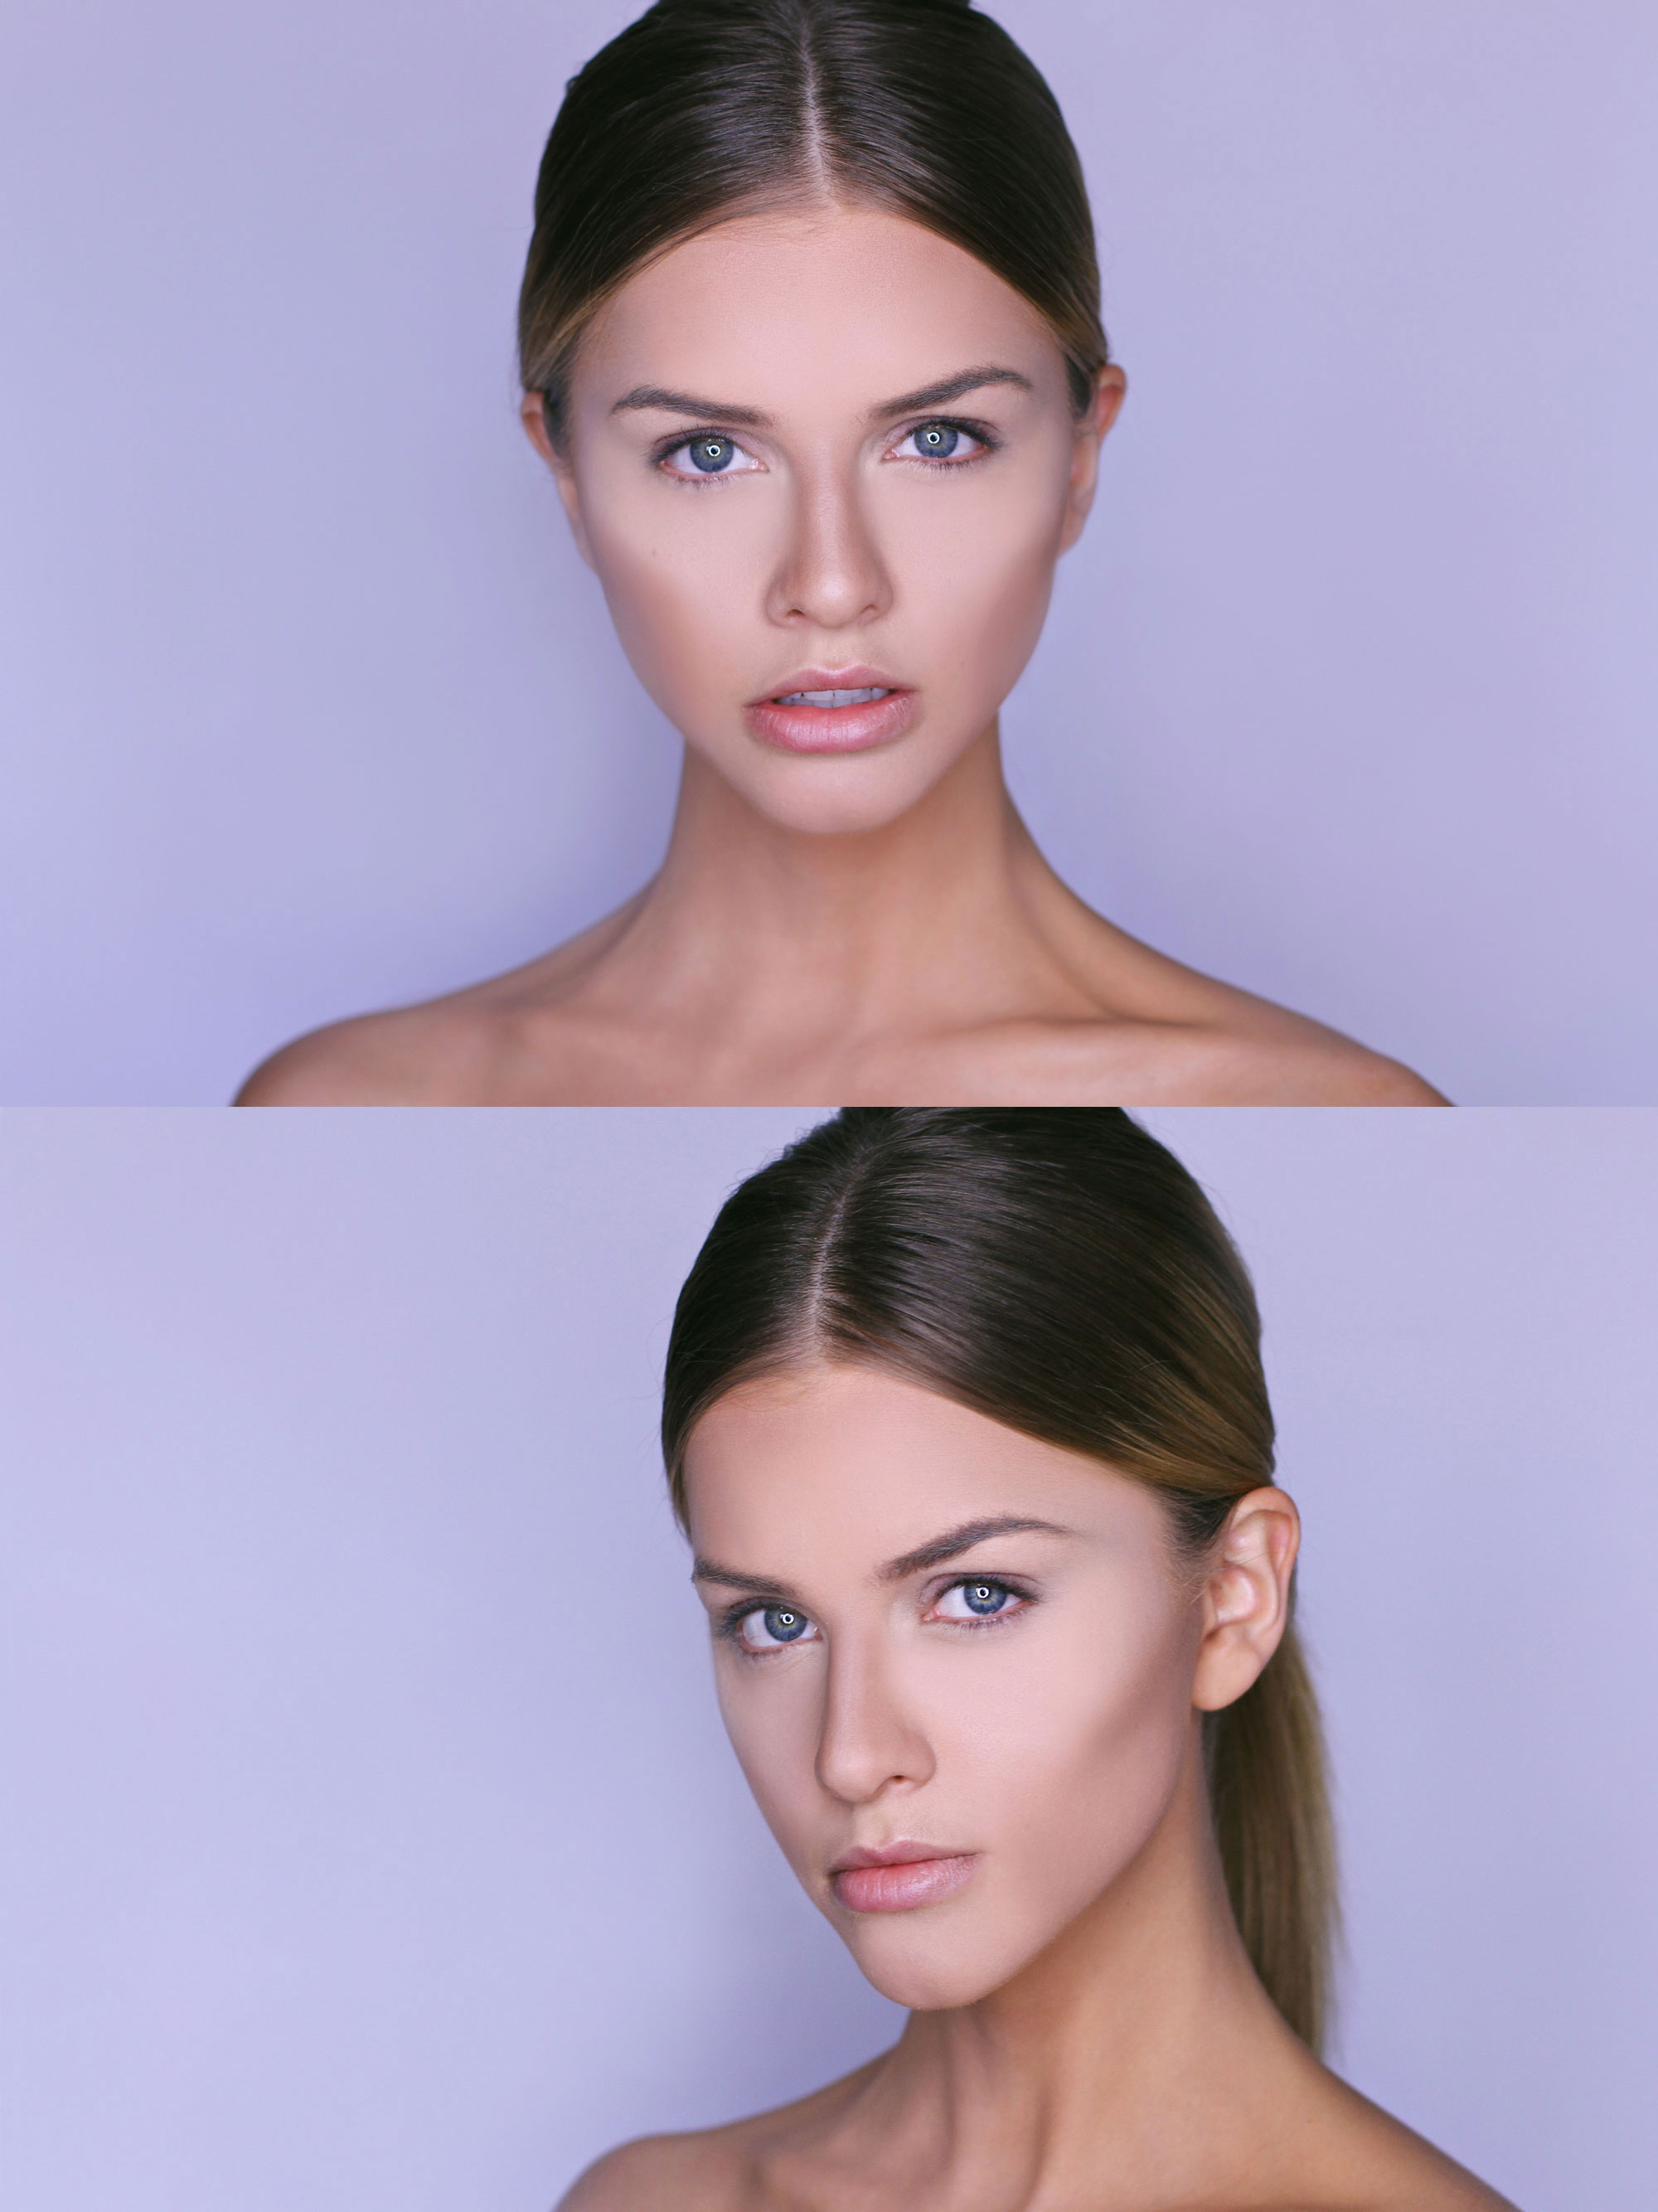
These photos are from a while ago and I didn’t even know winged liner was going to be such a thing! Maybe I’m telepathic and I knew it would be an upcoming trend!? Or maybe it’s just pretty so I did it…..

Photos taken by the darling Jessa Kae

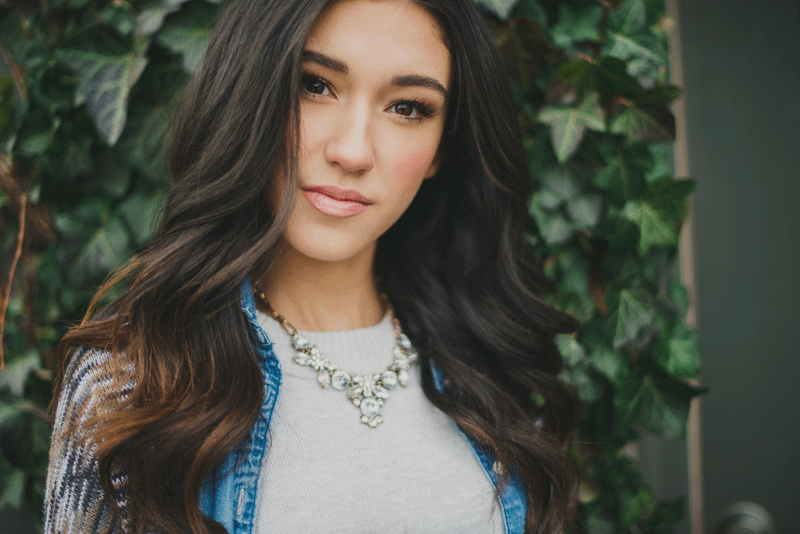
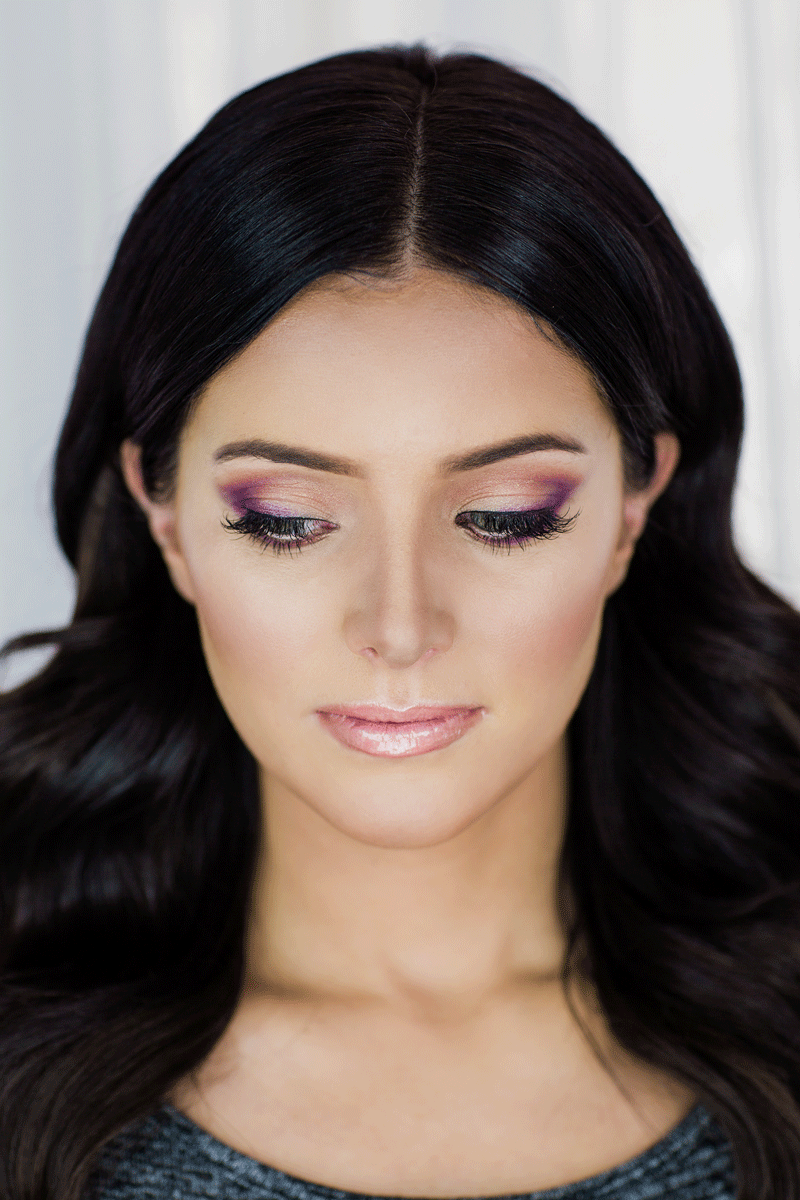
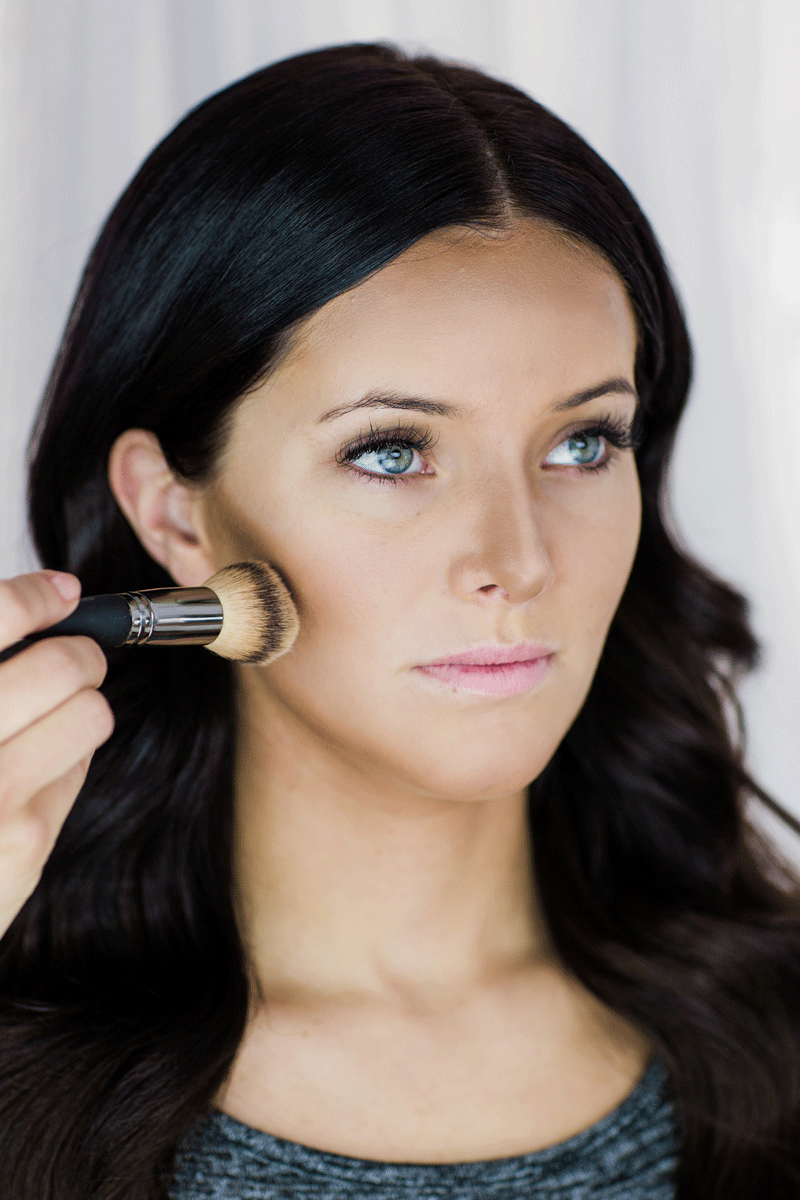
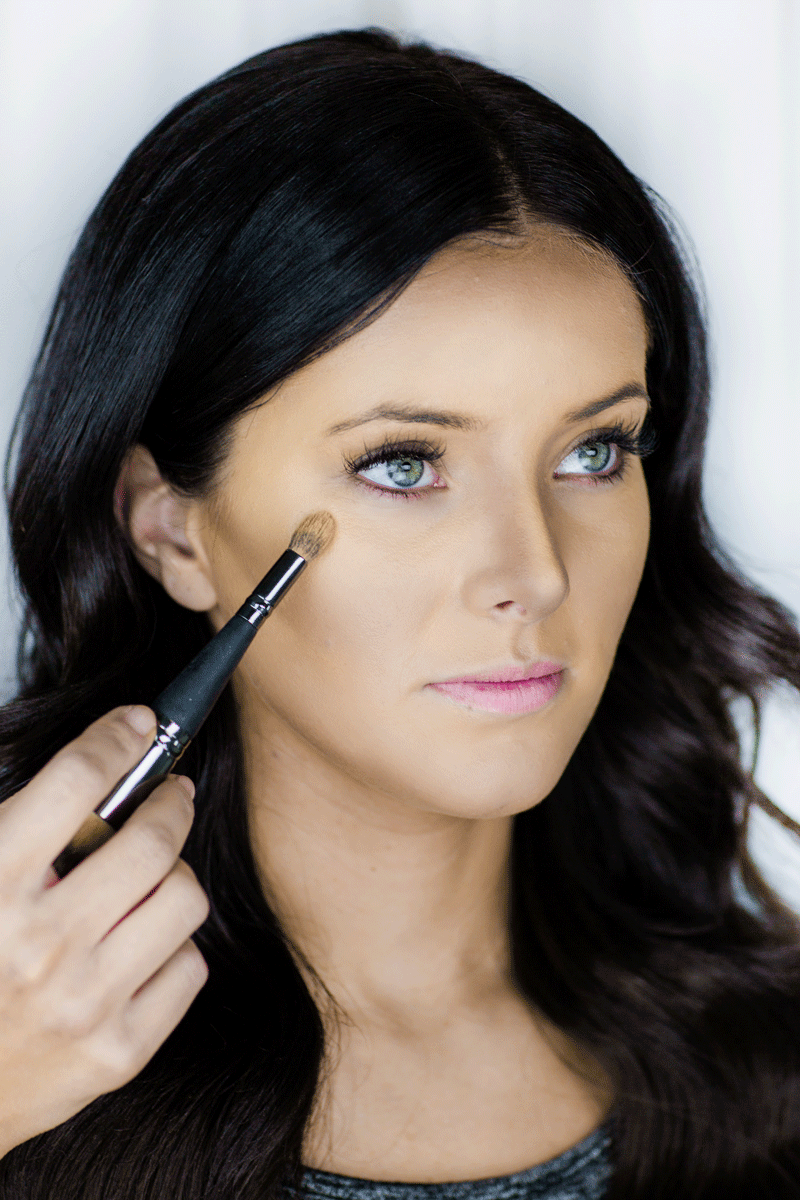
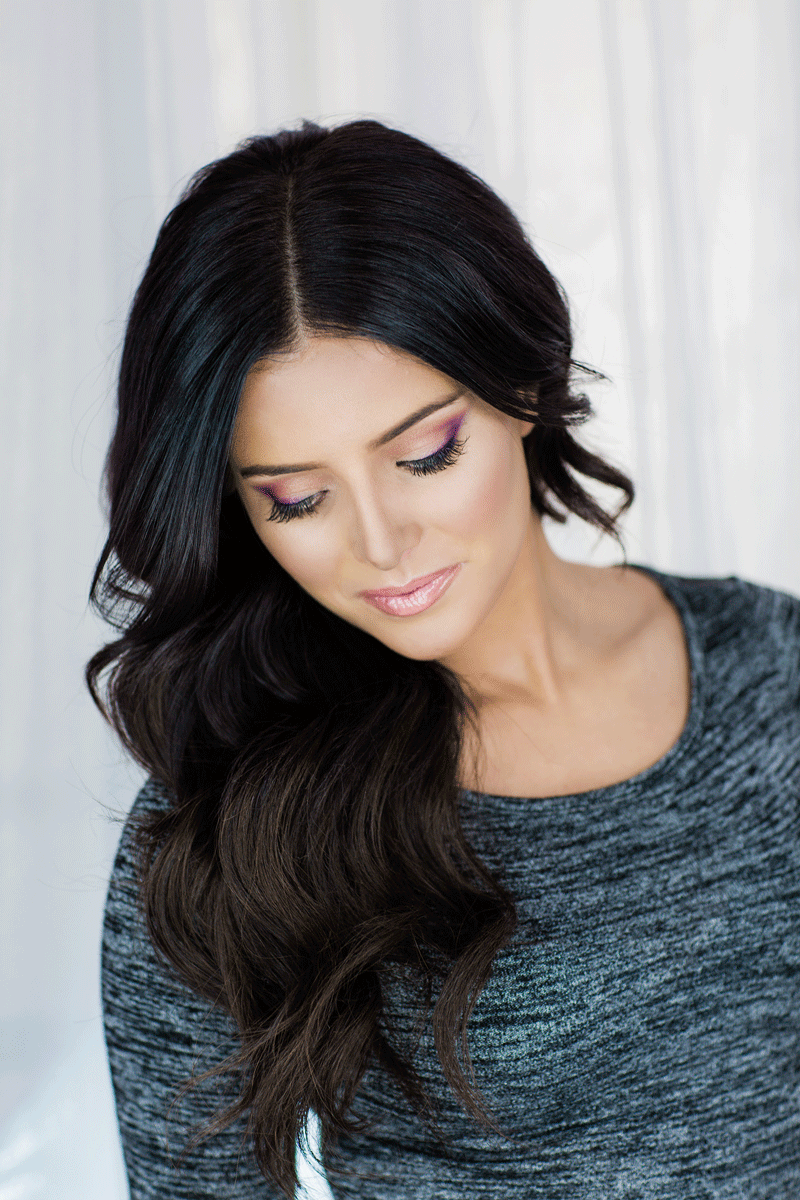
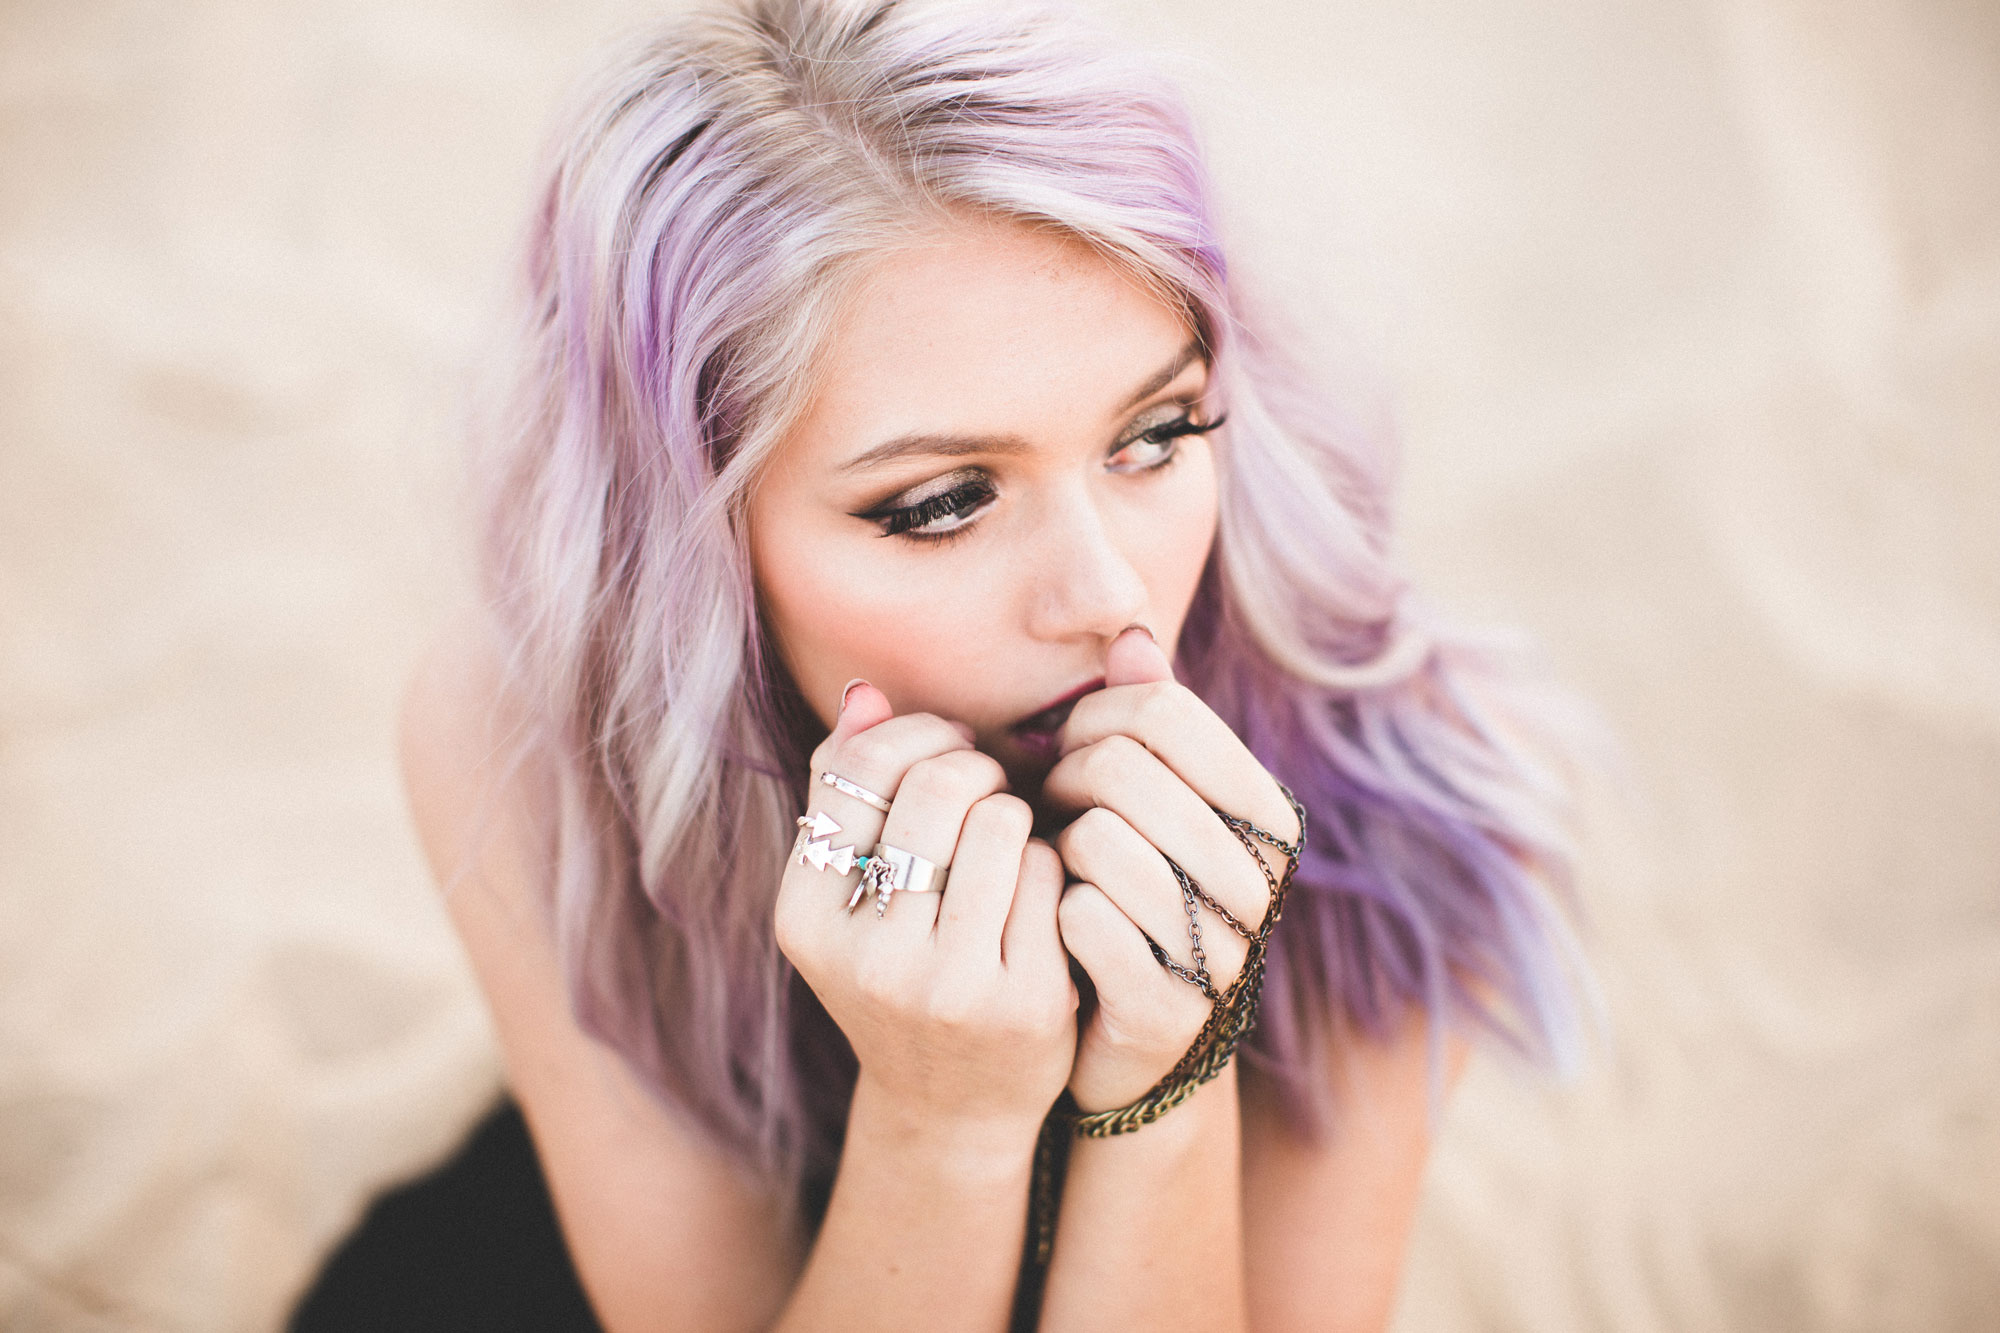
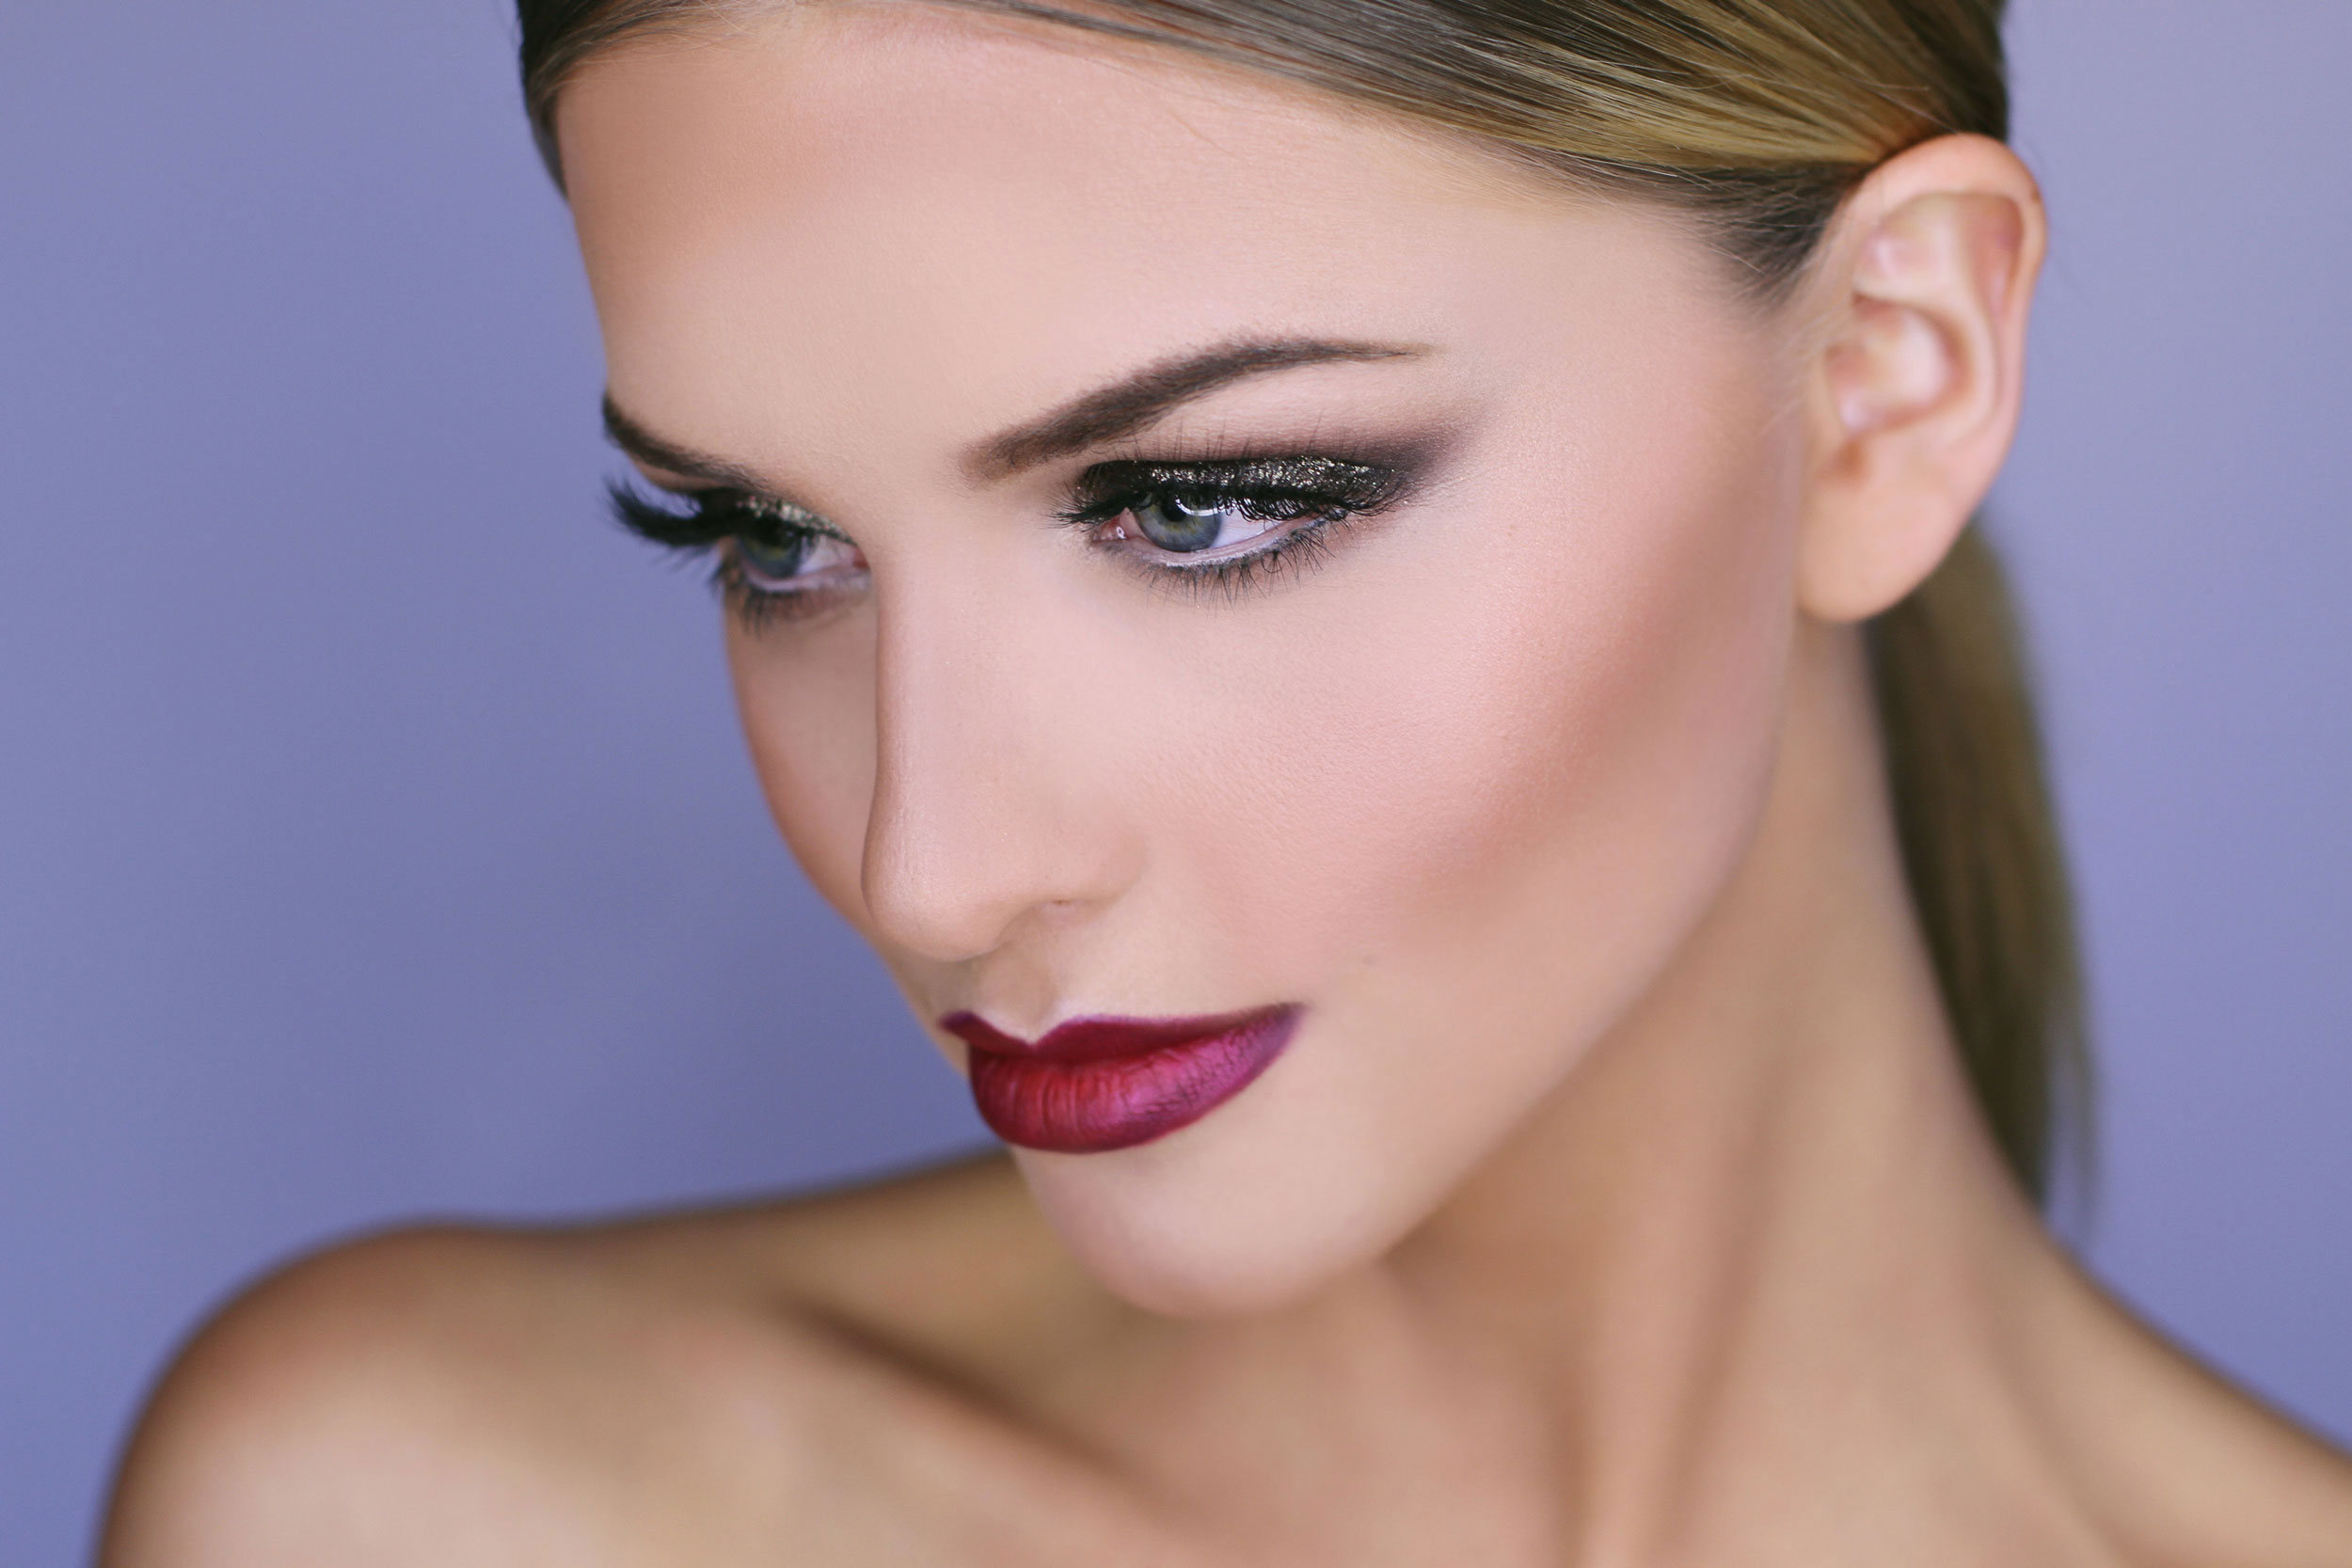
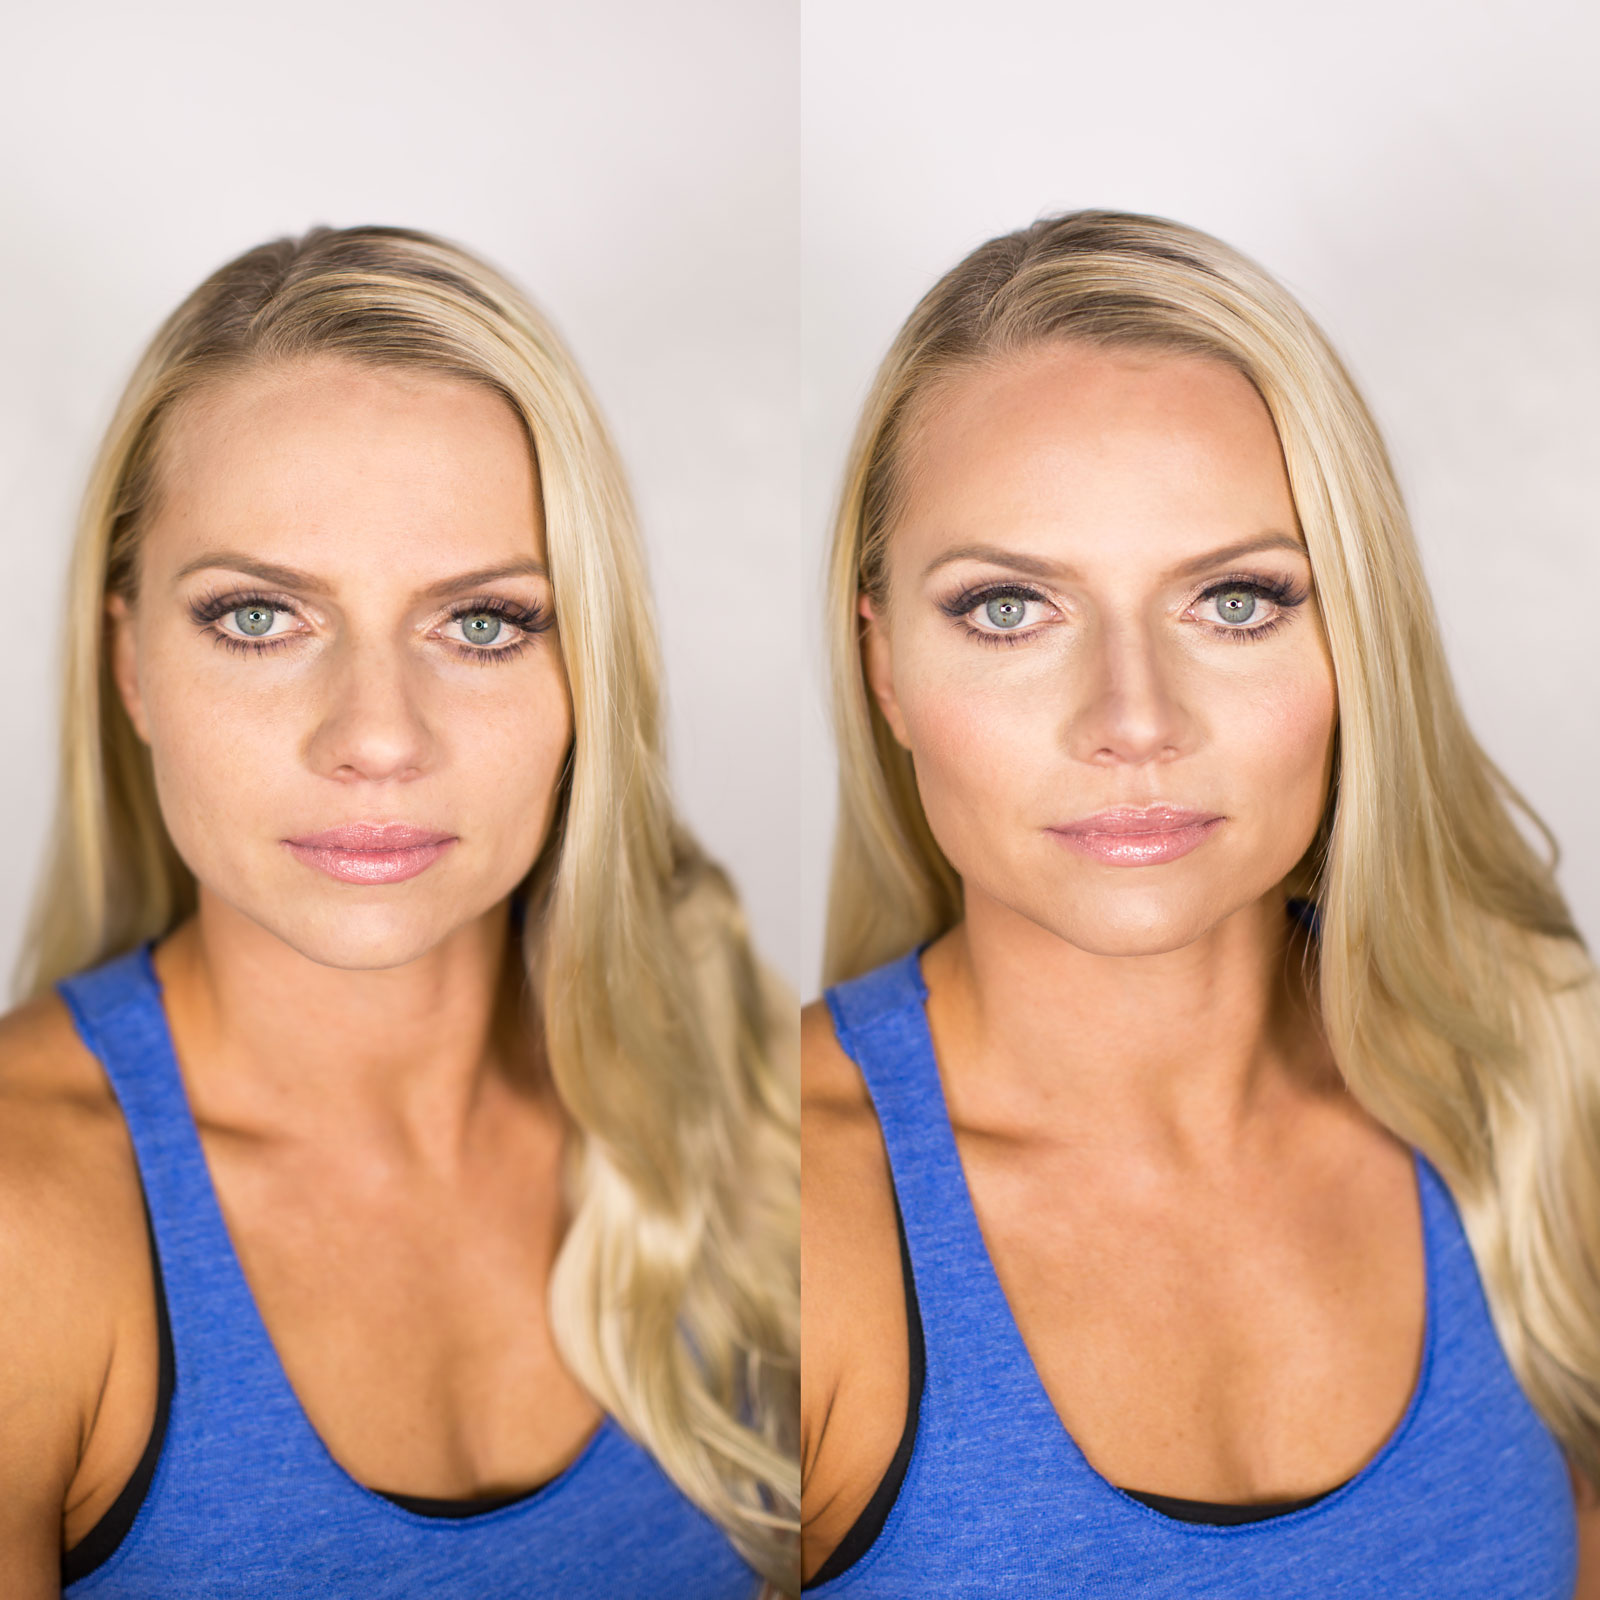
And here’s what I used on beautiful Marina:

Complexion: Smashbox foundation primerLancome Teint Miracle foundationLaura Mercier Secret ConcealerBobbi Brown Bronzer in Natural, Chanel blush in Rose Bronze (the scent of Chanel’s blush is probably one of my favorite things in the world!) To highlight her cheeks I used Laura Mercier Peach Mosaic. 

Eyes: Urban Decay Eyeshadow PrimerUrban Decay Naked Basics Palette, Chanel liquid eyeliner,  Tarte inner rim liner, Temptress lashes from House of Lashes, Brow Wiz in Taupe.

Lips: Myth lipstickNaked 2 lip liner, Crystal gloss. 

Hair: 1.5″ curling wand from my fav curling iron brand Sultra, velcro rollers. 

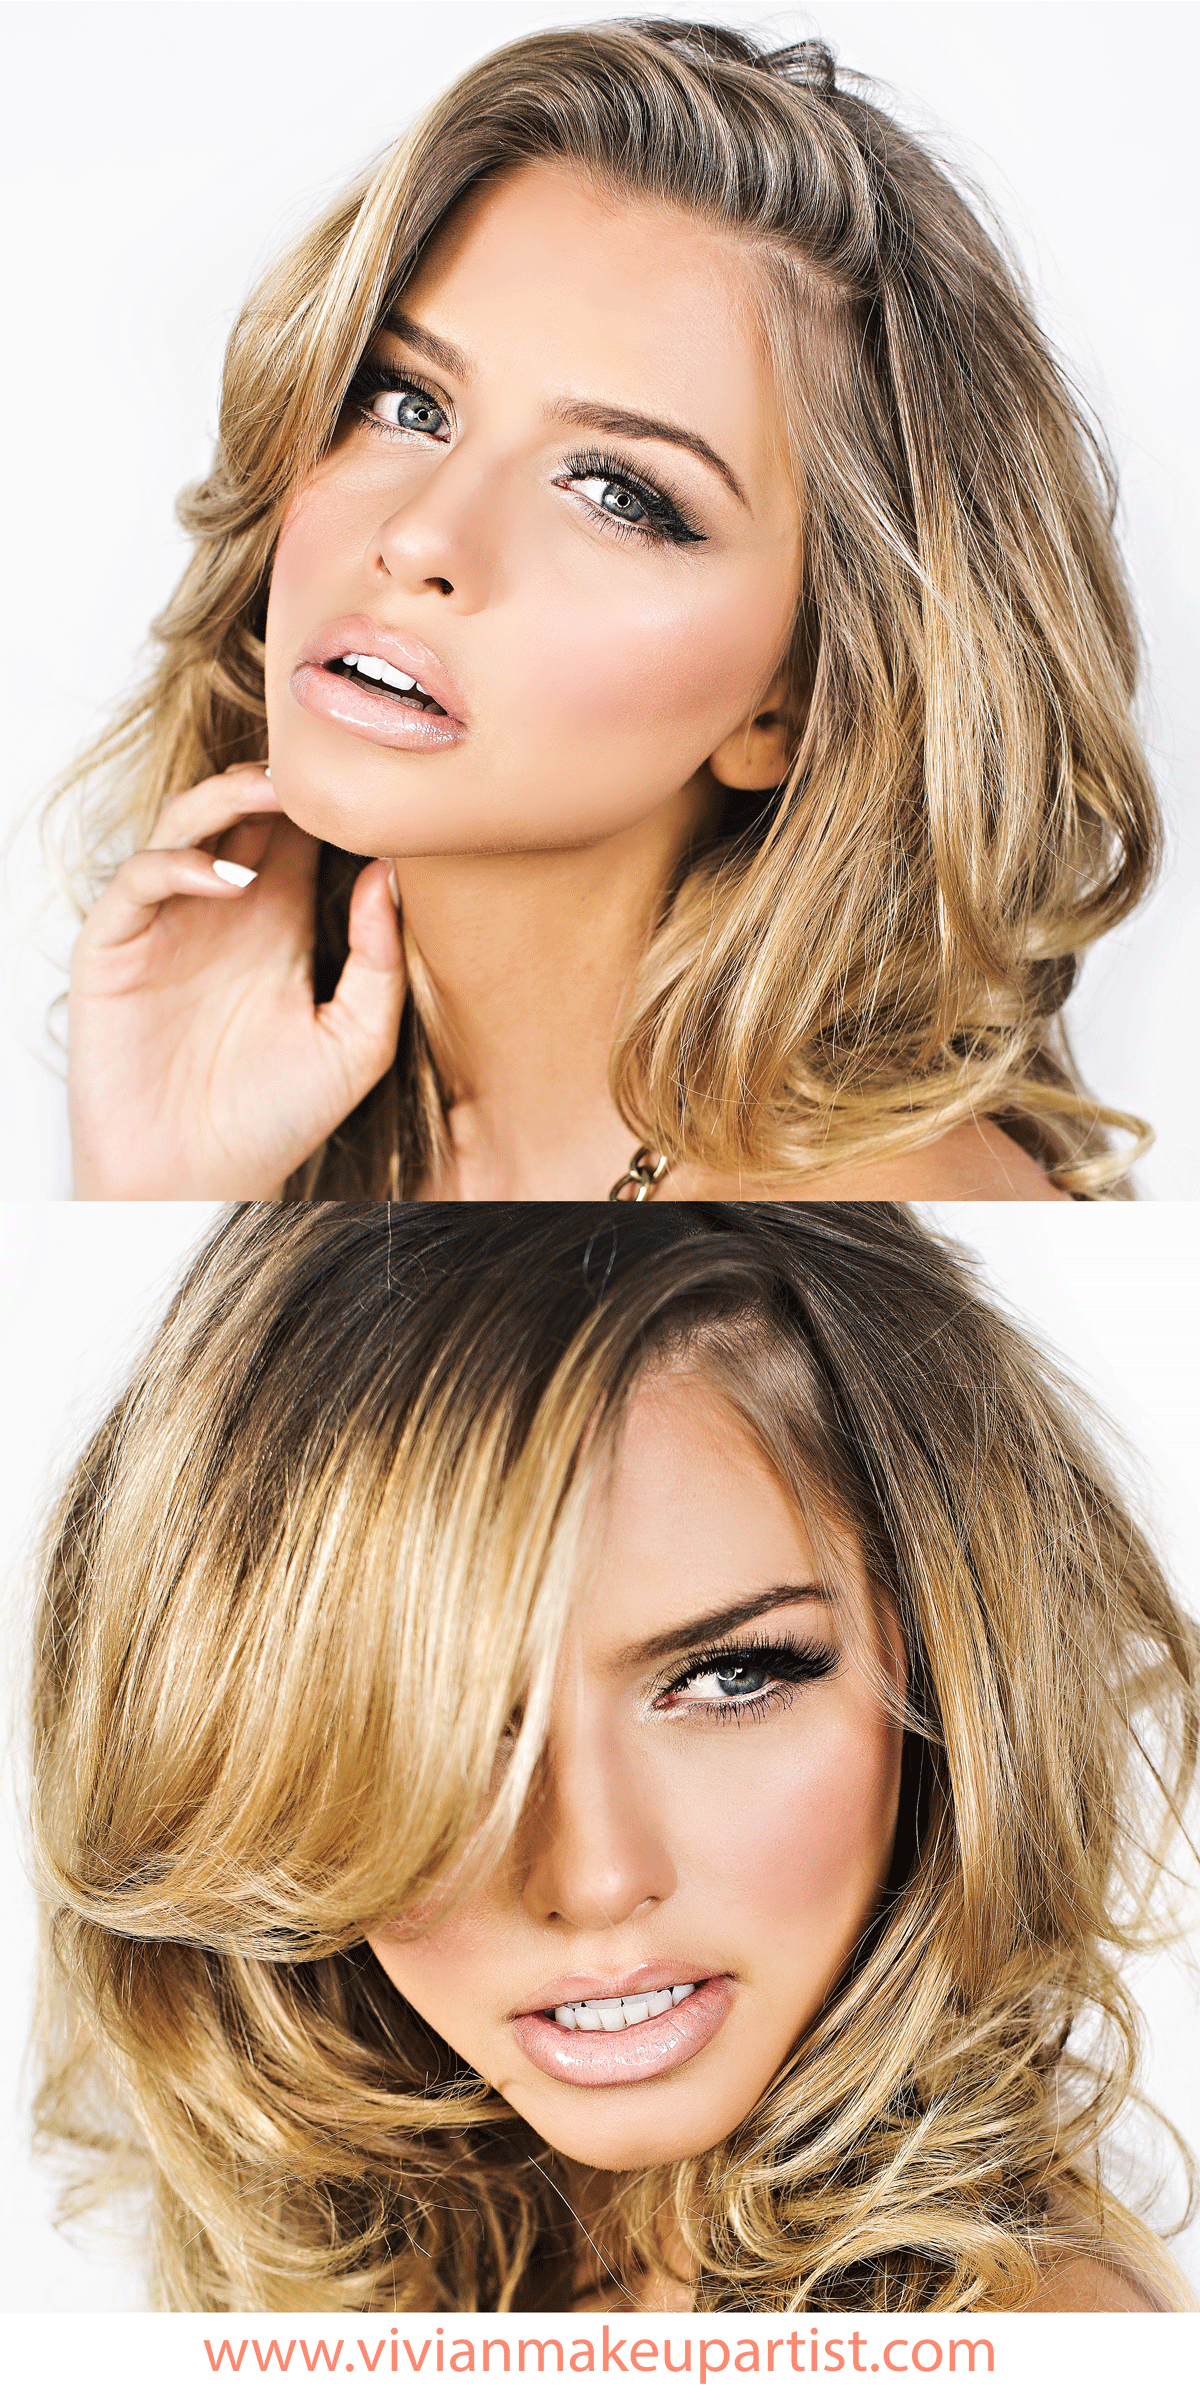
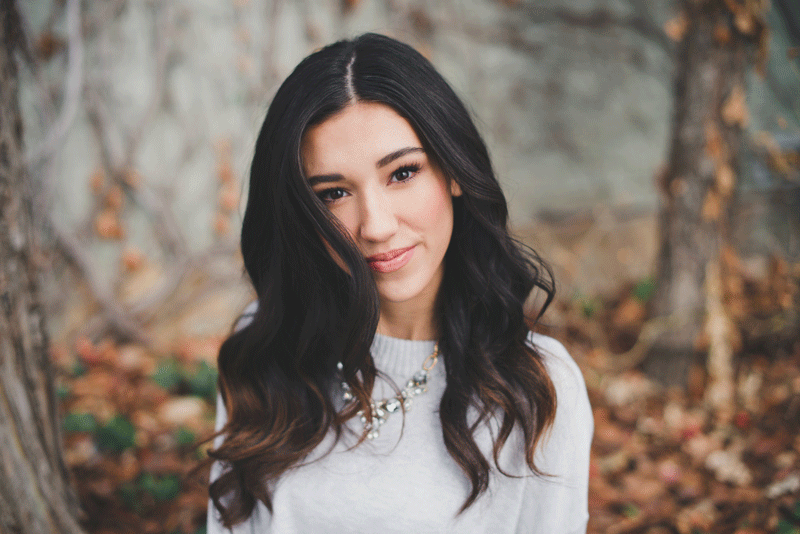
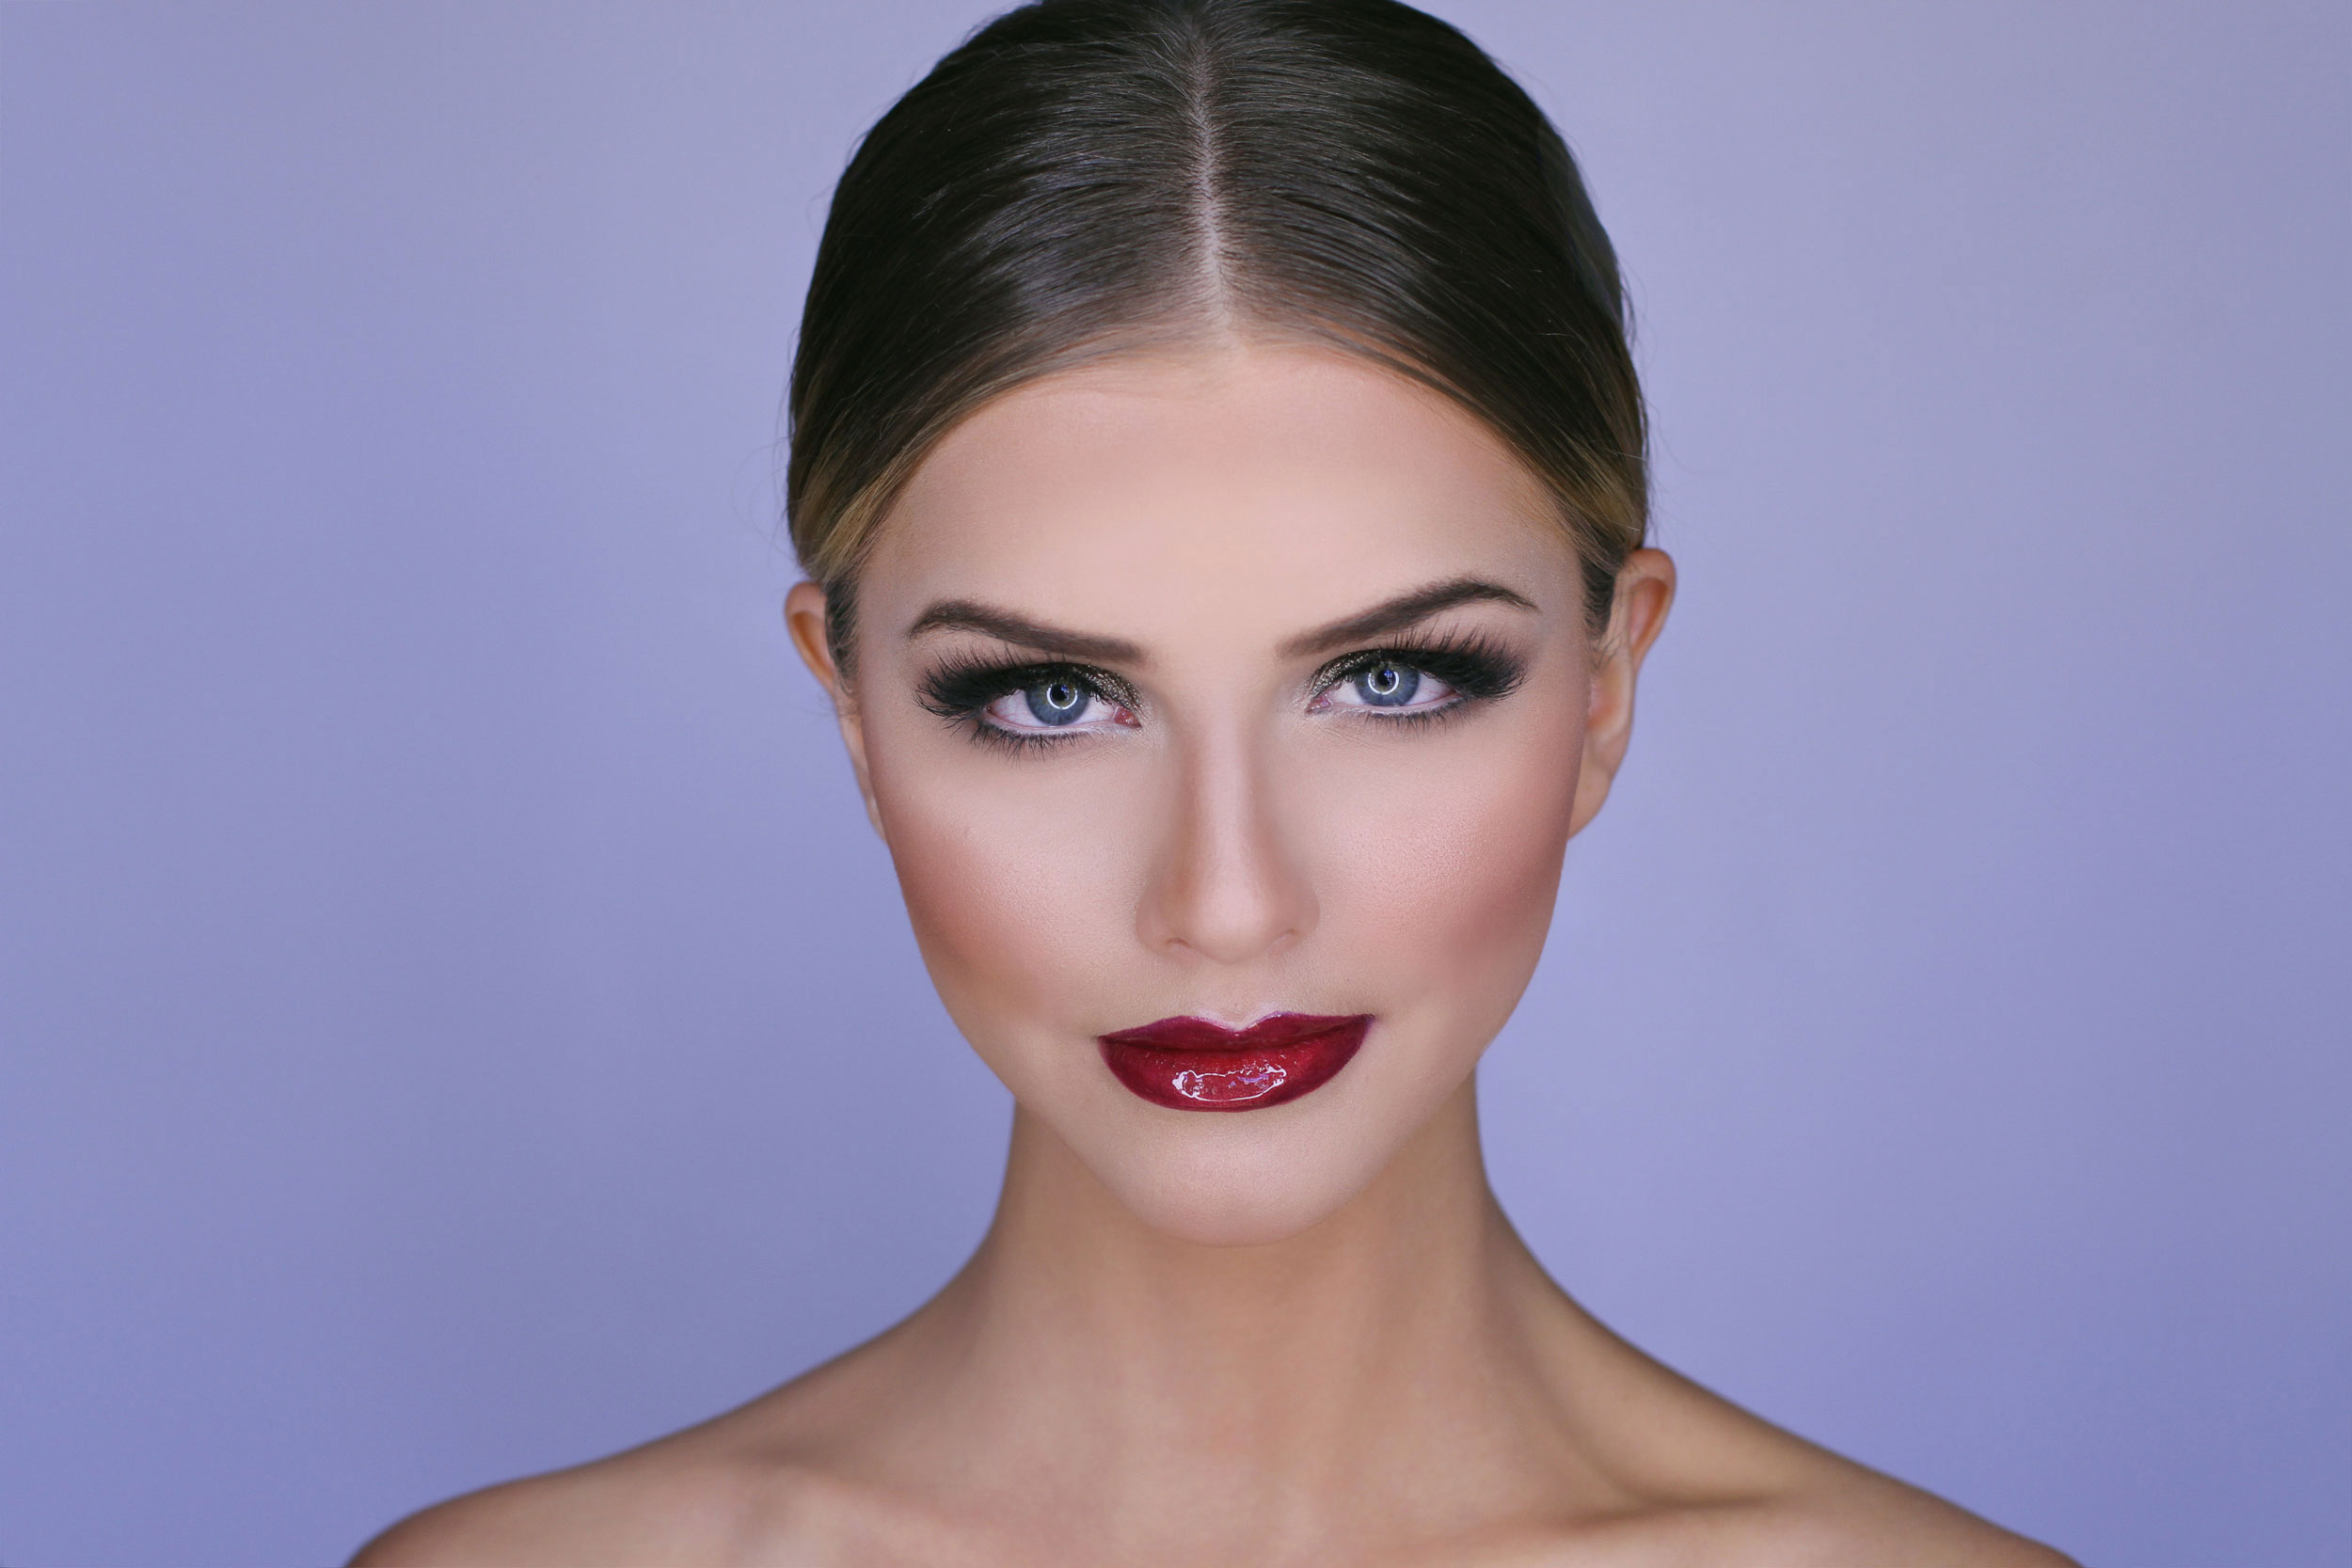
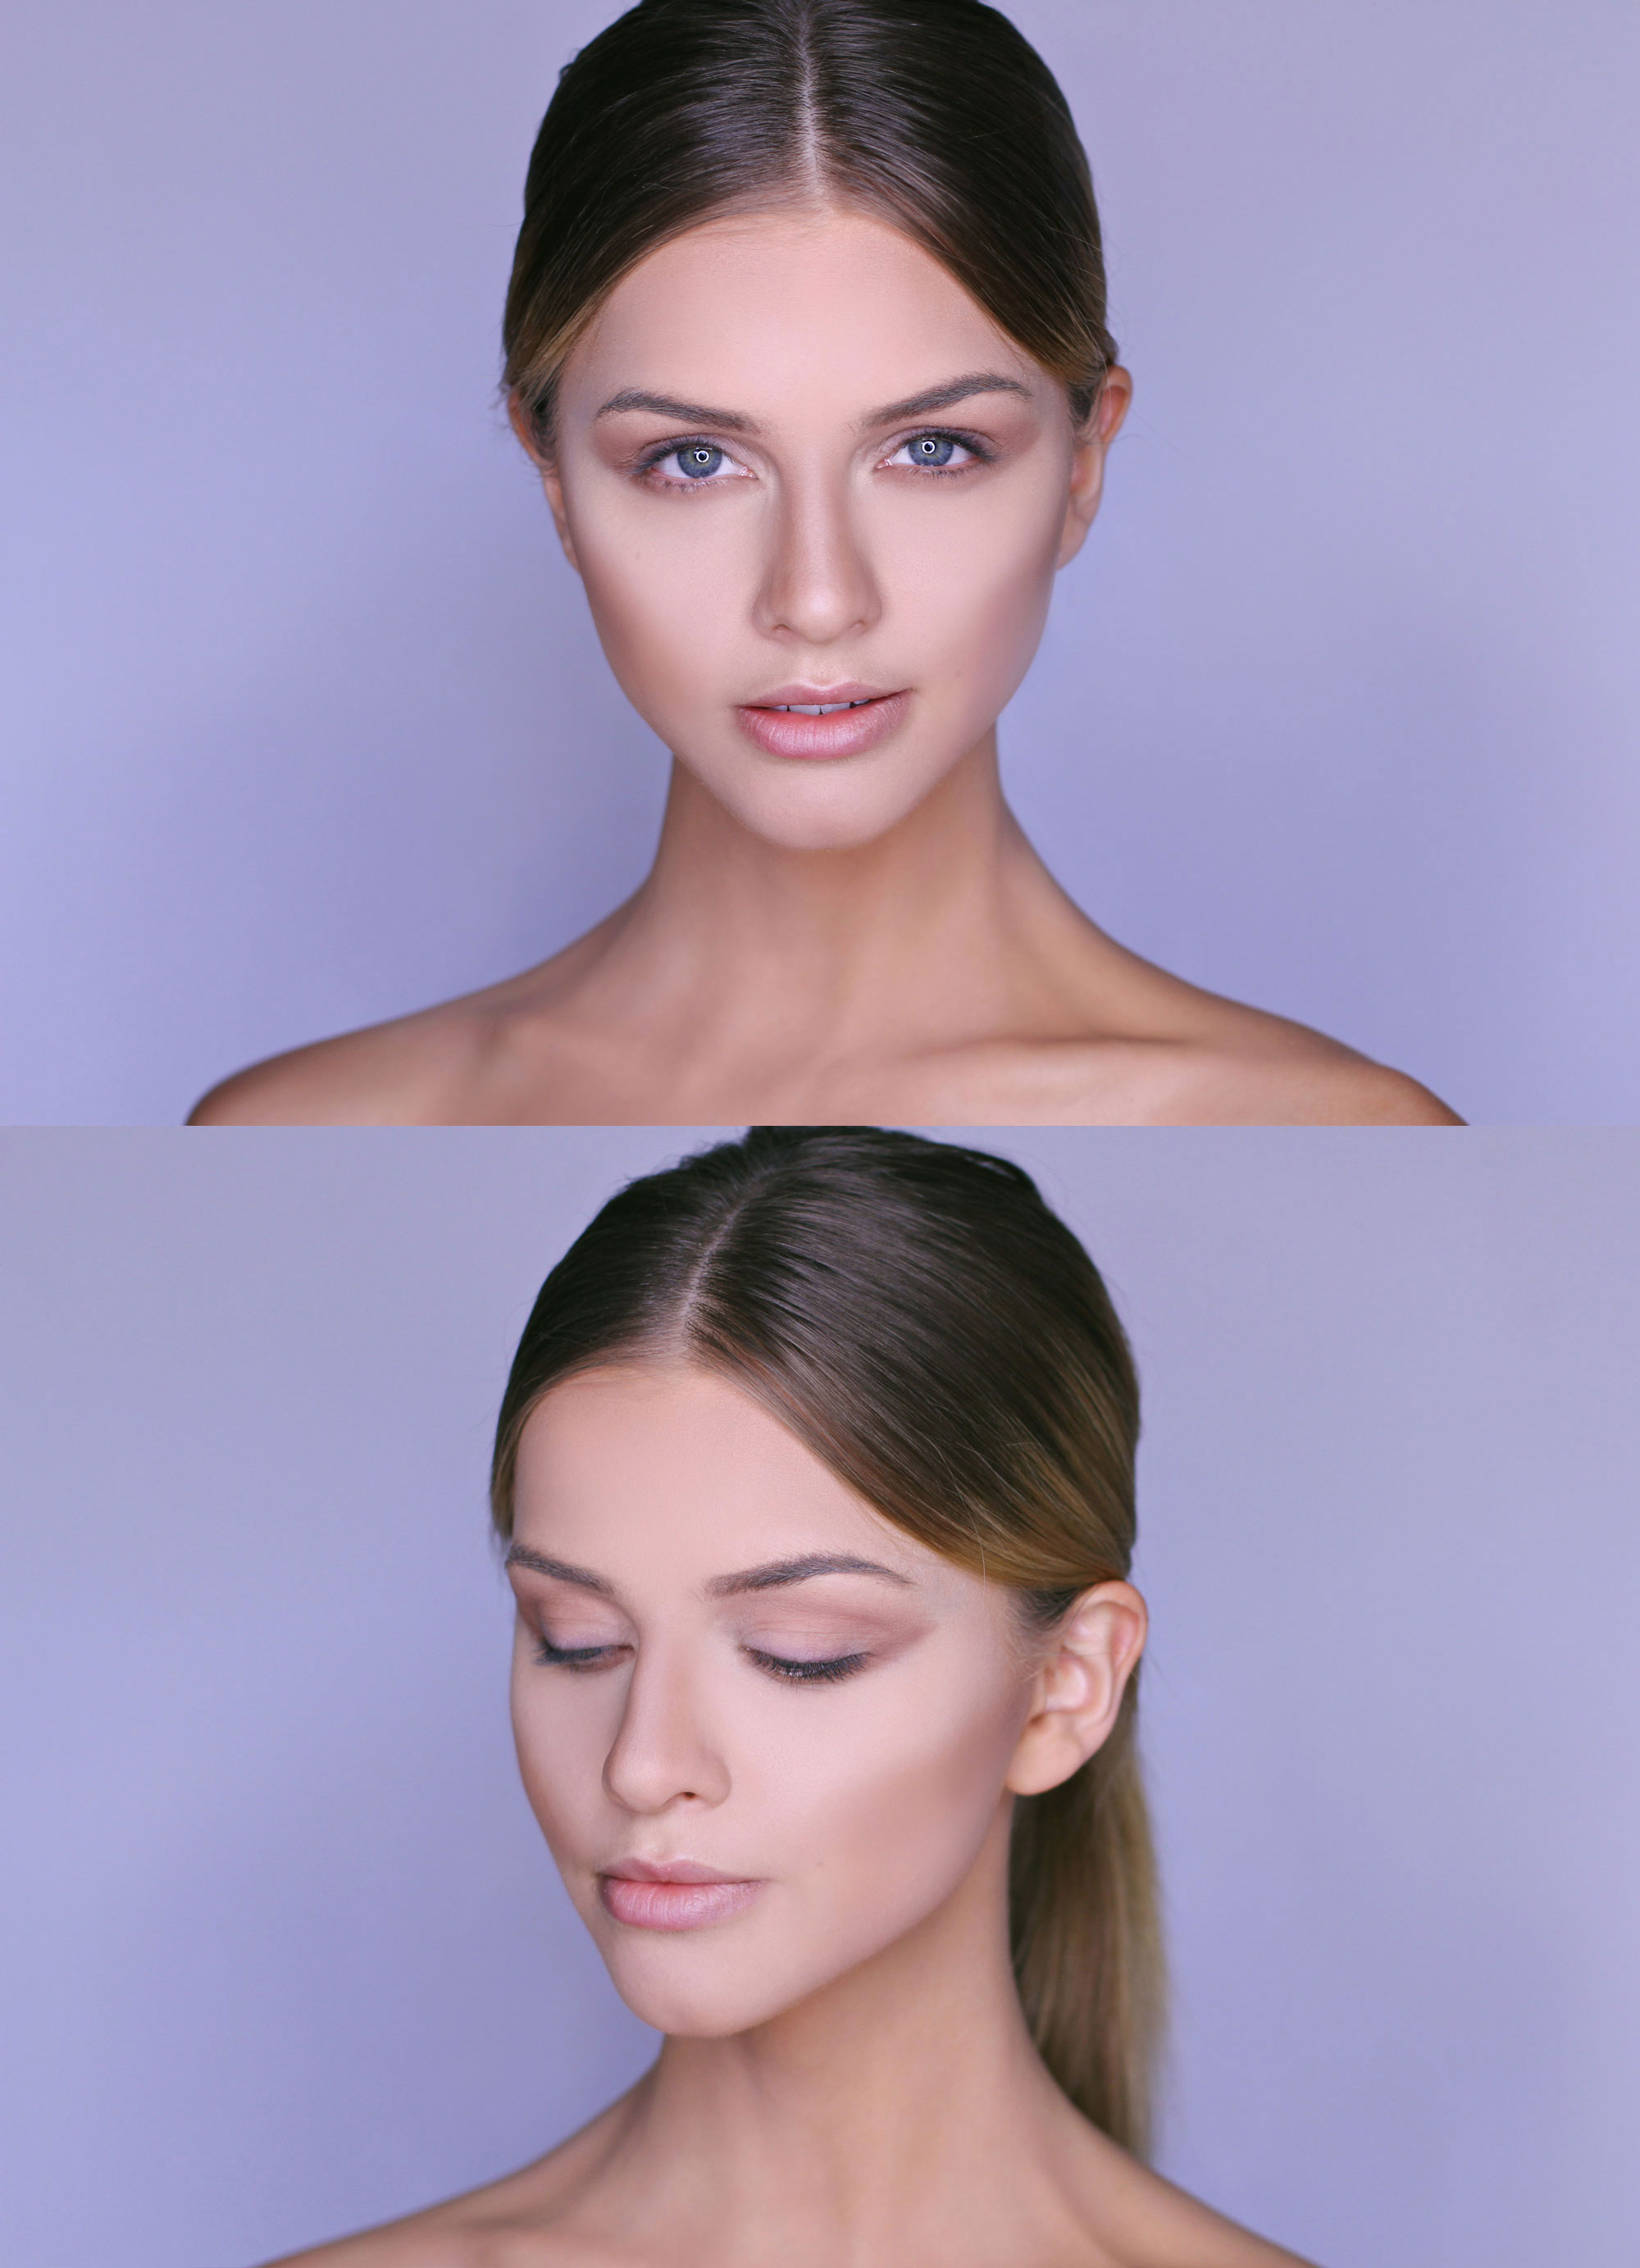
One of my favorite beauties of all time rocking her wingsvivianmakeupartist_

2017-07-14T15:43:25+00:00 January 21st, 2015|Hair, Makeup, Uncategorized|1 Comment

Makeup for Senior Photos

When it comes to your makeup for your senior photos I recommend going with makeup that is timeless and staying away from extreme trends. I think fluffy lashes, a pop of color on the cheeks, and a soft lip can look great on just about everyone!vivianmakeupartist_beforeandafterTaylor’s look:

Complexion: Temptu foundation,  (Similar foundation recommendation non-airbrush Lancome in Bisque 4.) The main difference between airbrush foundation and non-airbrush is mostly just the way it’s applied. Think spray painting something vs. painting it with a brush. I think both ways work well! Bronzer is Warm Glow and Blush is Dollymix. Concealer is Laura Mercier Secret concealer #2.5

Eyes: Eyeshadow base, MAC eyeshadow in Wedge,  Lancome Brow Pencil in Sable.  Wispies. 

Lips: Lancome lip liner in Charme, Lipgloss in Patience Please.makeupforseniorphotosvivian
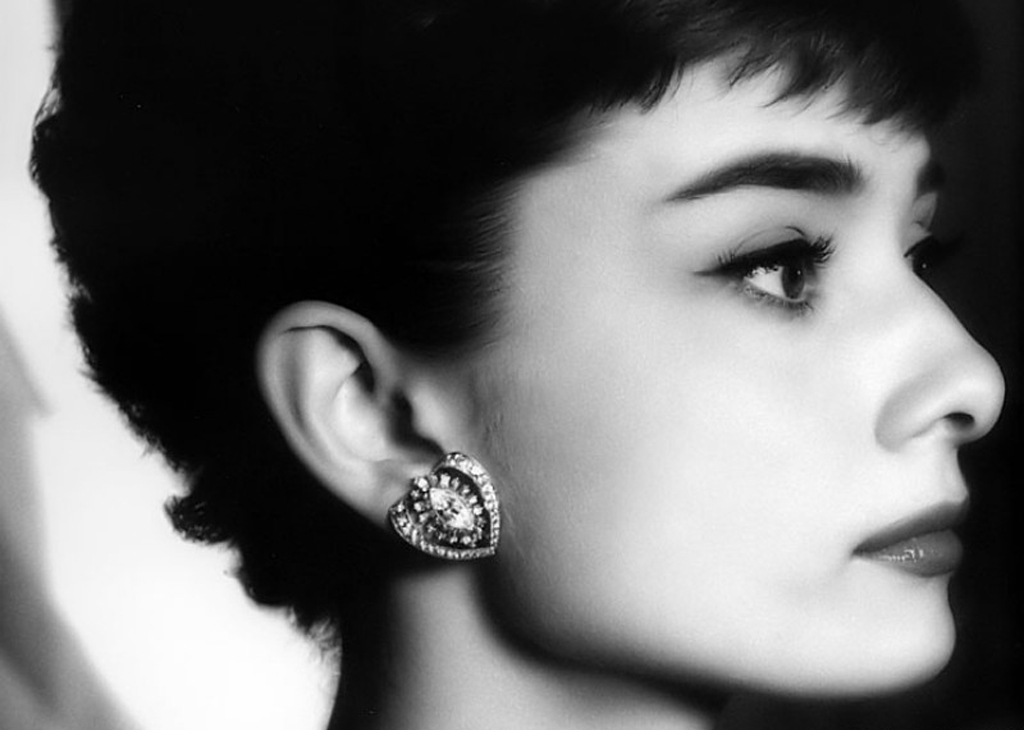
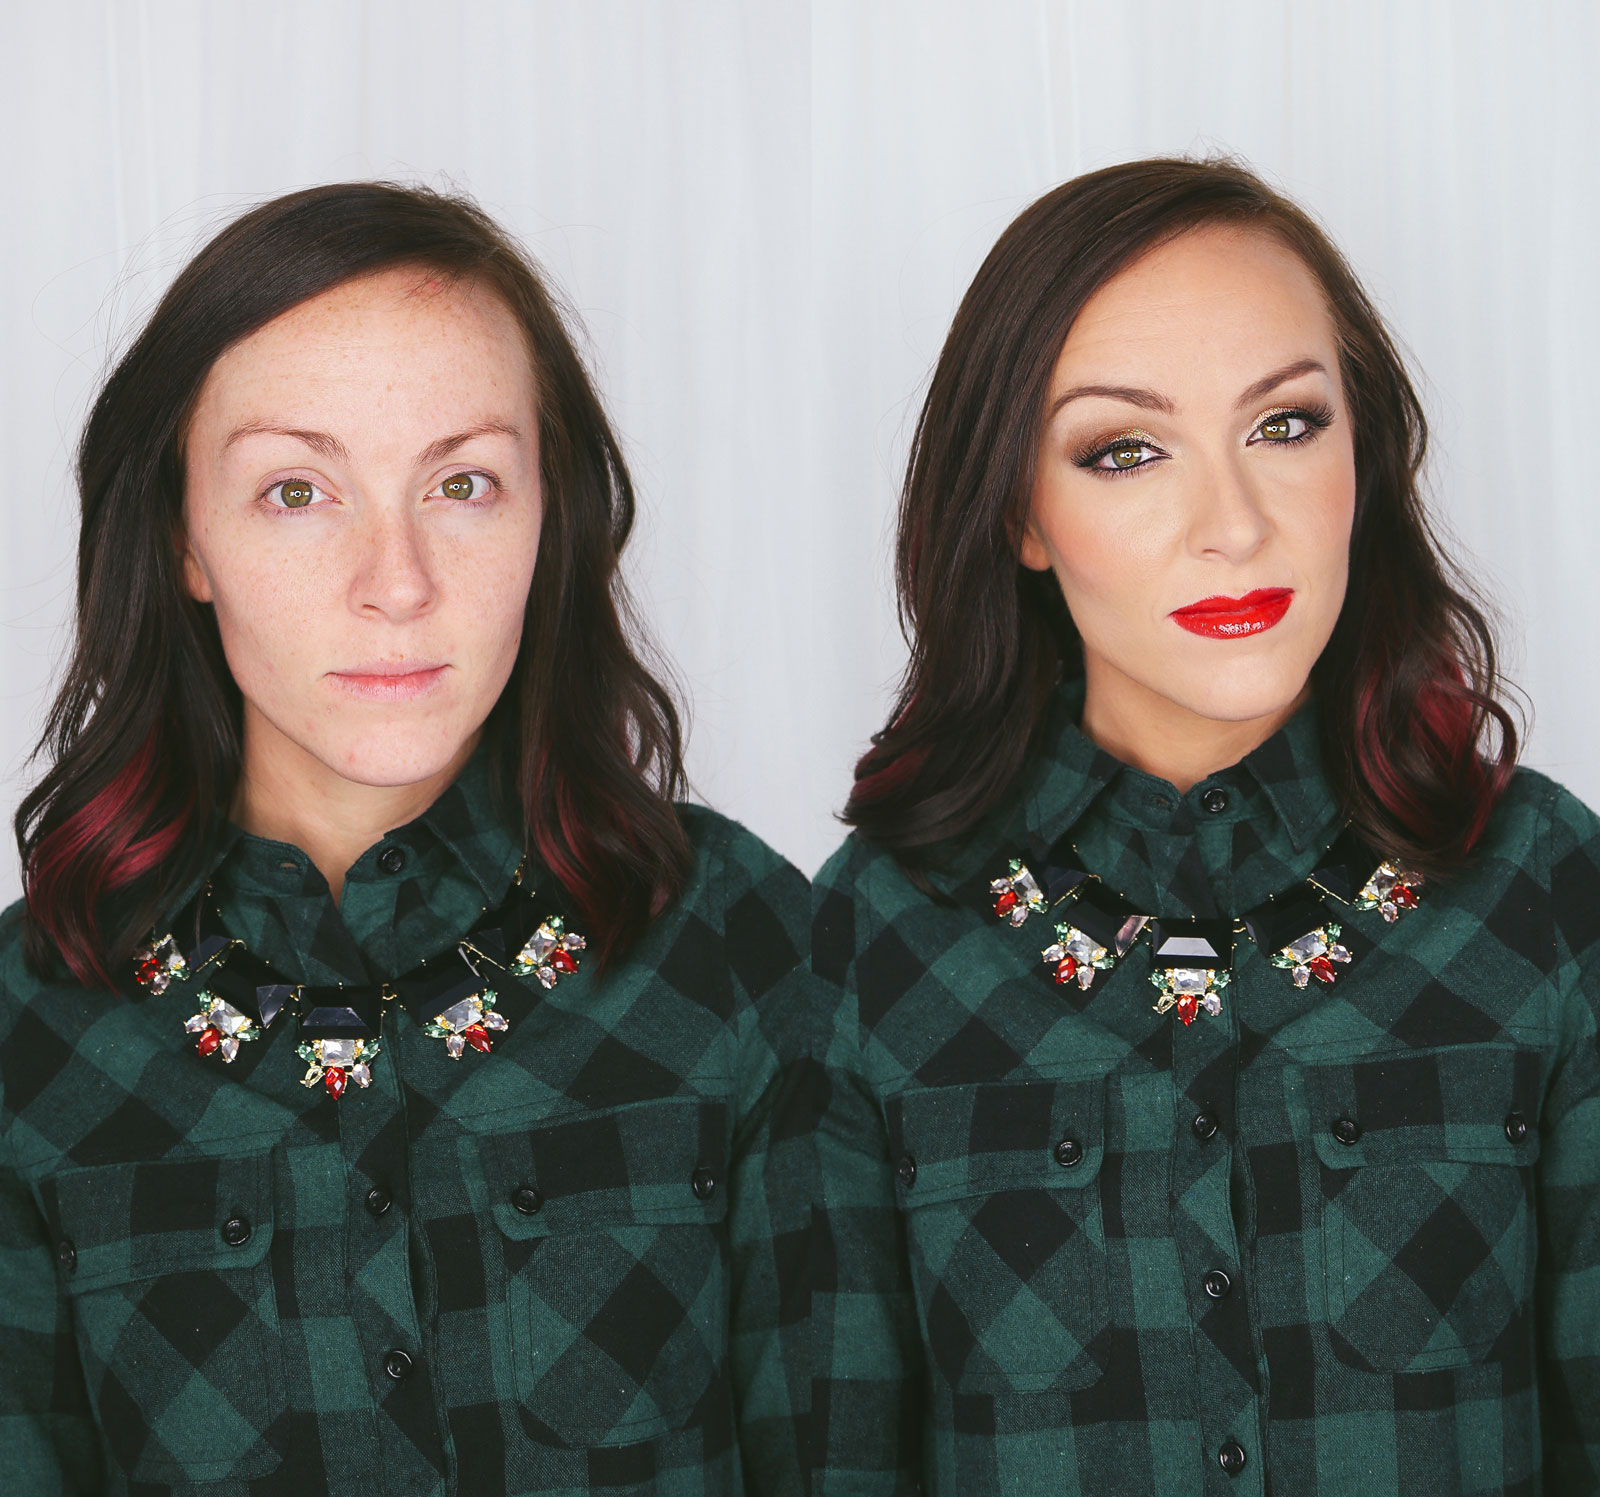
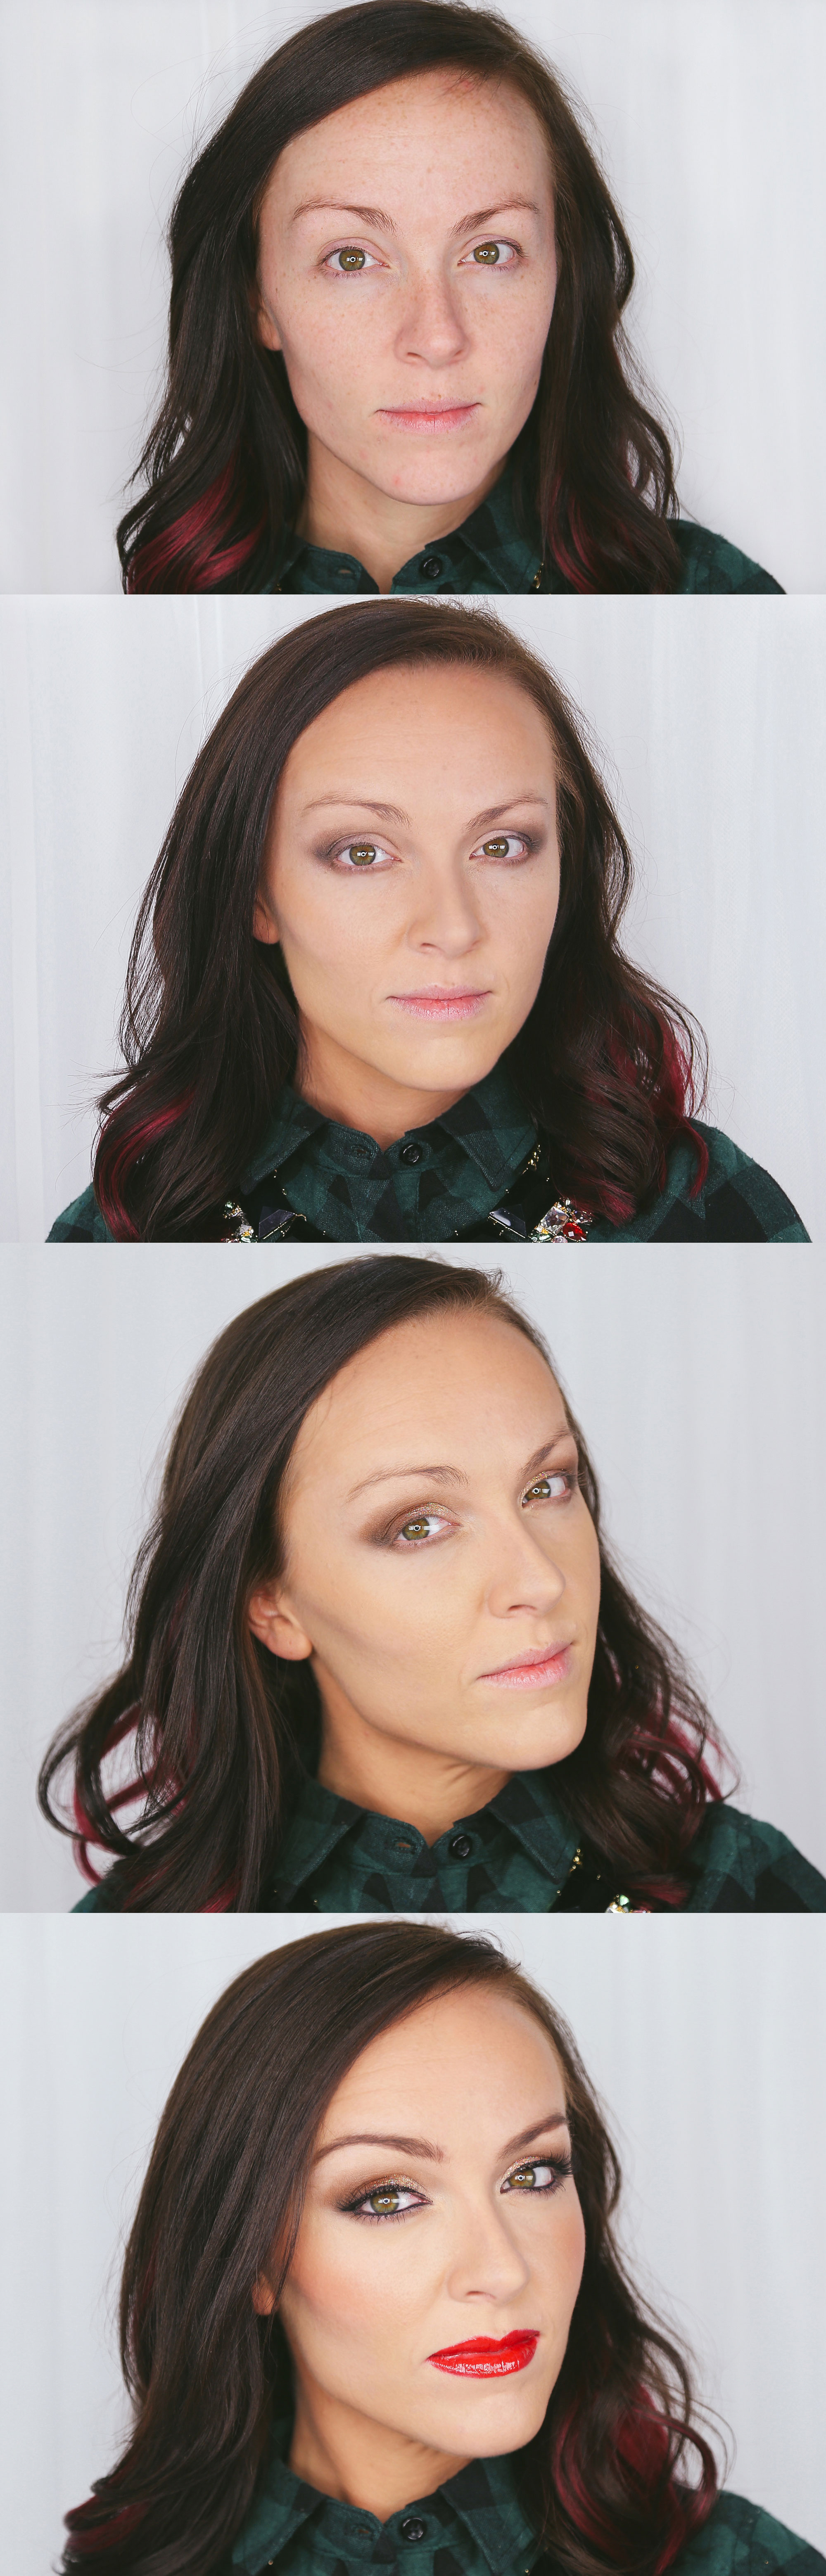
A balanced makeup-look like this photographs so nicely!
makeupbyvivianmakeupartistmakeupforseniorphotosseniorportraitmakeupPhotos by Simplicity Photography


2017-07-14T15:43:26+00:00 January 18th, 2015|Makeup, Uncategorized|1 Comment

Electric Violet Eyes and Contouring

It’s time! Your everyday, easy-to-use all in one, contour and highlighting foundation is available today! Use Maskcara’s IIID foundation to achieve this look.vivianmakeupartist_highlight_contourShailey has the most feminine and dainty features, so much prettiness.Before_sideTo achieve this look start by applying the contour color (Here I used Stone) of your foundation to your forehead, under your cheekbones, and along the side of your nose using the larger side of the dual-ended brush by Maskcara (I used the brush by It cosmetics because the other brush had not been released yet.)Step1_contourYou can blend with the same brush or with a beauty blender sponge (get it damp before using it.) I used the beauty blender because I was blending the IIID foundation into another foundation to achieve full coverage for Shailey’s family photos. Yes! You can use the IIID foundation alone for sheer to medium coverage or with another foundation for full coverage. Step2_blendWith the smaller end of the brush apply your highlight shade (here I used Sunlit.) This will go down the center of your nose, upper cheekbones, center of forehead and basically anywhere else you feel you need the coverage. Blend blend blend!Step3_highlightThere you go! Everyday contouring, quick and easy. (Sorry about not getting individual photos of the blush and illuminator, which adds the finishing touch to this complexion.  Shailey’s little ones had reached their limit for watching their mama get her makeup done! Understandably! So I quickly finished up. I was impressed they lasted as long as they did!) Blush color is called Pink Grapefruit and illuminator is Pearl.violetshadowThe rest of the details:

Eyes: Urban Decay Eyeshadow Primer, Jilted and Slowburn from the Urban Decay Electric Palette,  MAC Retrospeck, Stila Liquid EyelinerAnastasia Dipbrow in Ash Brown applied with angled brush. 

Lips: Urban Decay lip liner in Naked and Native with Bobbi Brown Crystal gloss.before_after_maskcaraSpecial thanks to Whitney with Jessica Janae Photography for the photos!

2017-07-14T15:43:26+00:00 January 12th, 2015|Makeup, Uncategorized|8 Comments

Freckles are Friends

I think freckles are adorable and people that have them always have added liveliness to their skin. It’s kind of like having permanent blush or a semi-tan! I like to use products with a natural finish to brighten up certain areas of the face on people with freckles, allowing the natural dimension of the freckles to show through. vivianmakeupartistHere’s what I used:

Complexion: Laura Mercier Tinted Moisturizer in Nude, Tarte concealer in Light Sand, Laura Mercier Shimmer Bloc in Peach Mosaic to illuminate inner corners of eyes, center of nose, and above lips, Tarte Cheek Stain in Blushing Bride, Maskcara Cosmetics to contour in Stone

Eyes: Urban Decay Eyeshadow Primer, MAC Eyeshadows in Bronze and Carbon, Stila Liquid Eyeliner,  Short Flare False Lashes and Lancome brow pencil in Taupe.

Lips: Urban Decay lip liner in Obsessed, Bite Lip Mask in Champagne.

vivianmakeupartist_jessicaJanaePhoto by Jessica Janae Photography

2017-07-14T15:43:26+00:00 December 26th, 2014|Makeup, Uncategorized|0 Comments

Kjerstin Makeup

beforeandafter_Doing makeup on someone with colorful hair like this made me have to think a little bit (heaven forbid right!? 😛 ) Like hmmm, do I need to do brighter makeup so her hair doesn’t take all the attention away from her pretty features? Or do I do lighter makeup so things aren’t competing? After a couple of adjustments and finding out the location of the photo shoot, I decided that a gunmetal-neutral toned smokey eye and slight pop of color on the lips would be a good balance.
free_people_makeupkjerstin_makeupfree_peopleHere’s what I used: (P.S. ARE THESE LISTS USEFUL? COMMENT AND LET ME KNOW! Yes, No, Kinda Sorta?)

COMPLEXION:Temptu s/b Foundation in 004 (this can be applied with a sponge or a foundation brush also! And that’s a great price on Amazon for both the beauty blender and It Cosmetics brush.)Laura Mercier Secret Concealer #3, High Beam to illuminate, MAC Blush in Well Dressed,Bobbi Brown Bronzer in Elvis Duran.

EYES:Urban Decay Eyeshadow Primer,MAC Eyeshadows Kid on the crease, Carbon on the outer corners. Stila Vintage Black Gold on lid applied lightly, Stila Liquid Eyeliner,  Hypnose Mascara, Ardell Wispies strip lashesAnastasia Dipbrow in Blonde for brows.

LIPS: Lancome lipstick in Fleur De Lis, Urban Decay liner in Native, Buxom gloss in White Russian.

HAIR: T3 curling iron, Kenra Hairspray used at the root of hair after backcombing, Beach Head used all over for beachy texture.

These pretty pics were taken by Jaci Marie of beautiful Kjerstin.

2017-07-14T15:43:26+00:00 December 17th, 2014|Hair, Makeup, Uncategorized|14 Comments

Simply Sadie Holiday Step by Step

Working with Sadie is always a joy. You may remember her from a previous post when I did a more natural look on her, so it was fun to vamp it up a bit for her holiday shoot!sadie_before_after Keala Jarvis was a sweetheart and took some progressive photos for me because I think it’s helpful to see the how the makeup looks at different points of the process. sadie_holiday So I started with basic complexion, did her eyeshadows and added a pop of gold, then finished the look with brows, blush, lips, and lashes. Here’s what used:

Complexion: Temptu s/b foundation in 005Laura Mercier Secret Concealer #3, Makeup Designory shadow foundation to contour, Tarte Cheek Stain in Tipsy, Bobbi Brown Bronzer in Elvis Duran (or Natural.)

Eyes: Urban Decay Eyeshadow Primer, Urban Decay Naked Basics Palette, add a touch of Urban Decay Bondage on the lid and then immediately add glitter over the top. Urban Decay All Nighter on lower inner rim, Lancome Artliner in Noir on top, Lancome Hypnose mascara, Ardell Wispies lashes. Her brows are Lancome’s powder pencil in Sable applied with a damp angled brush. 

Lips: Urban Decay lipliner in 69, Bite Beauty High Pigment Pencil in Pomegranate, and some gloss. 

Make sure to comment if you have any questions at all! I would love to help. vivianmakeupartist

2017-07-14T15:43:26+00:00 December 9th, 2014|Makeup, Uncategorized|3 Comments

Holiday Makeup Deluxe

Take your holiday look up a notch by adding a bold lip. Follow the steps in my last post and then just add a few more details to get this extra glam holiday makeup look. holiday_makeupholidaymakeupHer lip color is MAC Russian Red and Lancome Mauvelle liner. I added some mini flares to her lower lashes and her top lashes are Flutter Lashes.  Keep your lips matte finish for a durable, velvety look—or gloss them up! Whichever you prefer! I added my favorite go-to Bobbi Brown gloss. This stuff is amazing for photos. holiday_makeup_lookvivianmakeupartistHere’s a little recap! holiday_makeup_look_vivianmakeupartist

2017-07-14T15:43:28+00:00 November 21st, 2014|Makeup, Uncategorized|1 Comment

Holiday Makeup Look

I don’t actually watch runway fashion shows terribly often, but when I do I sometimes think “Well, ya, of COURSE they can wear that, they can wear anything and it would probably look good on them. But I don’t look like them and I don’t have a million dollars to spend to play dress up.” The photos below may seem like I am giving you the makeup version of the runway show experience since Marina is so beautiful, but hear me out! You can probably achieve a similar look using mostly products you already own. The only thing I had to purchase for this was the one shade of super duper sparkly eyeshadow.

step_1Apply foundation primer (lately I’ve been liking Tarte’s.) Then foundation and bronzer.  Apply a lip hydrator (I’m obsessed with Bite’s lip mask! I use it on my cuticles too.) Apply eyeshadow primer and fill in your browsstep_2Then use a light brown eyeshadow on the crease and under the lower lash line. Wing it out and connect them together! I used Wedge by MAC.  The brush I used to apply and to blend for this was the Tom Ford Blend brush.  Since I’m a professional makeup artist and I’m doing makeup around the clock, I tend to invest more in brushes and things that will save me time, and this brush does. But for this any fluffy shadow brush with do.  I also like the MAC Fluff Brush. step_3Ok now for the fun part, sparkly eyeshadow!!!! I used Vintage Black Gold and there’s a quick video showing how to use it here. I applied it with this brush thing shown in the photo above, but I haven’t used it again since so I’d probably just apply it with your finger or a multitasking synthetic bristled brush like this one here.  I lined the lower inner rim with Lancome’s Blanc eyeliner but really any white khol eyeliner would probably work.step_4Apply mascara, Hypnose is a favorite of mine. Add your favorite light lip color, here I used Buxom White Russian.  *Optional, add top eyeliner and some lashes. For this look I used Ardell’s #205.

Photos by Jordyn Willey


2017-07-14T15:43:28+00:00 November 19th, 2014|Makeup, Uncategorized|2 Comments

Photo Makeup

People will often say to me “Well, I know for photos I need to just wear a lot more makeup.” Which is true—-kind of. You don’t want to just pile on a lot more of exactly what you do everyday, you want to wear makeup that gives the right dimensions. You know all that highlighting and contouring buzz that’s going around? That’s what I’m talking about. In real life, people are seeing you in 3D. A photo is 2D, so adding in flattering dimension can make all the difference.

Fitness extraordinaire Samantha Leete hired me to get her ready for her wedding and we had a blast together! We’ve worked together several times since and in the photo below I am showing on the left just an everyday makeup look. It’s one color of foundation all over the face, and on the right is photo ready makeup.  samantha_leeteSo the main thing I implemented for Samantha’s makeup in the right photo, is highlighting and contouring.

Complexion: Temptu s/b foundation (non-airbrush foundation recommendation Teint Miracle,) Laura Mercier Concealer #3,  Bobbi Brown Bronzer in Elvis Duran (I use Natural all the time too,) Tarte Cheek Stain in Tipsy , Illuminator is High Beam by Benefit, and for everyday contour I recommend Maskcara Cosmetics  and for the advanced makeup-ess or professional MUA I recommend MUD.

Eyes: Urban Decay eyeshadow base, MAC eyeshadow in Bronze, Carbon, and Rice Paper, Chanel liquid eyeliner on top in NoirTarte Inner Rim liner, Lancome Hypnose mascara, Anastasia Dipbrow Pomade in Blonde 

Lips: Urban Decay lip liner in Naked 2,  Chanel gloss in Seashell

And her hair……….it’s just naturally shiny and beautiful.

Photo by Jessa Kae 

2017-07-14T15:43:28+00:00 November 18th, 2014|Makeup, Uncategorized|1 Comment

Poison Ivy Makeup

When Jackie asked me if I could do her makeup for this I was ecstatic. Poison Ivy Makeup!? Yes please! This kind of stuff is so much fun.poison_ivy_makeup_hairI thought progressive photos might make it easier to see how to do it. poison_ivy_makeup_1Let’s talk about her eye color…. way pretty, right!? So, I’ll list what I used but you may be able to get a similar look using products you already have.poison_ivy_makeup_2Apply your foundation and contour color. ↑ I used the foundation from the makeup design school I went to here along with a little bit of airbrush foundation here. Don’t feel like you have to rush out to get an airbrush (even though they can be great,) normal foundation will work just as well, I just didn’t have the exact colors I needed so I went with airbrush.

poison_ivy_makeup_3Add concealer, bronzer (Natural,) blush (Peach Mosaic,) lip liner (UD in Bang,)  and gloss (Chanel in Constellation.) Here’s a side view ↓poison_ivy_makeup_4.Make sure bronzer, blush, and contours all blend together nicely. My favorite blending tool is the beauty blender. poison_ivy_makeup_5Then add eyeshadow (Naked Basics and MAC Bronze.) ↑poison_ivy_makeup_6Then add some false lashes. You can’t go wrong with Ardell Wispies.leavesNow for the ivy part of this all…..get some leaves like these here and spray them with some glitter and allow them to dry. adhesiveApply lash glue to the back of the leaves and allow it to dry for about 45 seconds before applying to the skin. poison_ivy_makeup_7
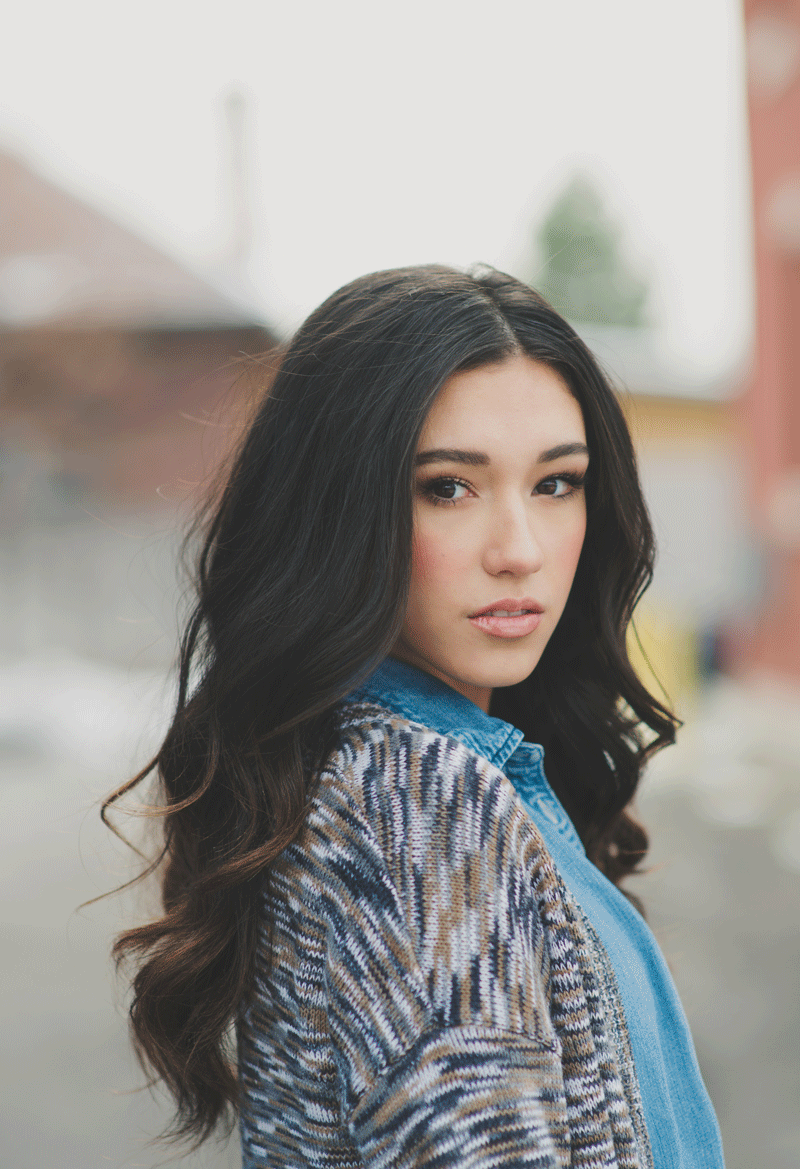
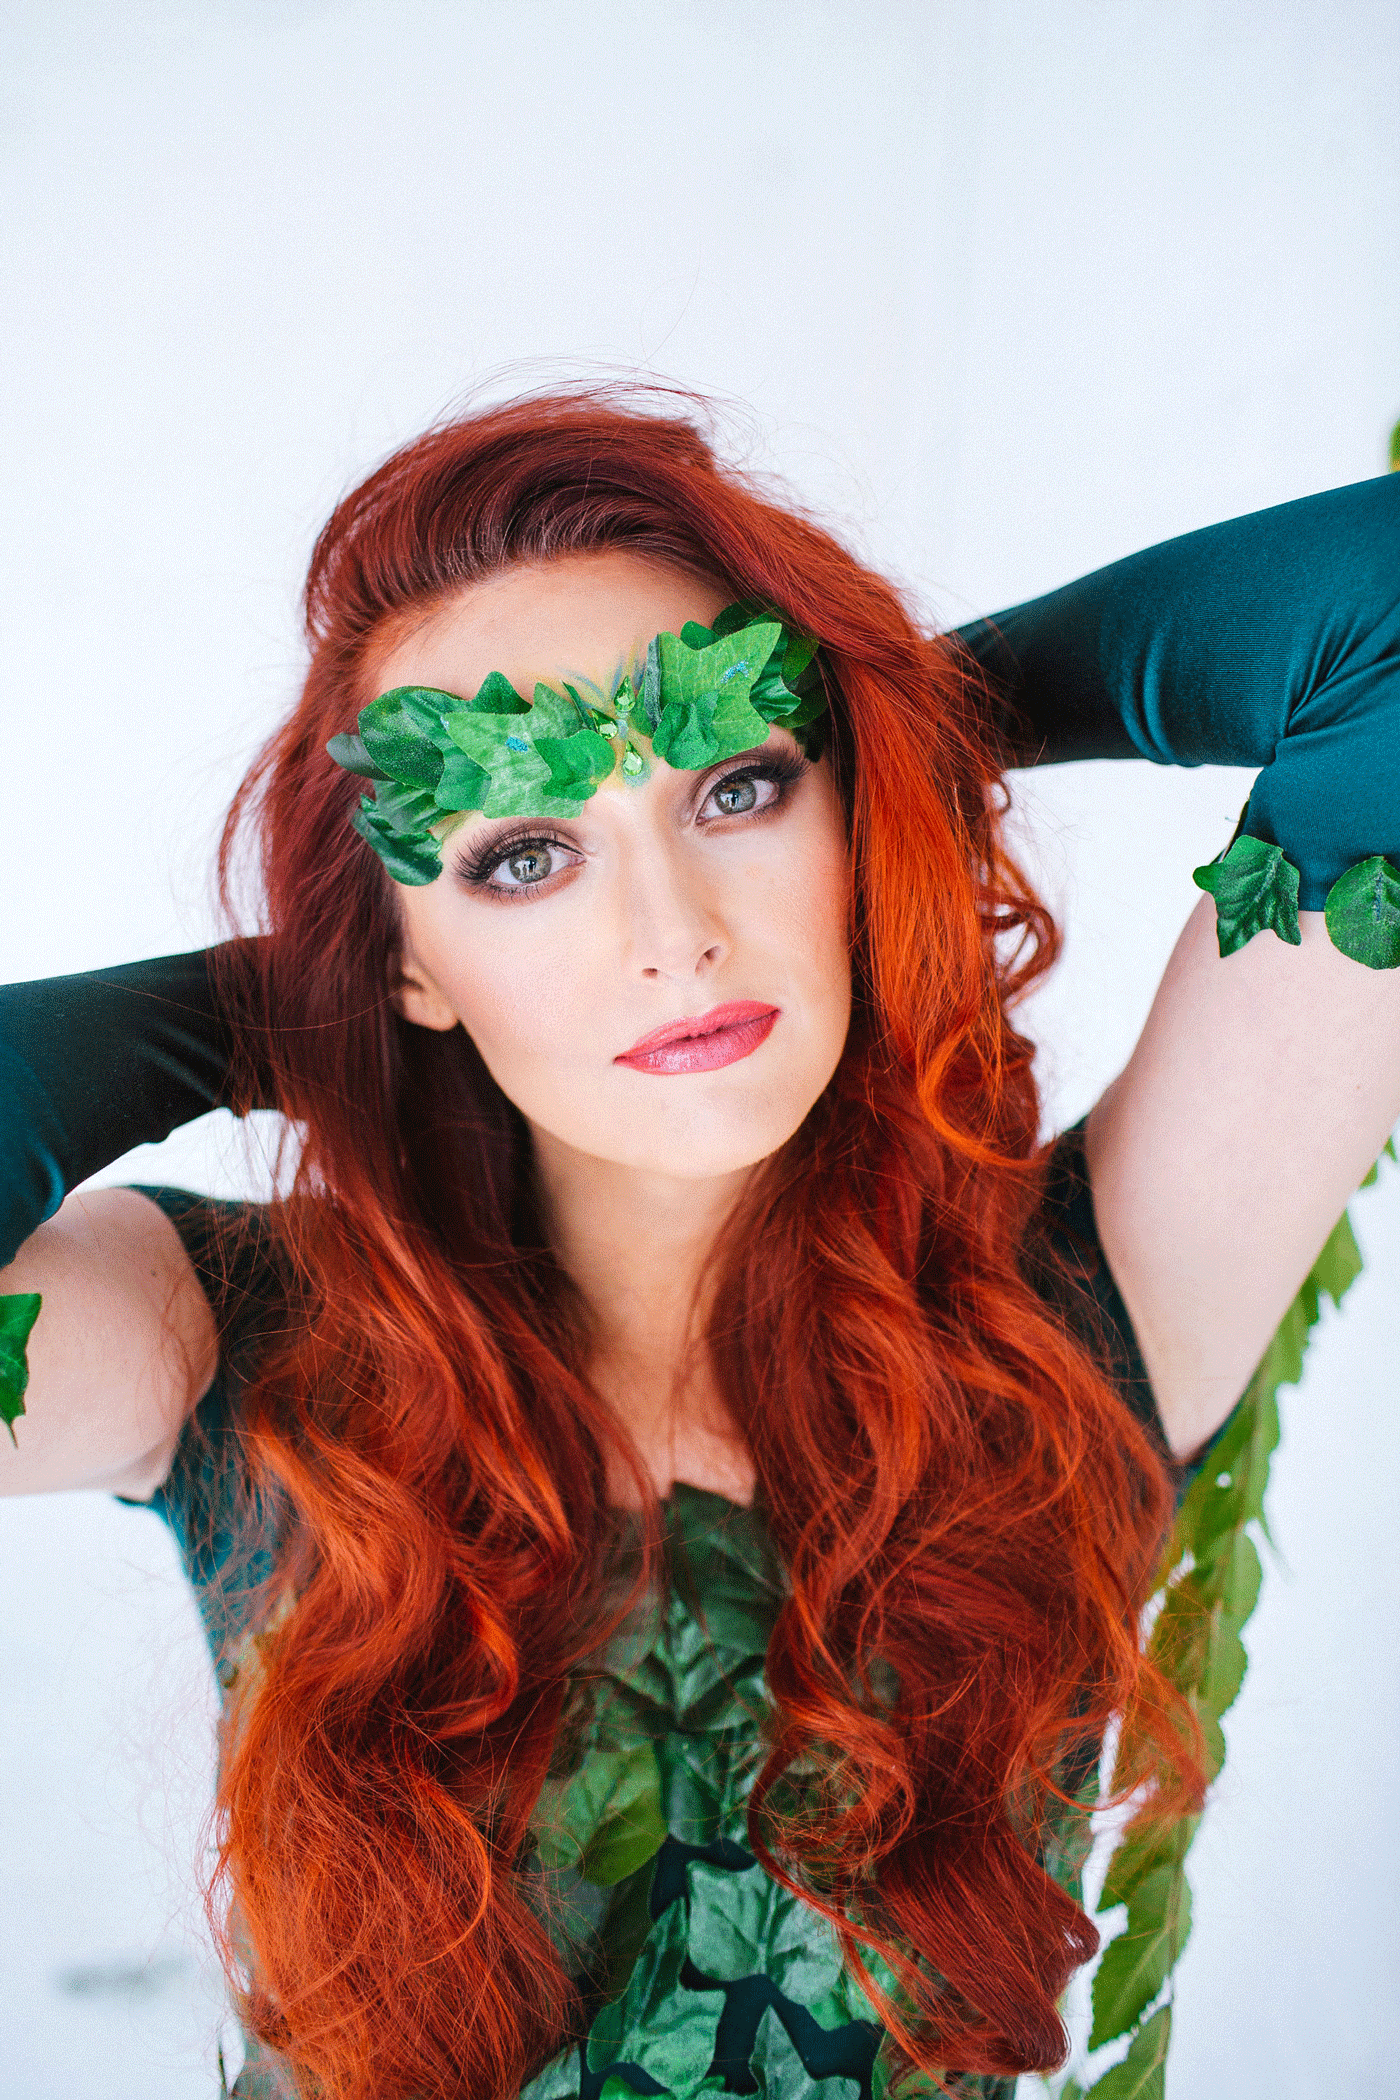
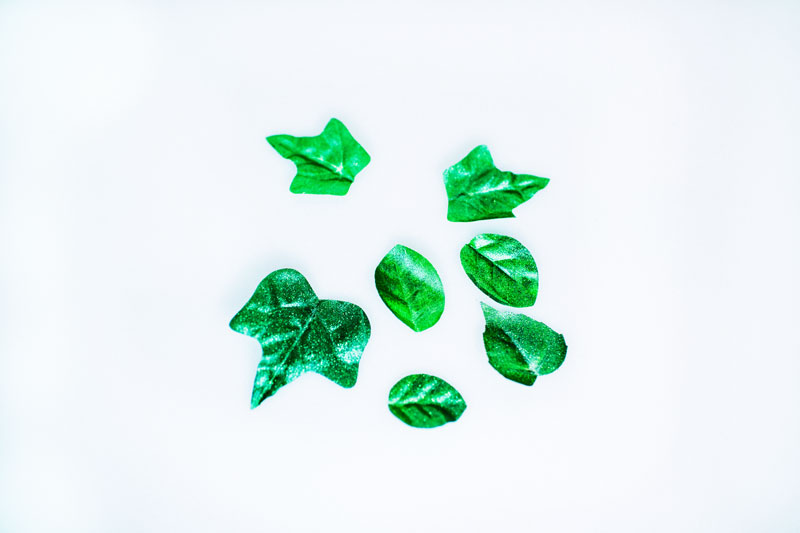
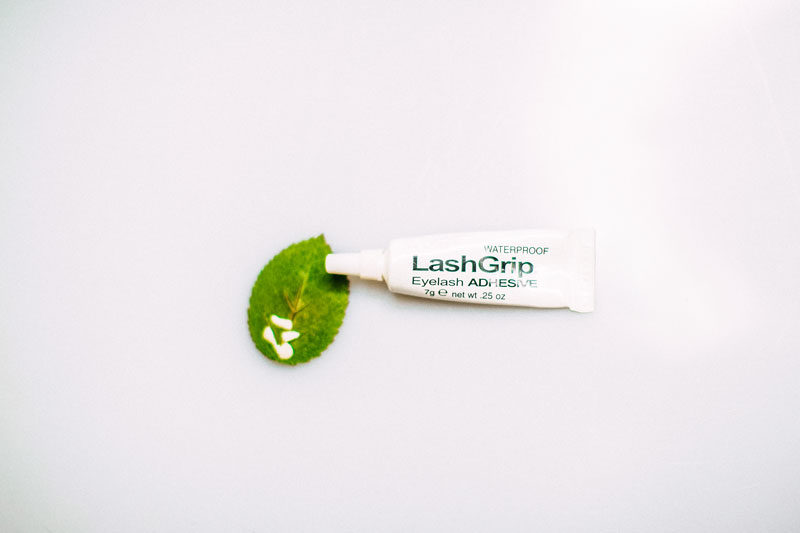
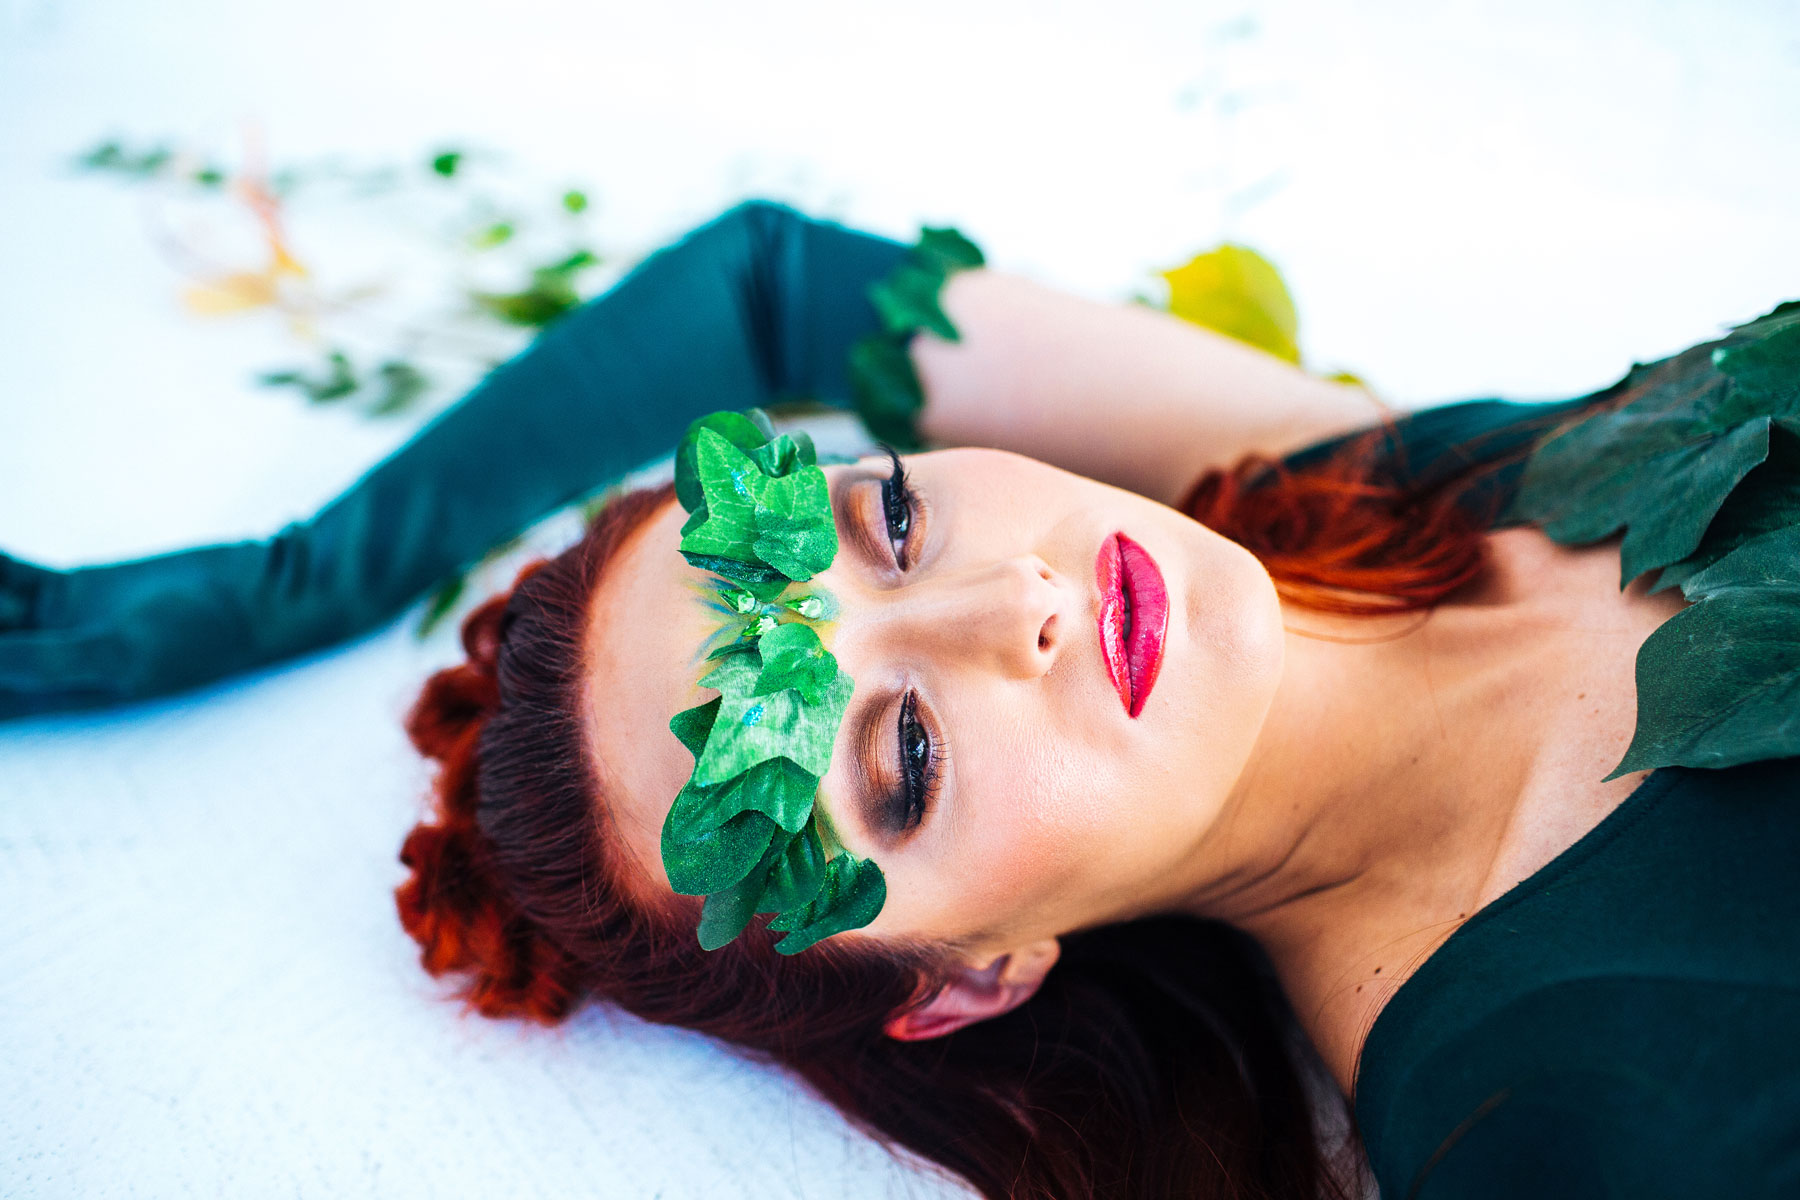
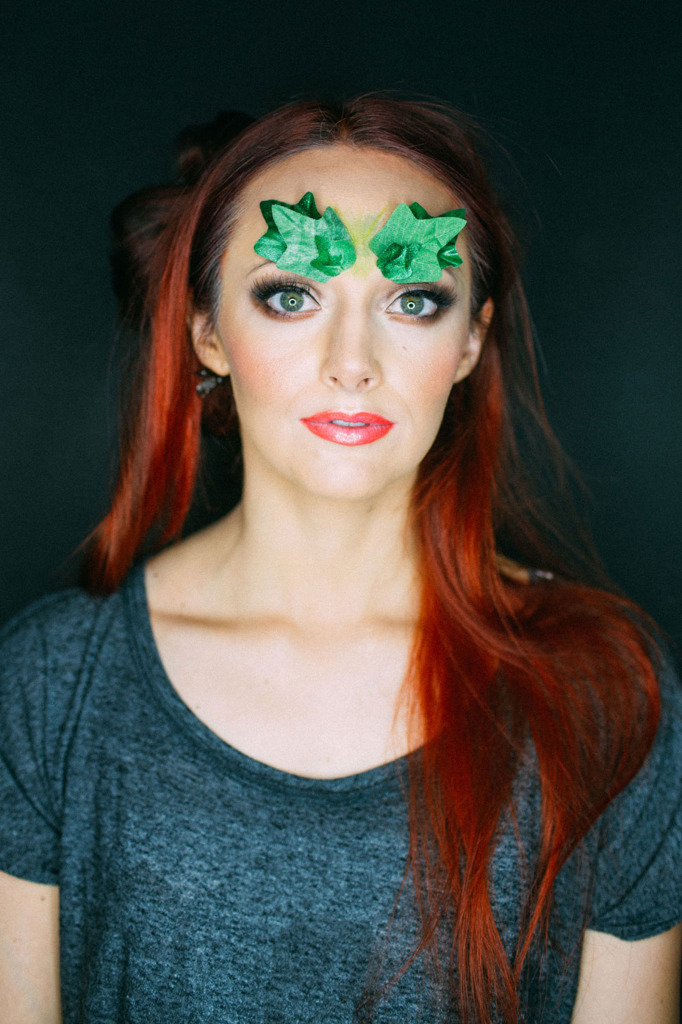
Layer the leaves on the skin adhering each one with lash glue and allowing it to fully dry. Apply green eyeshadow between the leaves to create extra detail. I used the green colors from the
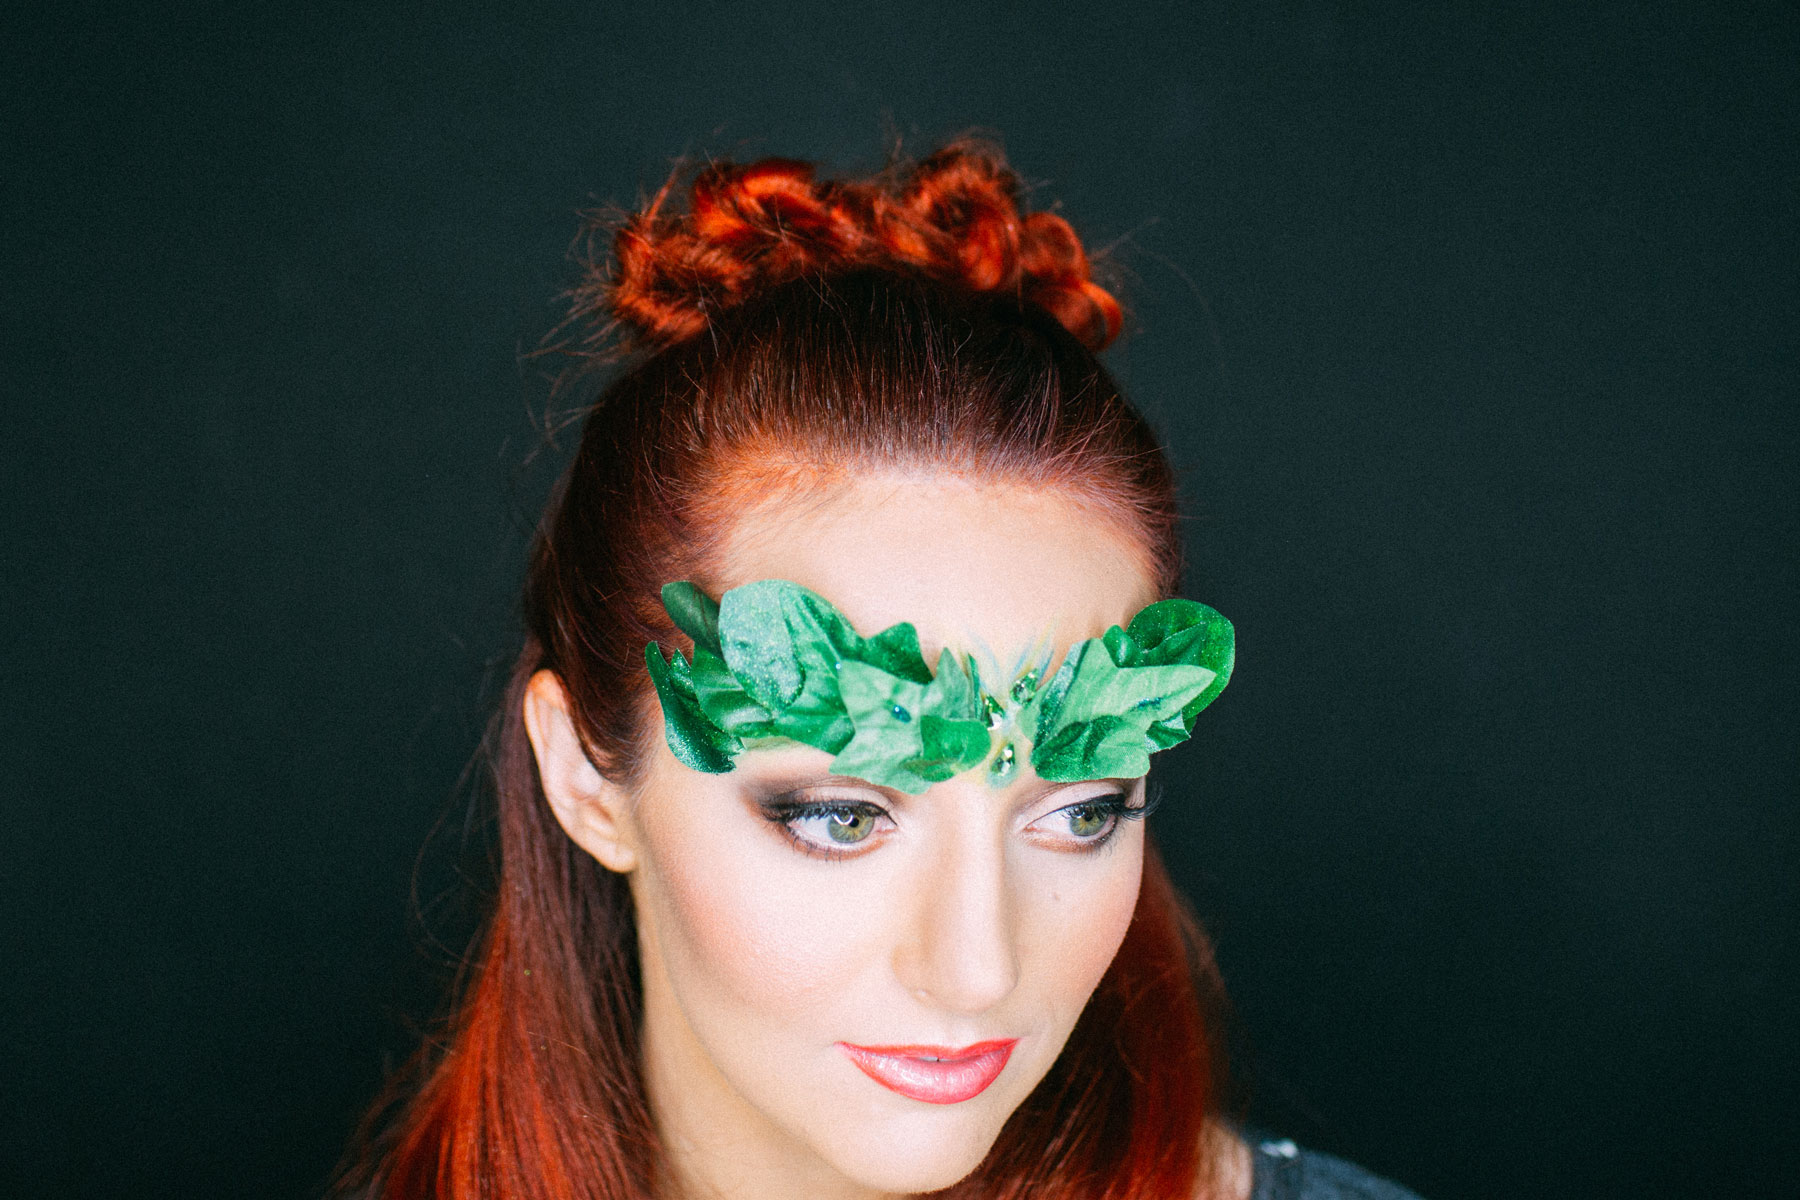
 UD Electric Palette.poison_ivy_makeup_10Add some rhinestones ↑ (similar here) to the center using lash glue. And you’re done!poison_ivy_makeupNow go do something fun!

This pretty face is Little J Style

Stellar images by Emmy Lowe Photo

Hair color and style by Aubrey Nelson

Vines by Rachel Osguthorpe


2017-07-14T15:43:30+00:00 October 29th, 2014|Makeup, Uncategorized|0 Comments