About Vivian

This author has not yet filled in any details.
So far Vivian has created 125 blog entries.

Amanda

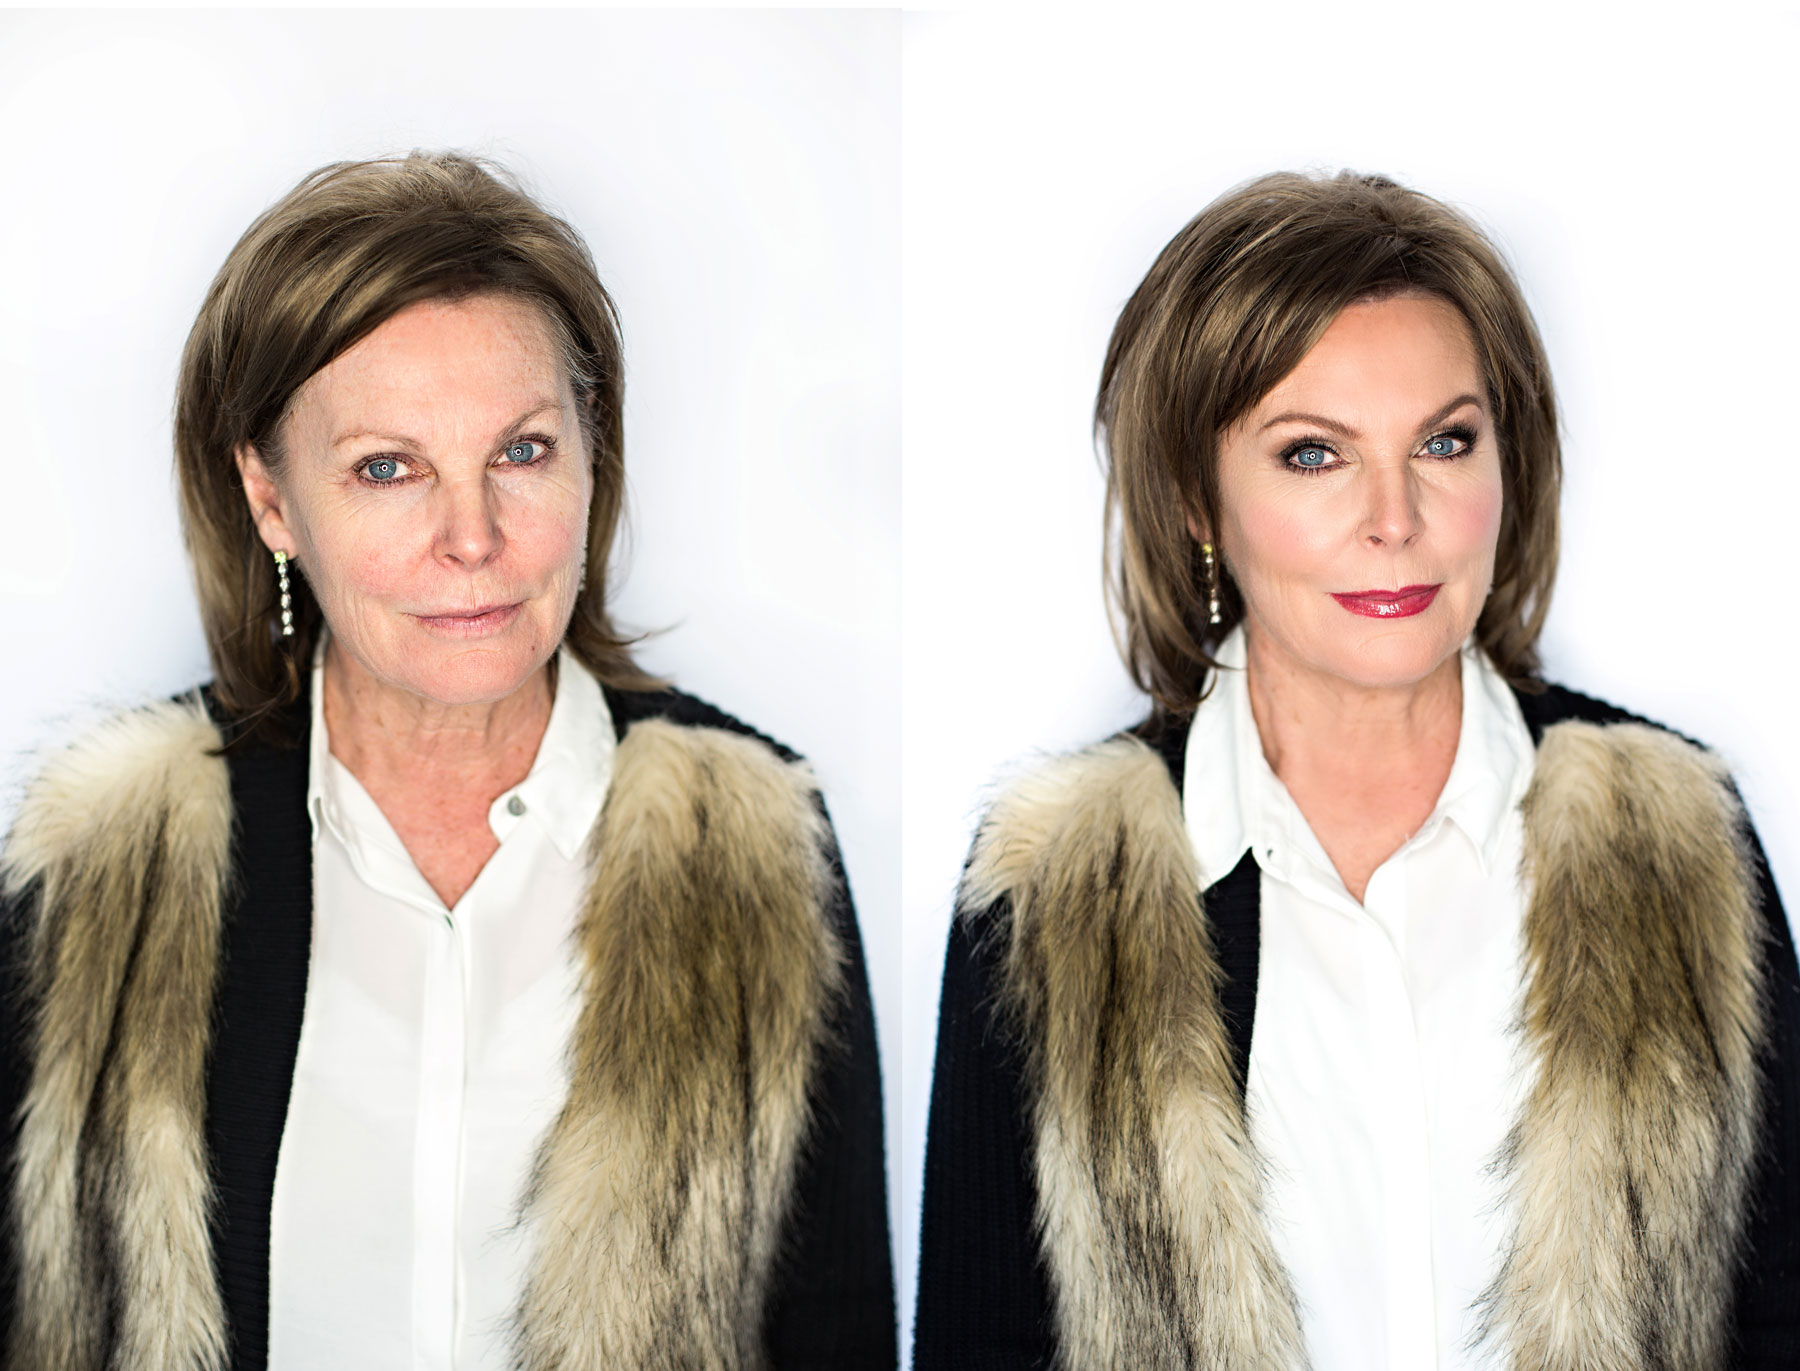
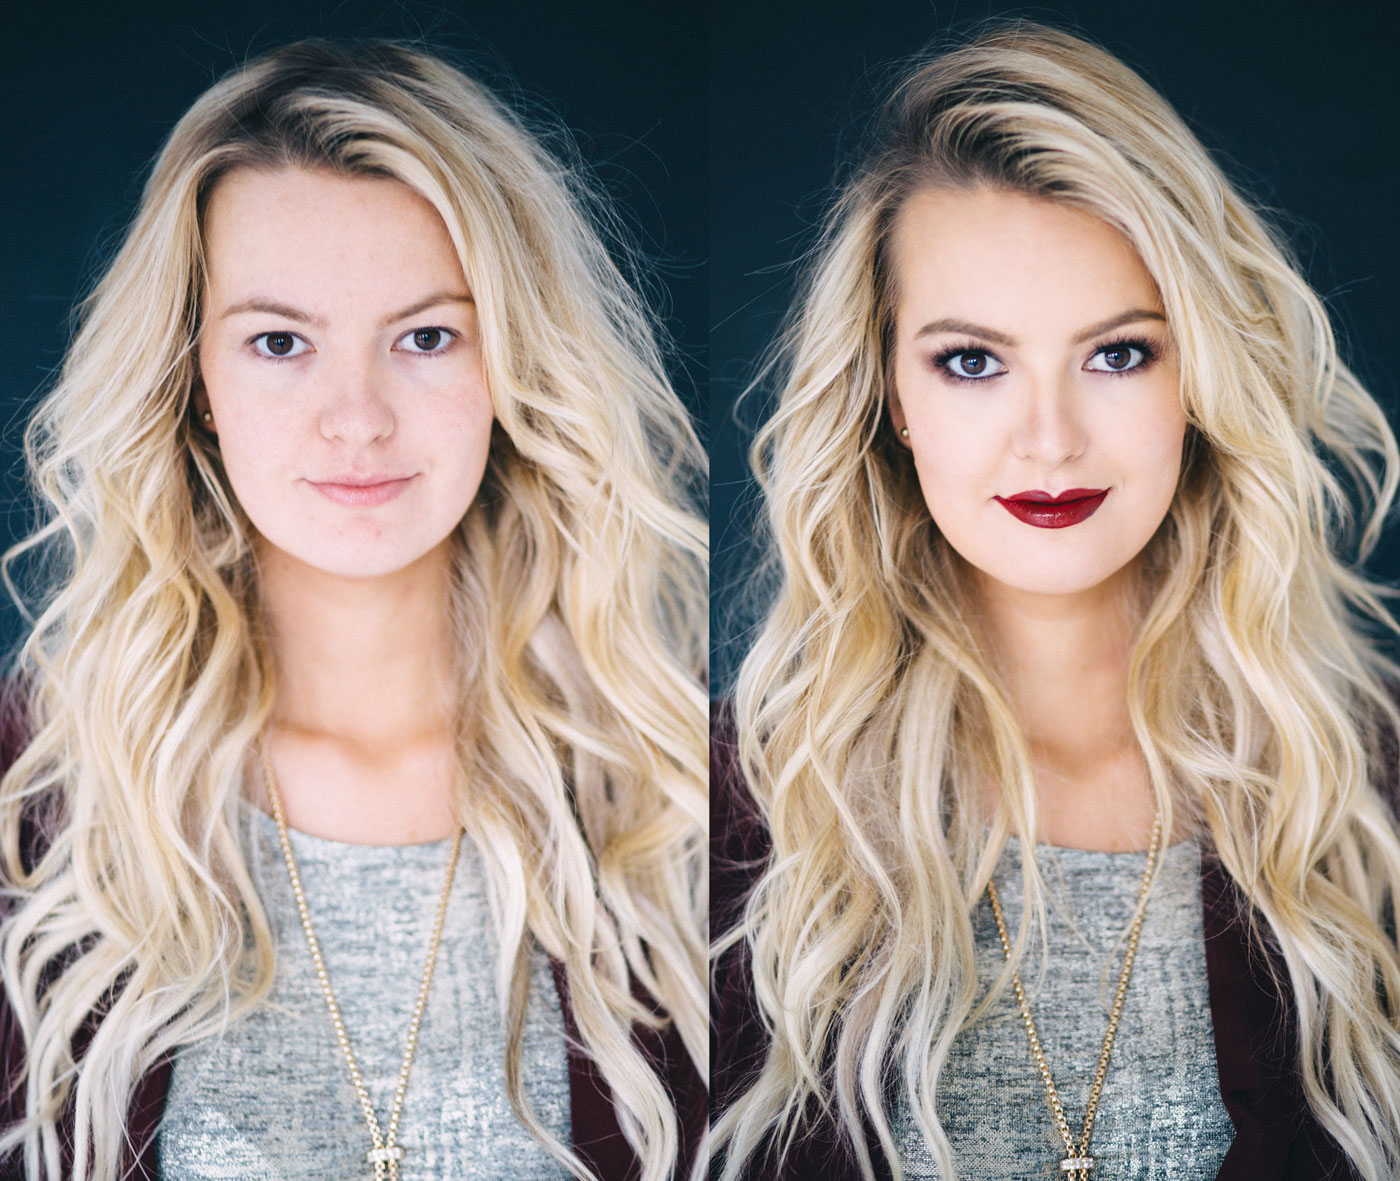
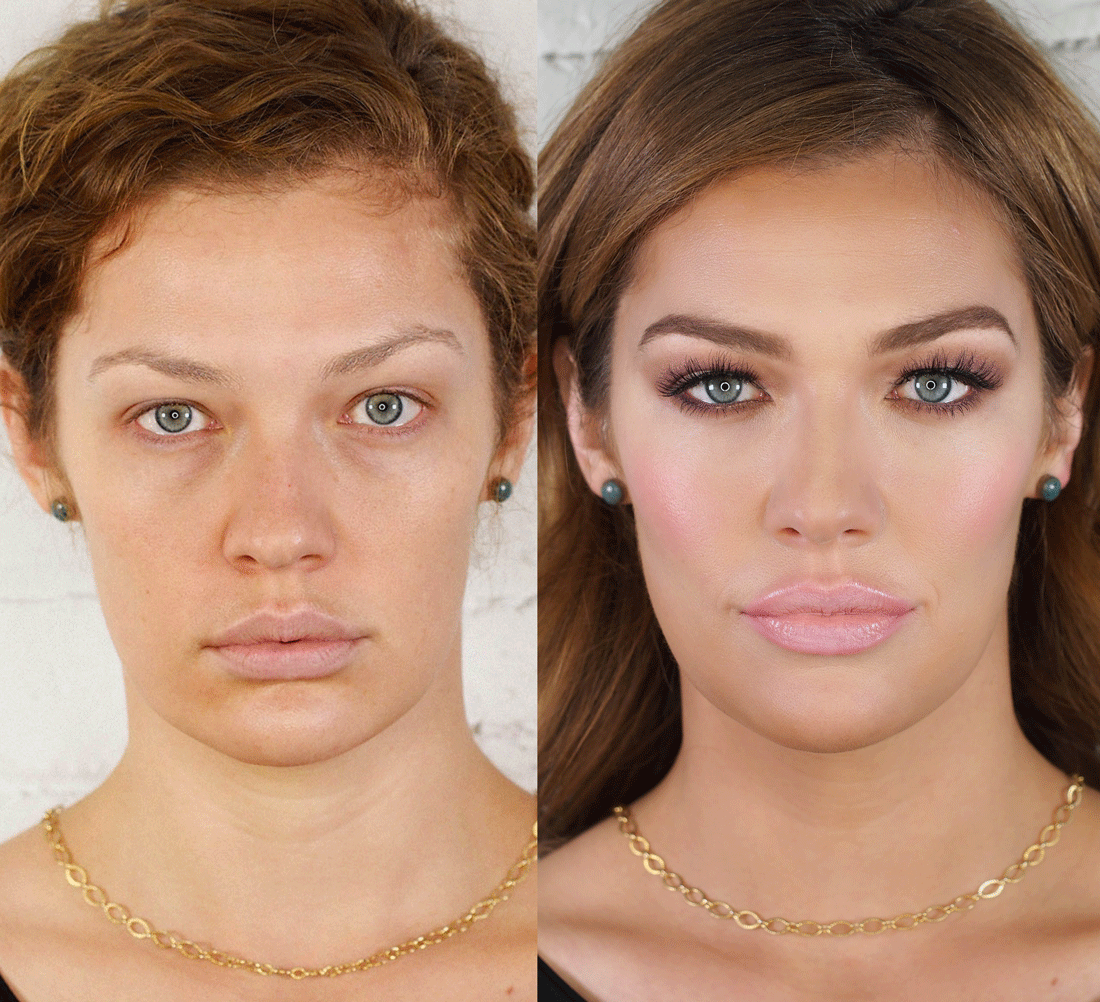
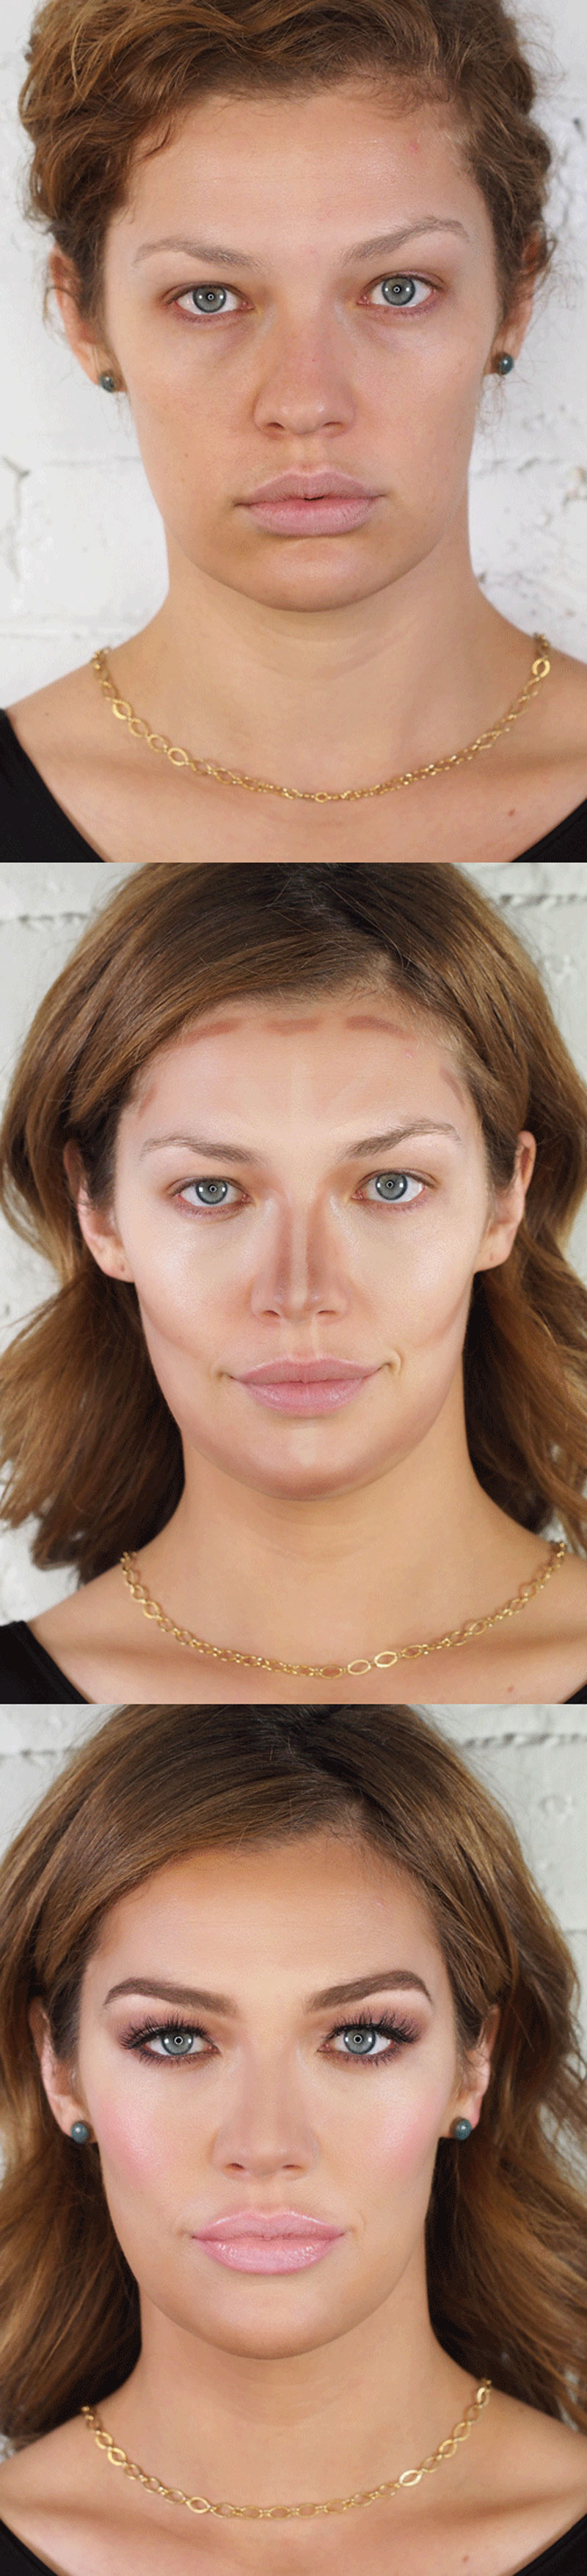
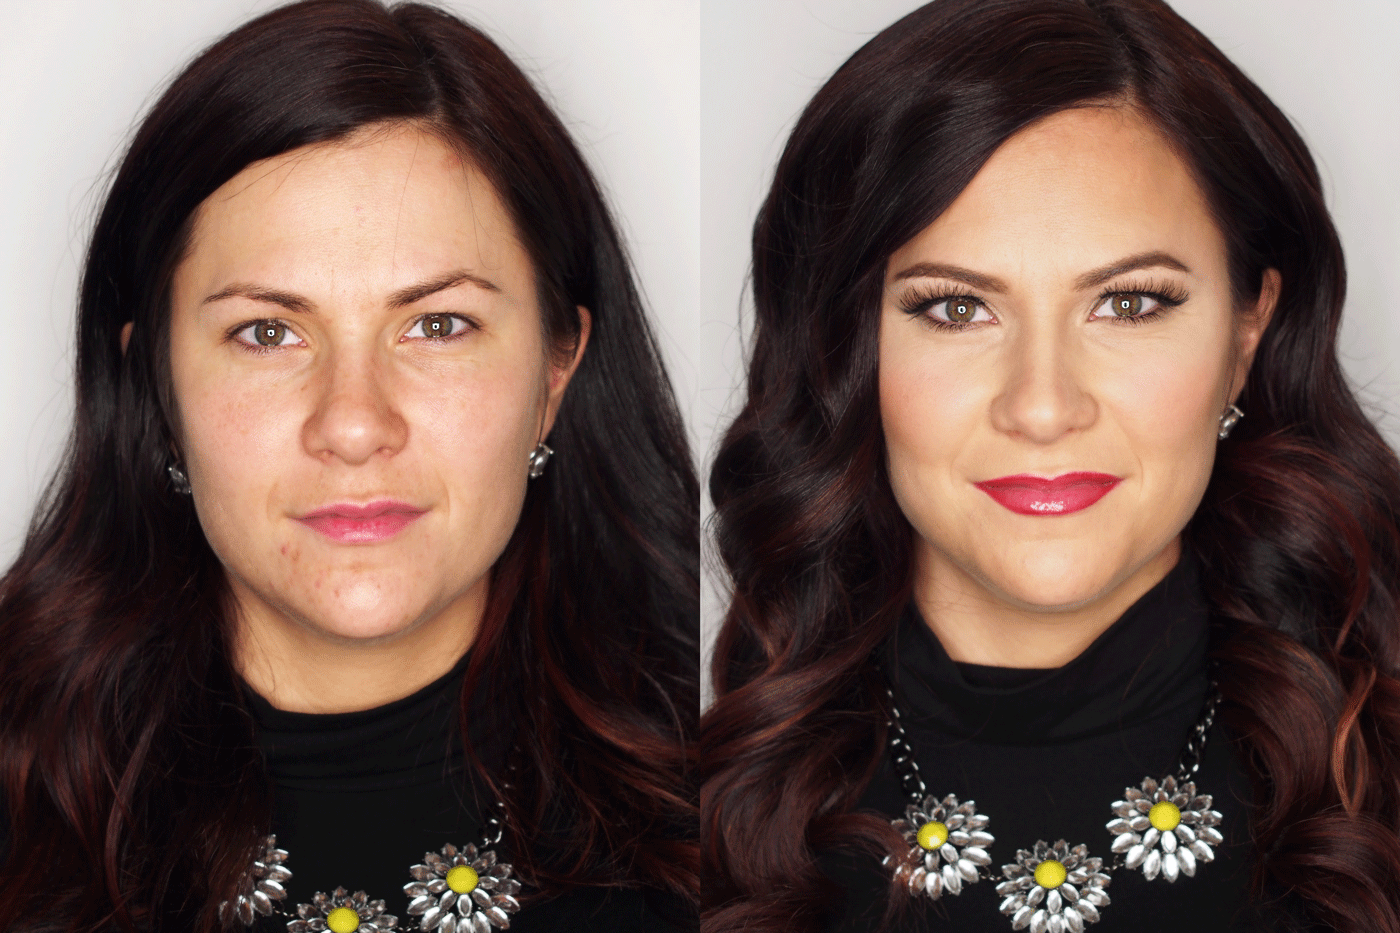
This before and after is from last summer. Amanda contacted me saying she had a catastrophe of some kind and had an event to go to so she was panicking. I’ve never seen her look anything short of totally gorgeous, so I knew it couldn’t be that bad, but I got her in for an appointment.

I  was super limited on time and luckily she had a photo of the makeup look she liked (a pic of Megan Fox, she kind of looks like her, huh?) so I was able to get it done in about a half an hour (for event makeup, that’s pretty quick in my book. Well, when you incorporate the socializing and catching up time too 😉 )amandas_before_and_after_web
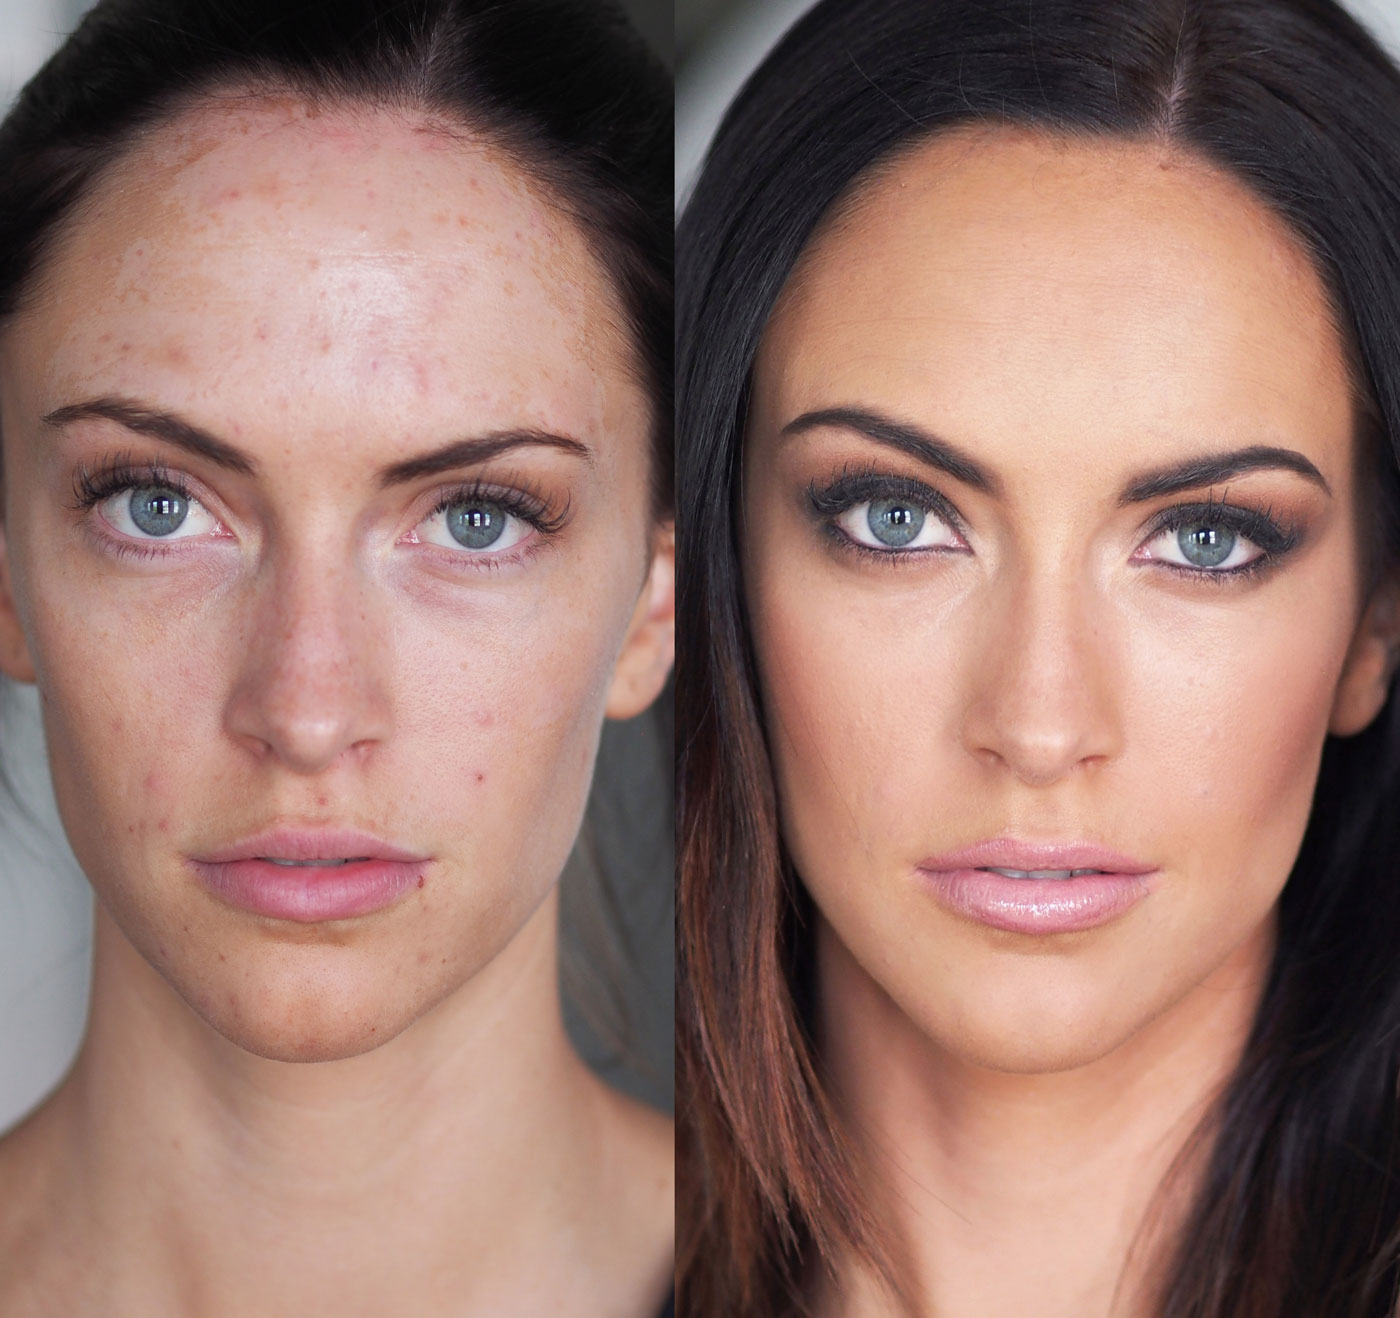
This product below was the life saving element. The Laura Mercier Secret Camouflage Concealer.

laura_mercier_secret_camouflage
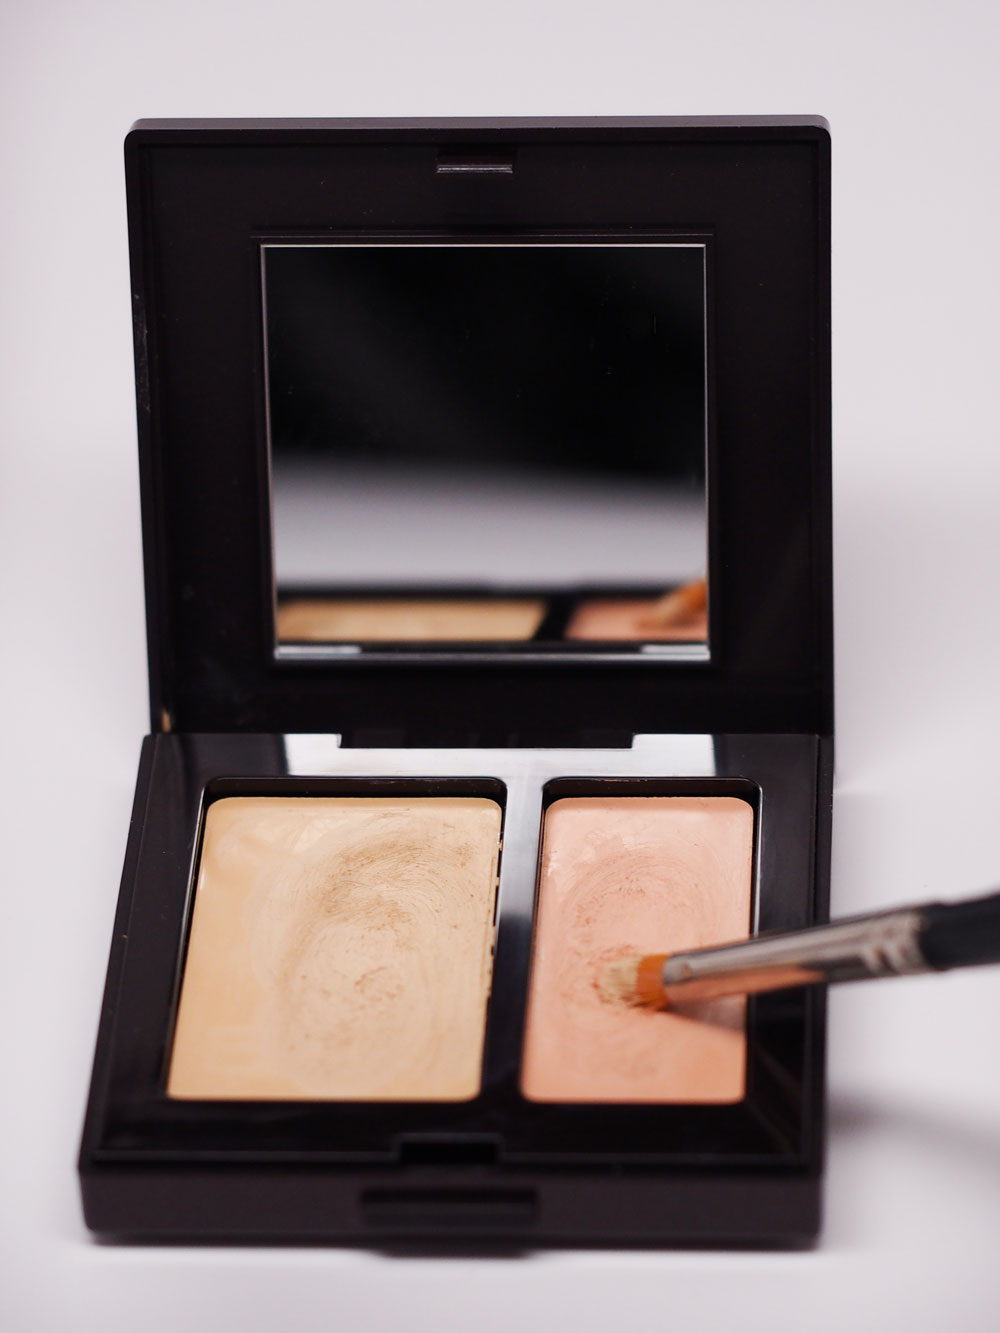
It’s an incredibly durable concealer and the shade is customizable. It comes in 8 color options, and each one has 2 colors that you mix together til you get the right tone. SC-2 is the one in the photo (and this is the brush.) For Amanda, I used SC-4 and I traced along the lighter part of her skin (mostly forehead) using a color that was close to the tone of the tanner part of her skin. That way I wouldn’t have to put on several coats of foundation because the colors already looked more similar, therefore a more uniform complexion.

Are you staying with me here? 😎

This same concept works for tons of other things too! If you have a zit or a little sun damage, there’s no need to pile on a bunch of makeup to every visible surface of your skin. Just put on your tinted moisturizer or foundation and then add a little concealer to any areas that still need a bit more coverage.

There’s more useful info on this concealer under the Details and Usage tabs on this page here. 

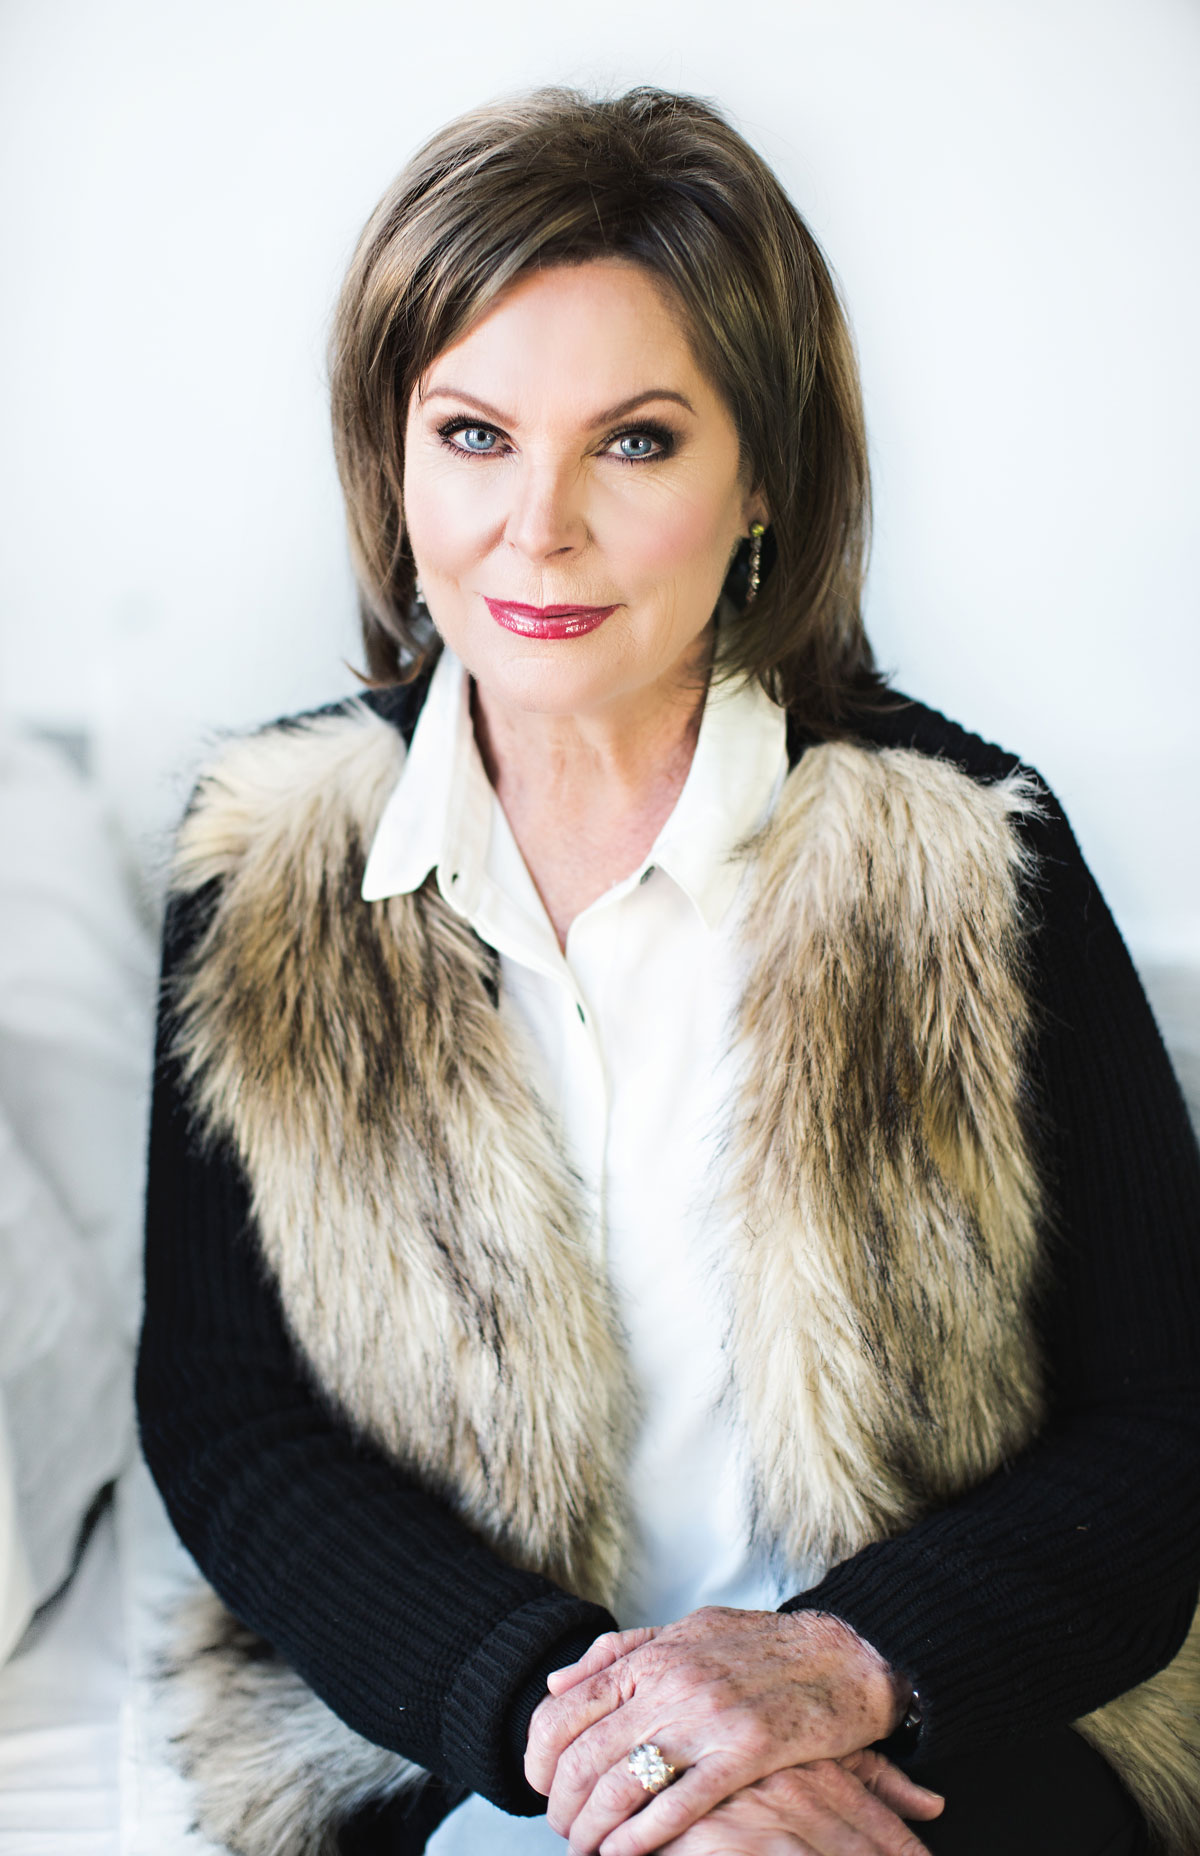
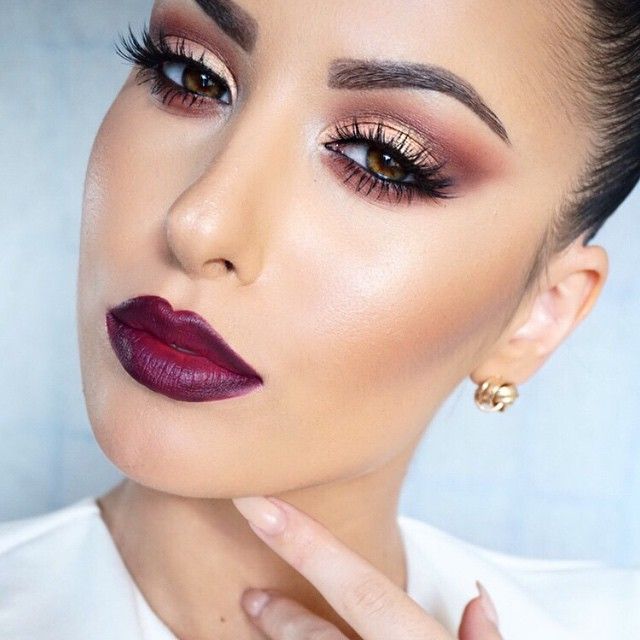
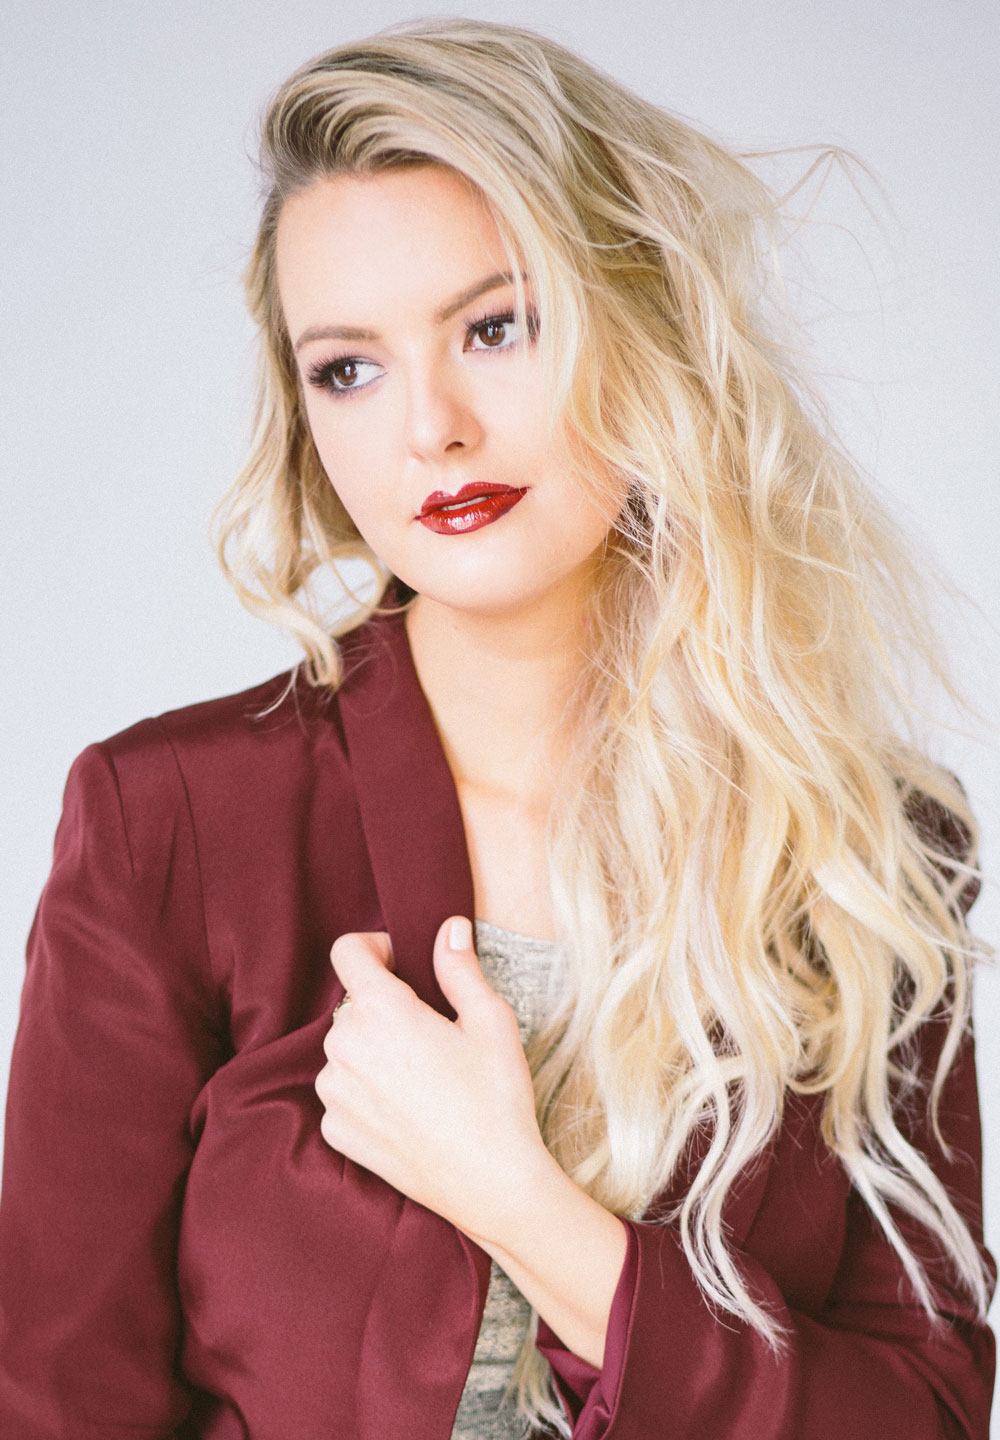
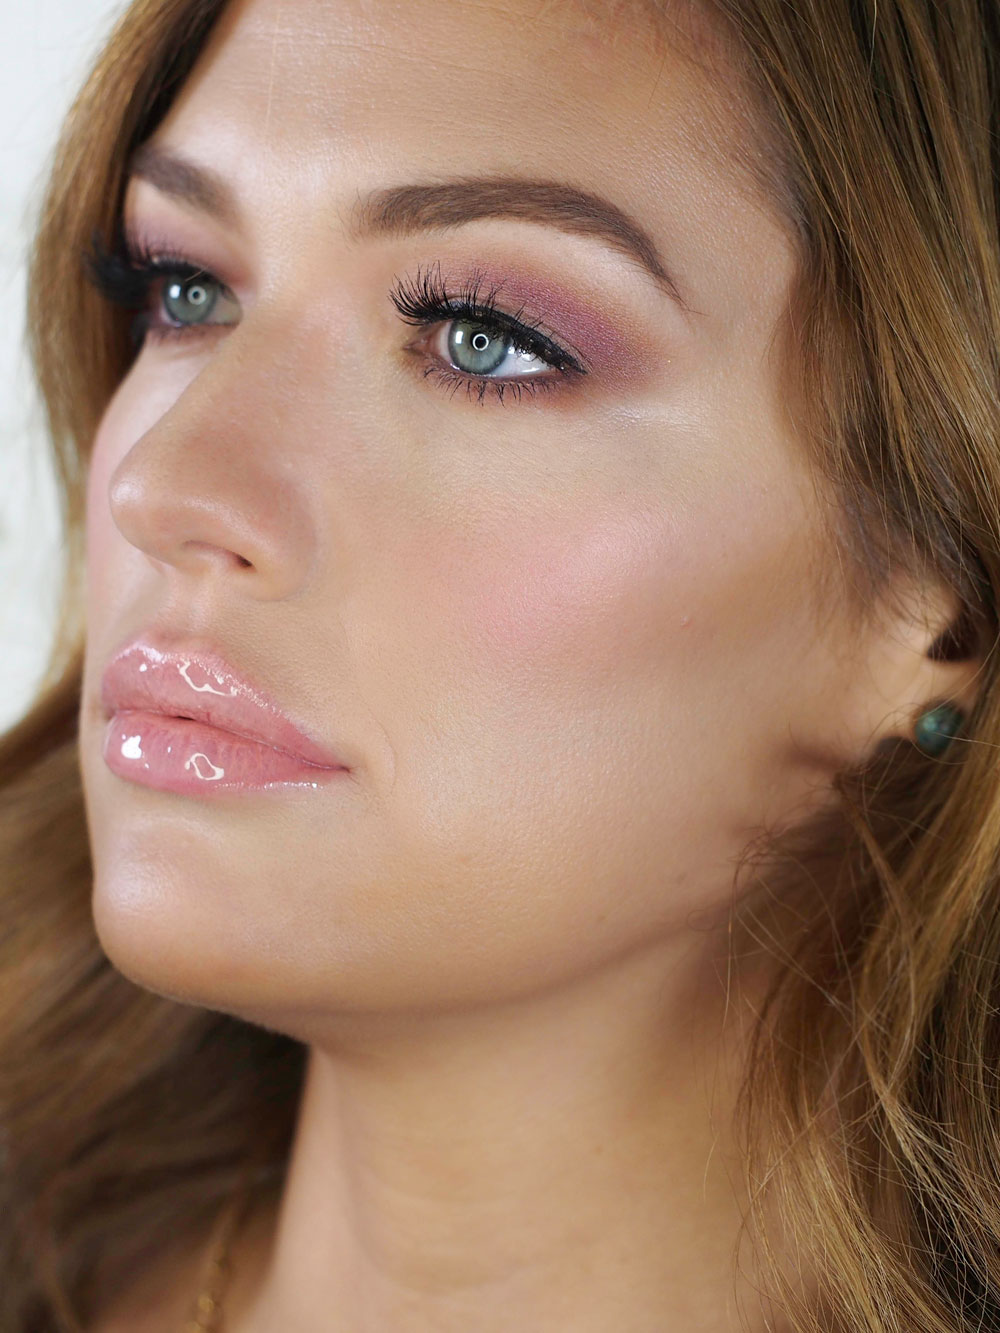
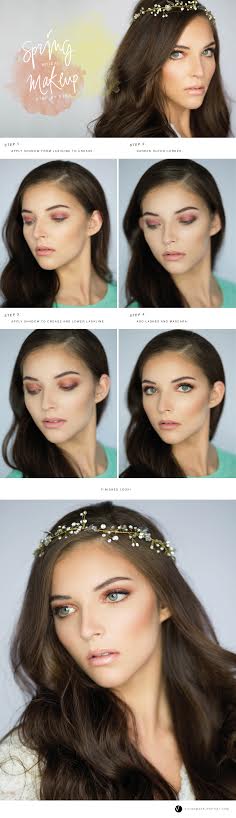
So Amanda had a drastic hair change recently, and I was elated to try a different look on her. We went super girlie with her makeup to go with her flirty new hairstyle and this adorable dress she was wearing (sorry I don’t have a pic of it!)makeup_spring_amanda

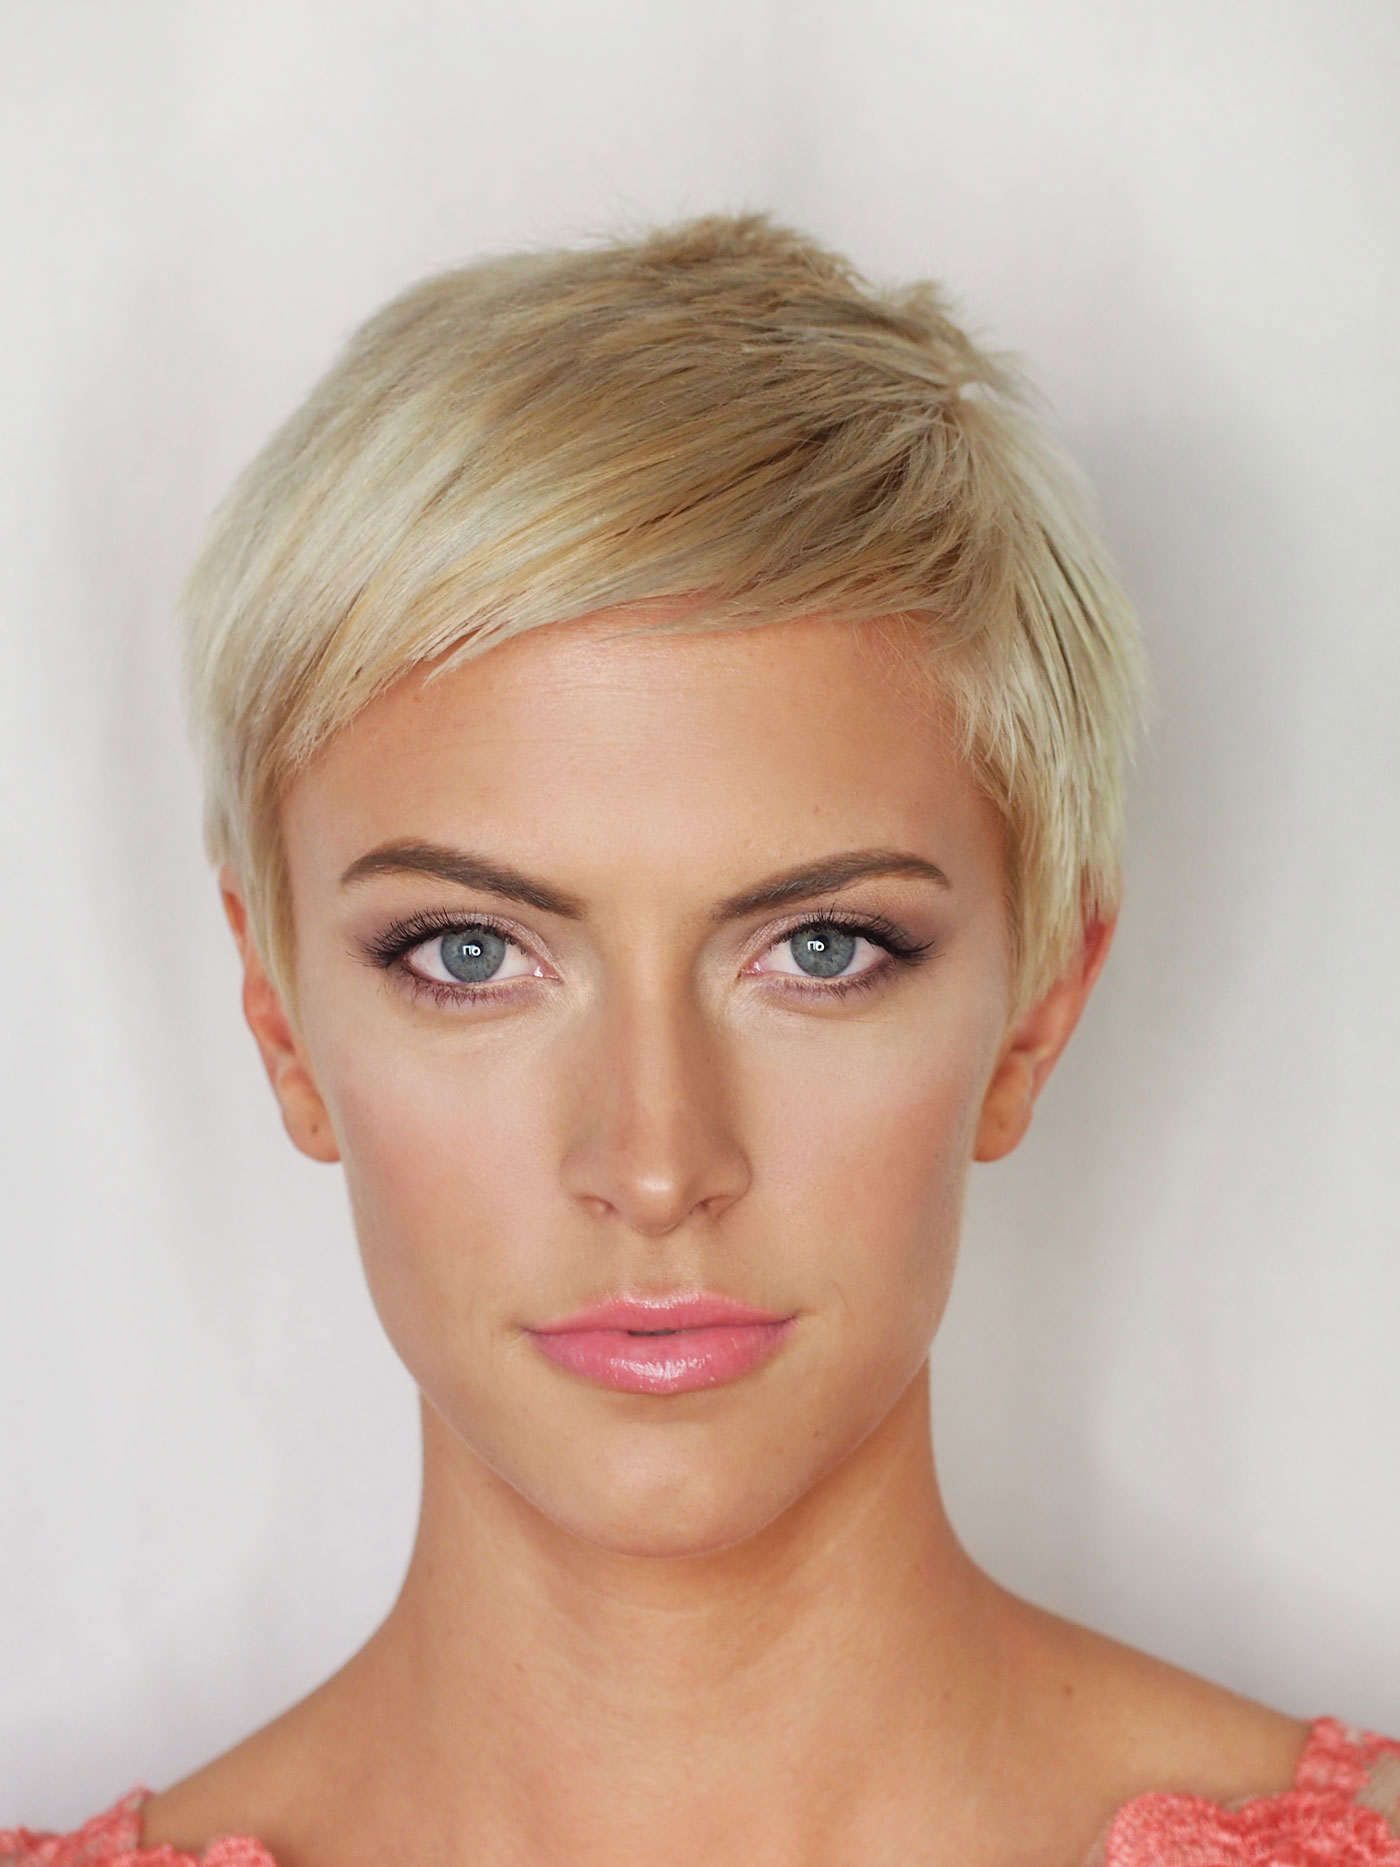
I think it took some getting used to for her, but once she saw it all put together she loved the fresh and super girlie vibe.  I definitely loved it!amanda_springtime_web
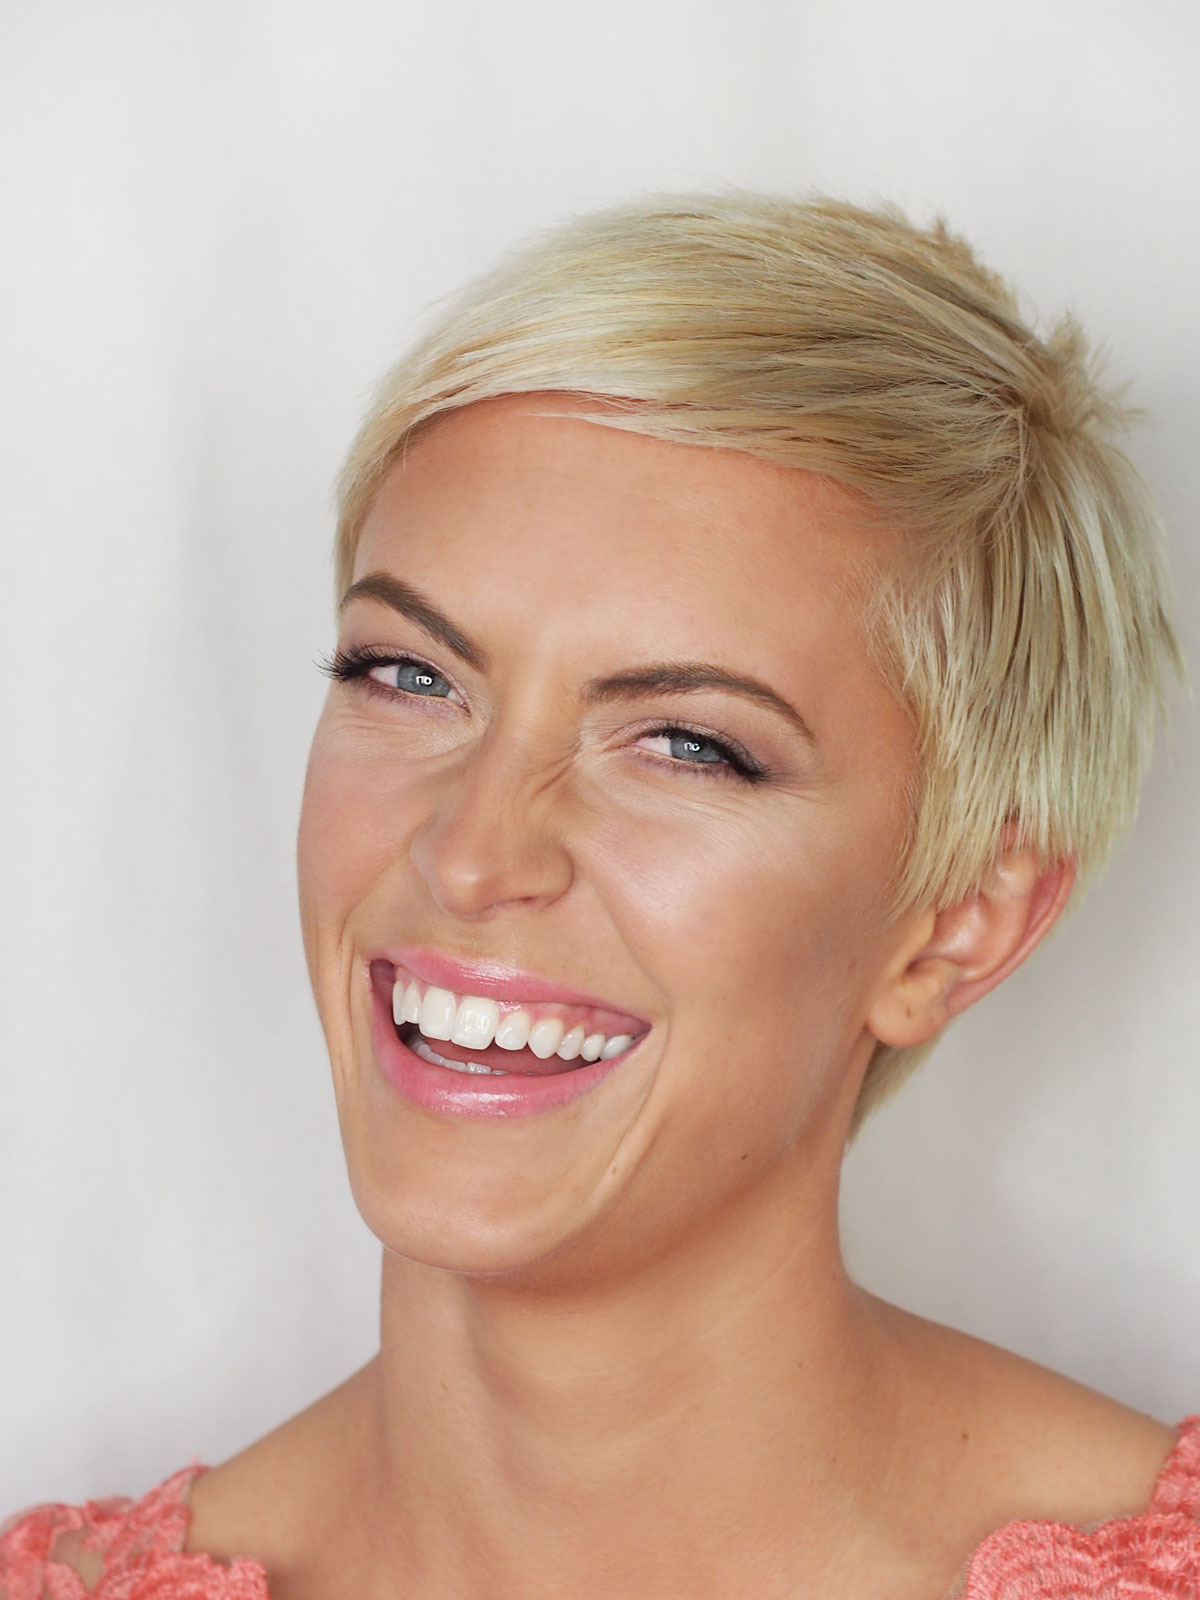
For this look I used:

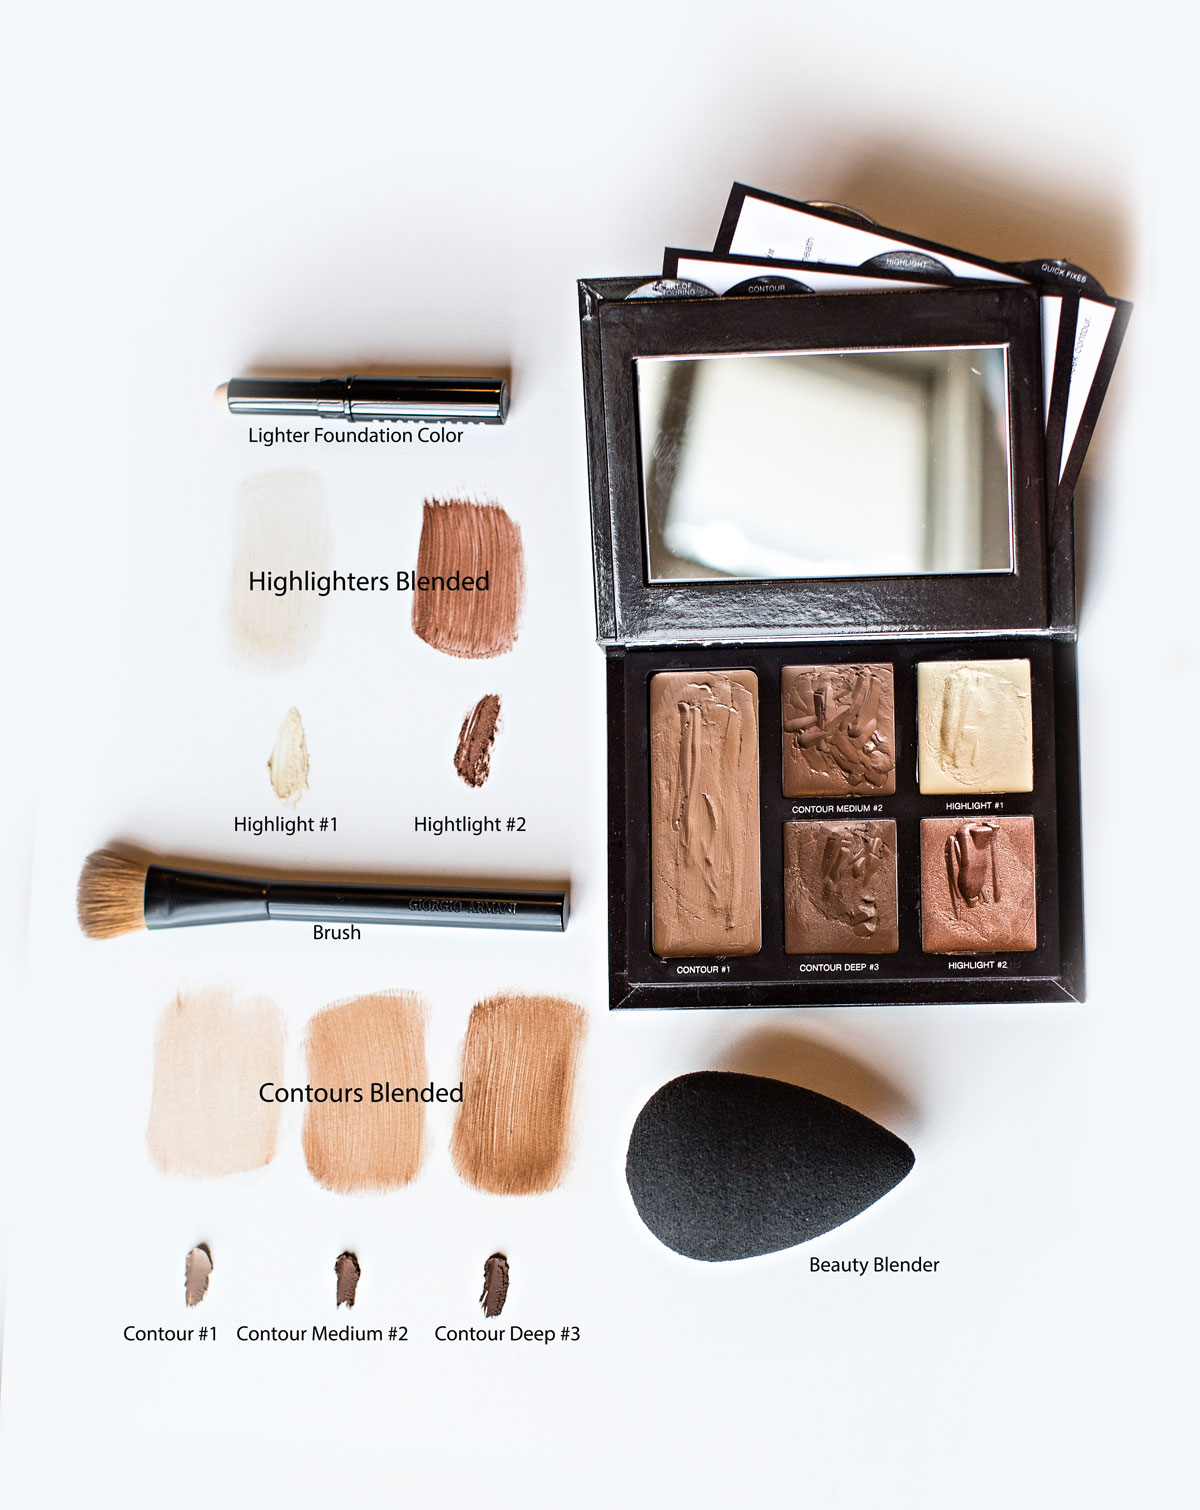
Complexion: Laura Mercier Oil-Free Tinted Moisturizer , RCMA Highlight & Contour Palette,  (I often use different things to contour with depending on people’s skin tone and skin type. RCMA is a brand most commonly used by professionals, in case you haven’t heard of it 🙂 The contour I used on Amanda would also look similar to the Laura Mercier contour colors or Stone by Maskcara Cosmetics.) Lancome Effacernes Concealer in Light Bisque, Tarte Cheek Stain in Fearless.

Eyes: Urban Decay Eyeshadow Primer,  MAC Eyeshadows in Saddle, Wedge, and Jest, Lancome Le Stylo eyeliner in Cafe and Tarte Inner Rim LinerHypnose Mascara, Flare Lashes Combo Ardell.

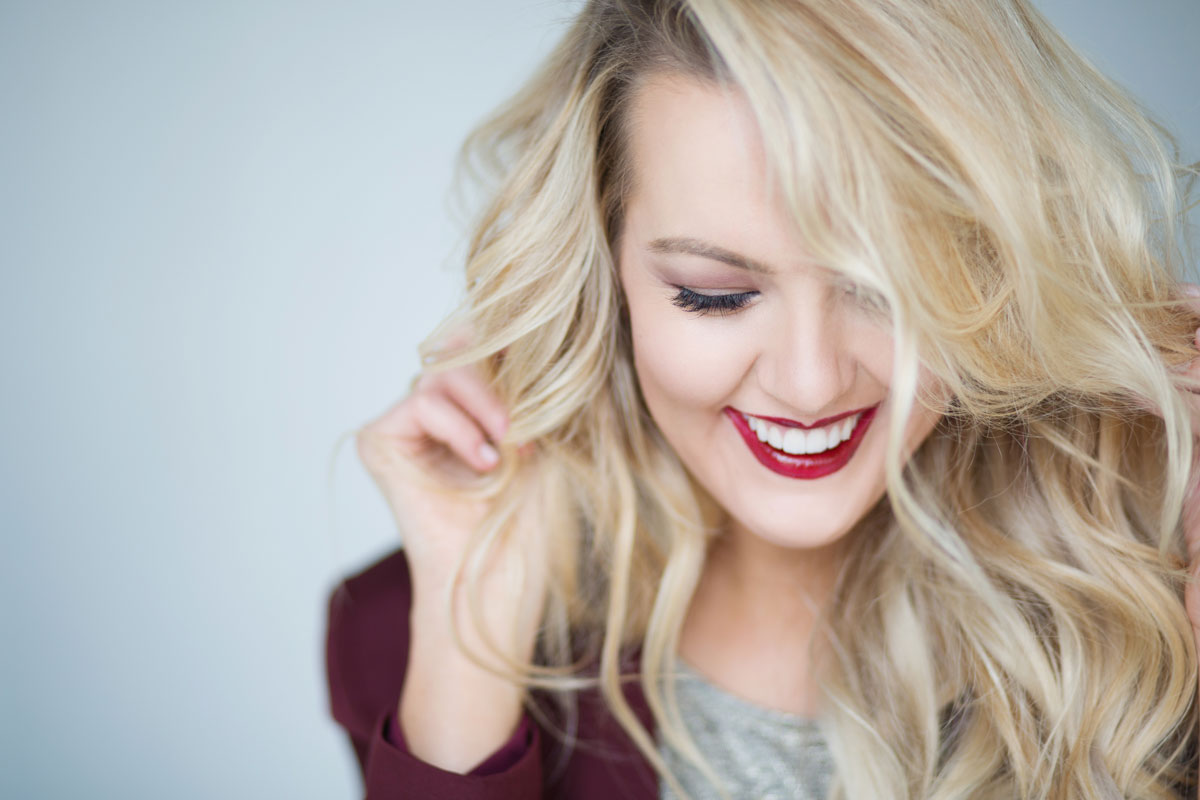
Lips: NYX Butter gloss in Maple Blondie —-A little confused by the name of the gloss, but whatever it’s so pretty! And it’s only $4.99. I get so excited when I find something I like that’s a little cheaper since most of my recommendations tend to be more of the luxury brands, ’cause that’s commonly what I work with and am most familiar with.

But yay for $4.99!!!!

xoxo


2017-07-14T15:43:21+00:00 February 26th, 2015|Makeup|4 Comments

Aging

A few months ago I wished a good friend of mine happy birthday and she responded by saying “Thanks girl. 29! I’m a little depressed!”

I think she was maybe referencing that she felt old or something? She’s only lived a fraction of her life (hopefully!) and she already feels like that?! So sad to me!

We’ve been listening to The Power of Now in our little household and it has so many good points.  Here are a few good tidbits from it:

“If you get the inside right, the outside will fall into place. Primary reality is within; secondary reality without.”
― Eckhart Tolle, The Power of Now

“All negativity is caused by an accumulation of psychological time and denial of the present. Unease, anxiety, tension, stress, worry – all forms of fear – are caused by too much future and not enough presence. Guilt, regret, resentment, grievances, sadness, bitterness and all forms of non-forgiveness are caused by too much past, and not enough presence.”
― Eckhart Tolle, The Power of Now

When I’m getting caught up in worry I’ve been trying to remember to just be in the moment. Sounds a little cheesy but it totally helps.

So back to aging. Last year I was prepping to teach a class to women who’s ages ranged from 21-99 and I wanted to have some good quotes. During my search, I happened upon this post written by one of my favorite people, Cara. She said pretty much everything I was thinking, but better. You can read it here. 

before_after_kari

Complexion: Lancome Absolue bx foundation, Laura Mercier Secret Concealer #2, Maskcara cosmetics to contour in Stone, Tarte Cheek Stain Flush

Eyes:  Urban Decay Eyeshadow Primer, Urban Decay Naked Basics PaletteLancome Artliner in Noir, Flare Lashes Combo ArdellLancome Brow Pencil in Taupe

Lips: Urban Decay lip liner in Catfight, Bobbi Brown Crystalkari_web
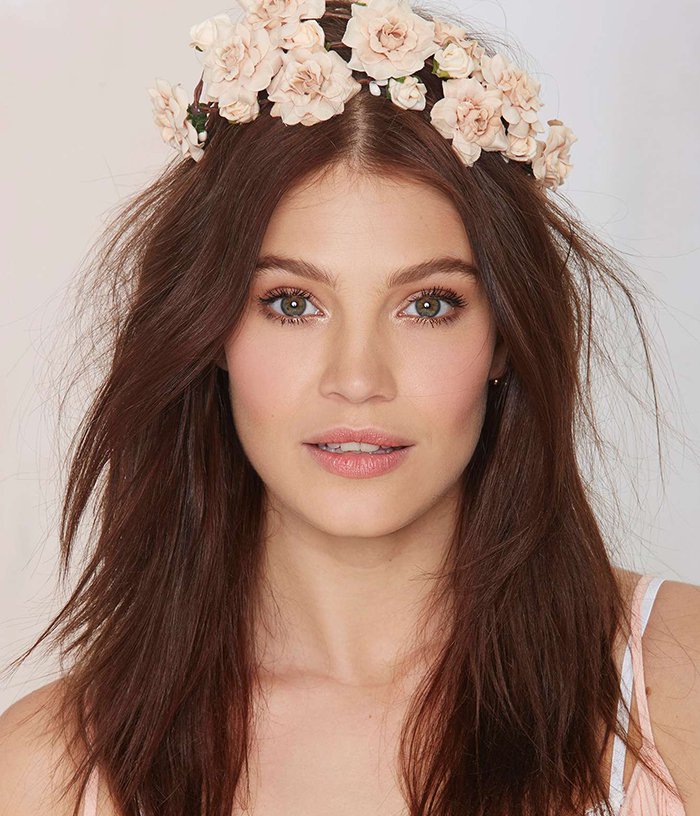
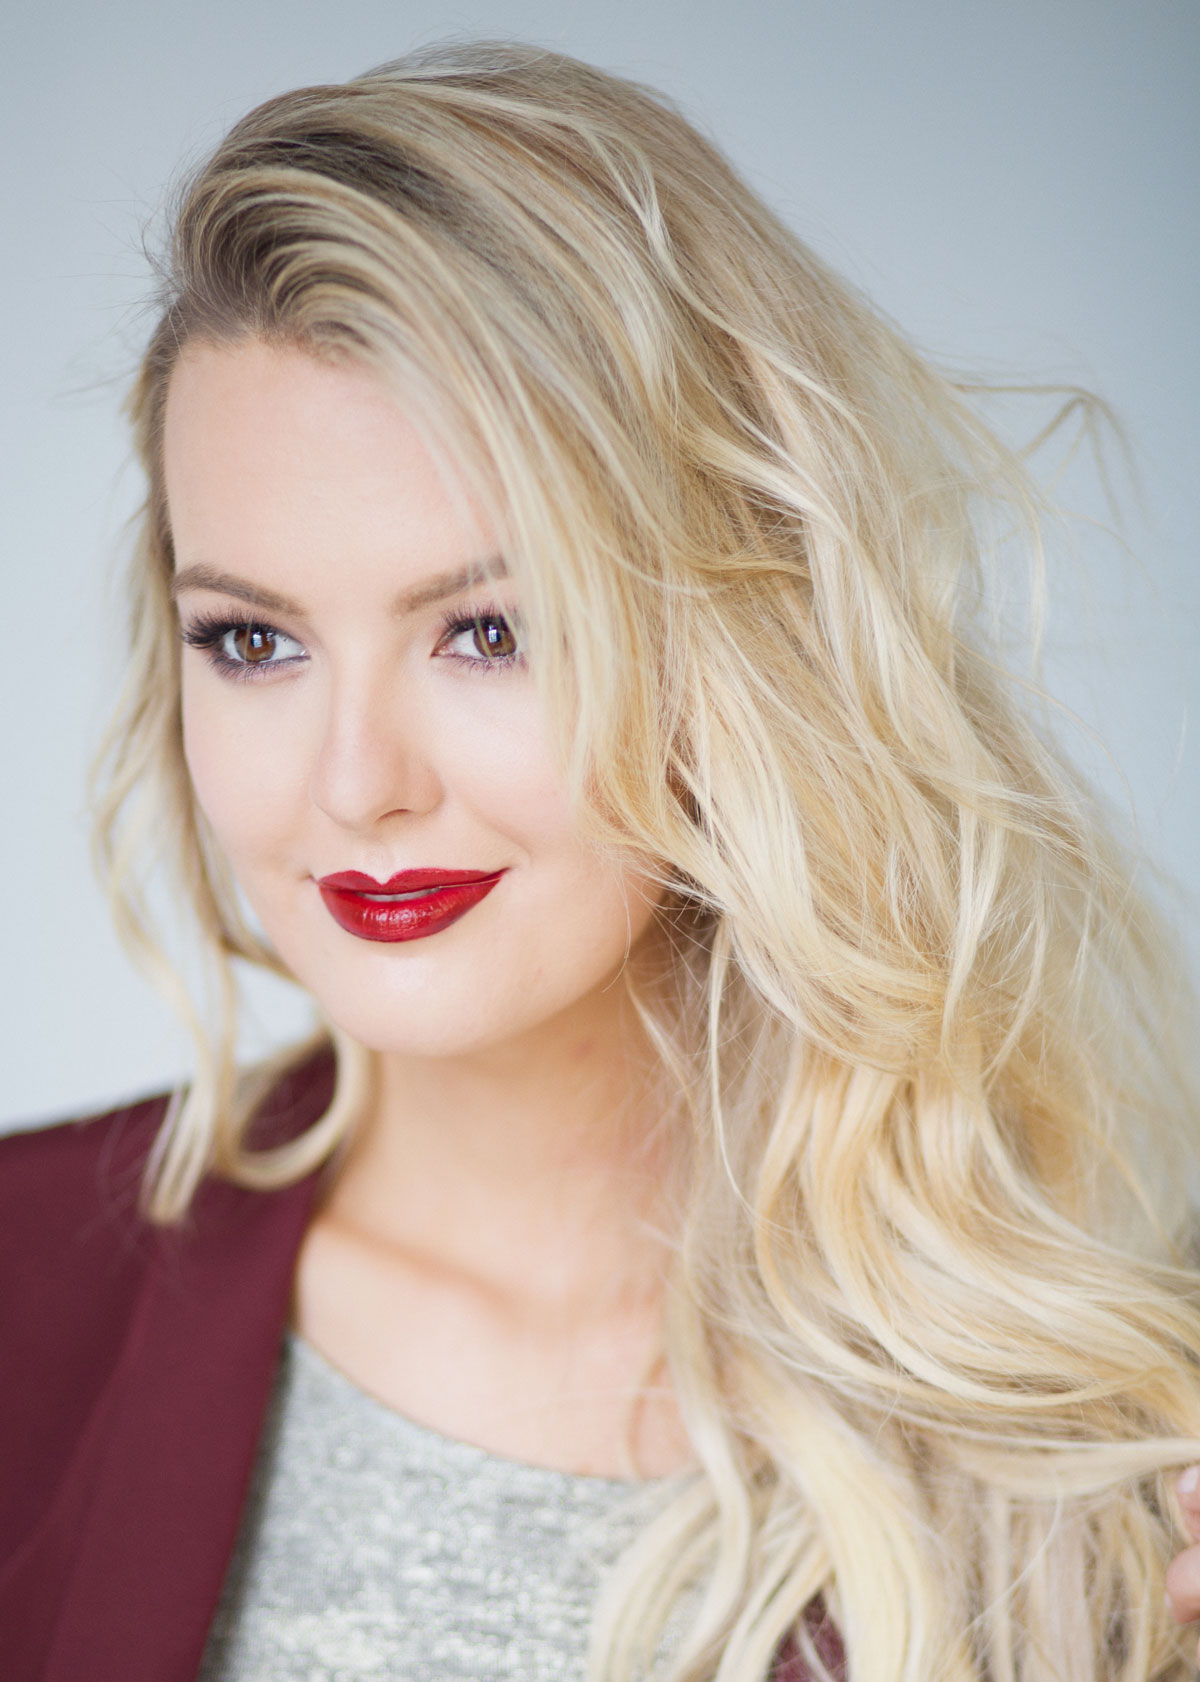
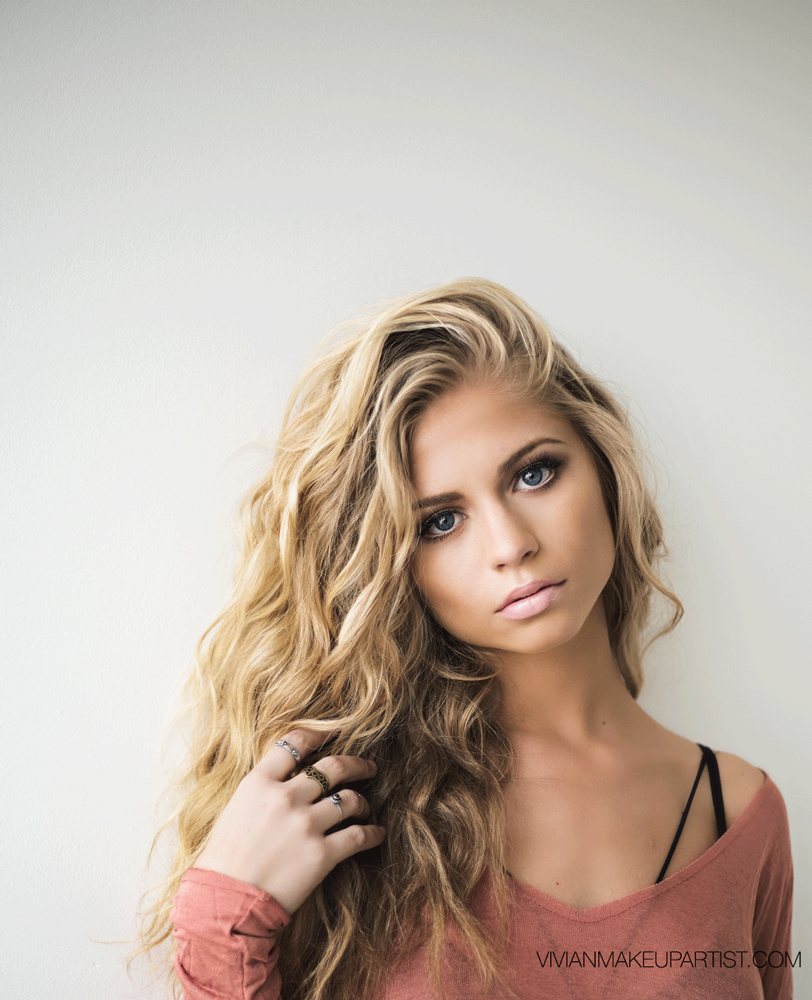
Isn’t Karri beautiful?

She was one of my models for a class that I did for the darling Steph of Hair and Makeup by Steph.  (ps Steph teaches hair styling classes and she’s amazing!)

I love Ms. Steph. She’s a good one. Hairandmakeupbysteph_vivianmakeupartistI will be offering some new types of classes for those who would like to be makeup artists (all levels.) If you’re interested either comment below or shoot me an email and let me know what kinds of things you’d like to learn, I want the classes to be as useful as possible!

Photos by JessaKae

2017-07-14T15:43:21+00:00 February 23rd, 2015|Makeup, Uncategorized|10 Comments

What is “Natural” makeup

When you hear the phrase “natural makeup” what does that mean? Is it the number of products used? The colors of the products? The amount of the product actually put on your face? All of the above?

People will often say they want a “natural” look. After working with thousands of clients, I have learned that it means ENTIRELY different things to everyone. So as soon as I hear that, my brain instantly goes into detective mode ’cause I’ve gotta try to figure out what they mean!

I didn’t do the makeup in these photos below, I am just using them for the sake of demonstration.

detaileddramatic_marsala


The photo on the left obviously looks more natural, so a lot of people think that that means there’s less steps and that it will take less time to do, which isn’t always the case. Sometimes it is the case, but not always.

So I analyzed each pictured to see what I thought was used to create each look and my guess is that they probably took about the same number of steps. natural_detailsdramatic_marsala_detailsKinda crazy right?

-You don’t always have to use something “dark” for it to enhance the feature. Example: In the first photo (flower crown) the illuminator color that’s on her inner tear duct is stunning and totally brings out her eyes. And it’s a light color!

-On a different note, to look real fancy super fast, line the inner rim of your eyes with a dark eyeliner and put on a bold lip. It’ll take your look up a notch and it’ll take like two seconds… or at most two minutes.

Which look do you like better? Comment below!

I promise you won’t be spammed for putting in your email address, it’s just to make sure you’re a real live human 🙂


2017-07-14T15:43:22+00:00 February 20th, 2015|Makeup, Uncategorized|10 Comments

Spring Bridal Makeup

The warmer weather here in Salt Lake is getting me excited for spring and summer! Since most brides would rather have the flowers, without the “April showers” (i’m such a poet) let’s call this look the springtime-with-summer-on-the-horizon-bridal-look 😎


bridal_makeup_for_springLike this look? Pin it!

The details

Step 1 Apply MAC Cranberry eyeshadow from lash line to crease using MAC Fluff Brush 213.

Step 2 Darken outer corner with MAC Embark using MAC Mini Shader Brush 228.

Step 3 Apply MAC Amber Lights to crease using MAC Fluff Brush 213 (same brush as step 1) and to lower lash line using MAC Mini Shader Brush 228 (same brush as step 2.)

Step 4 Add lashes, mascara, and a nude eyeliner. 

A few things, the flares I used for her lashes are twice as full as the typical individual flares from Ardell, therefore, I didn’t feel like she needed a dark eyeliner on top because her eyes were already defined by the lashes. Plus, the dark eyeshadow dupes as a liner.

Her lip color is Lancome lip liner in Charme and Dior Gloss 257 Venus.  Her blush is Chanel Rose Bronze. 

For brides, waterproof mascara is often a good idea, just in case.

These photos were taken by Jessica Janae, then they took some bridals after I got her ready. Pretty lady! Flowers by Soil & Stem. Headband by https://www.etsy.com/shop/ThePoshSociety

bridalbridal_makeup

Also, to follow up on my post about wavy curly hair texture, I tried the whipped creme mousse from Sebastian. I like it! It’s awesome if you do not want any crunch to your hair. I’d say it’s like 2/3 mousse with a little hold and 1/3 super light weight leave in conditioner. For something with a little bit more texture or hold, I love the Kenra mousse, and that link takes you to a sample size so you can try it out before making the big jump. Plus I’m kind of a fan of the smaller bottle for portability reasons too.

Wavy hair kind of makes me think of summer too…beachy waves….beach…..

Is it weird that now I kind of want a Big Stick popsicle?!
Oh the memories…big sticks and roller blading. Anyone know if those popsicles still exist?!


2017-07-14T15:43:23+00:00 February 18th, 2015|Makeup|7 Comments

It’s Me!

It’s me! My very own before and after on myself 🙂 vivians_beforeandafterI thought I would have a difficult time posting this, but to my own surprise I am actually excited about it! It’s a lot of pressure to feel like you always have to be perfectly put together, don’t you think? Of course I think it’s so fun to get ready and get dolled up! But my reality, especially over the last year, is that I definitely don’t get ready everyday. Sometimes, there’s just lots of other things I need to get done.

I’m working on conquering my insecurities. Because, insecurities are just….annoying! Aaaaaand sometimes cause me do things that are inconvenient and kind of weird. For example making my husband Jeff, go into a restaurant and order my food (having to call me mid-order because he can’t remember all the ways I like my order,) then bring it to me so I can eat in the car. Because I didn’t get ready and I am certain that I’ll run into people I know. I’ve always known that it’s a little ridiculous, but writing it out, just confirmed it. 😎

I remember once when I was a young teen, complaining to my mom about not liking the shape of my legs. And she said something that I had never thought about before. She turned to me and said “At least you have legs. And not only do you have them, but they work. There are so many people that would give anything just to have the chance to walk.”

She was right. I try to remember that our bodies are meant to be able to do things, and they don’t just exist to look a certain way.

Speaking of bodies, I am constantly having issues with my neck and back. Ya, I’m already falling apart I know! Haha, and I picked an interesting profession to work in, since I’m always hunched over while I’m working. When I have a tension headache I’ll lay down on my back with a pillow under my knee’s and rest on this thing here, and I just found it for half the price I paid for it! Even if I only lay there for a few minutes, it at least helps a little bit with my neck pain, so I thought I’d share.

So here are the details on my getting ready process:

I get spray tans 1-2 times per month and I go to Bella Airbrush Tanning in Salt Lake.  I get the half body tan (much cheaper if you get a package) and I ask the owner Amanda to do from my knee’s down and then my chest up. Kind of funny but I wear a lot of long maxi skirts and short sleeves tops, so the parts she tans is about all anyone sees! If I obey all the rules (there’s super useful info on the Bella site,) my tans last about a week, sometimes up to a week and a half. I always exfoliate with the Baiden Mitten before my tanning appointment.

I curled my hair using the Sultra 1 inch curling iron. This curling iron curls my hair faster than any curling iron I’ve tried. And I sprayed my hair with Oribe Beach Spray, and I found it on Amazon! Guys, why do I love Amazon so much!?

And here are the details on my makeup:

Complexion: Laura Mercier Smooth Finish foundation (this is like a medium coverage foundation, good for oily skin.) theBalm Bronzer on my forehead and neck, nose contour by Maskcara in Shadow, under eye concealer is Laura Mercier Secret Concealer, I used #3. Blush is Tarte Cheek Stain in Flush (you can’t really tell in this photo, but it’s like a sheer berry color.)

Eyes: Urban Decay Eyeshadow Primer, and I just used one eyeshadow actually and it was MAC Antiqued. Lancome Le Stylo eyeliner in Noir.Hypnose Mascara, Flare lashes combo pack.  And my new fav brow pencil (because it’s super fast) Dolce&Gabbana brow pencil in Soft Brown. A more budget friendly option, and one I use often is Brow Wiz.

Lips: Giorgio Armani Lip Maestro Lip Stain in Gio

I mostly needed a before and after photo, but Jessica took some other photos and did a great job!vivian_johnson_makeupThis blazer is already on sale and if you enter the code 20PRES15 at checkout it’s an additional 20% off for Presidents Day. It’s a little spendy but fits amazingly and is so comfy. Same with this top! Enter the code at checkout (sometimes I forget to enter the codes! Don’t forget!) And this is the necklace I’m wearing. 
vivianjohnsonvivianI hope you all had the most wonderful Valentine’s Day yesterday and a great Sunday xoxoxo

2017-07-14T15:43:23+00:00 February 15th, 2015|Hair, Makeup|3 Comments

The color

before_after_michelleThis natural beauty looks like Milla Jovovich to me! In my post about contour I promised the rest of the details for her look and here they are!

Complexion: Tarte Cheek Stain in Fearless, Laura Mercier Secret Concealer #3, Bobbi Brown Bronzer in Natural on top of forehead and neckline.

Eyes: Urban Decay Eyeshadow Primer,  MAC Eyeshadows Vanilla (under brow) Saddle (warm brown) Nocturnelle (purple), Lancome Le Stylo eyeliner in Cafe, House of Lashes in Siren, Lancome Brow Pencil in Taupe with MAC Brun added to the arch using an angled brush for definition.

Lips: Urban Decay lip liner in Native, MAC Pro Longwear Lipglass in Patience Please. vivianmakeupartistI added Bobbi Brown Crystal gloss for the photo above. It’s the shiniest stuff ever!

A friend of mine posted this on Instagram and I really loved it. quoteIt makes so many great points!

Have a wonderful day everyone!

2017-07-14T15:43:23+00:00 February 10th, 2015|Makeup|0 Comments

Mint Arrow Makeup

Every time I do makeup on Corrine (she’s the mastermind behind the high-end deal blog Mint Arrow ) I think to myself “I’m flattered that I’m here, but I don’t know if you need me cause you don’t really need makeup…….”  BUT it’s those subtle makeup details that will make you look as good in a photo as you do in person.mintarrowmakeupThe details:

Complexion: Bobbi Brown stick #3.5 (sheer application,) Contour Medium #2 from the Laura Mercier Flawless Contouring Palette, under eye concealer is Secret Concealer #3.7.

Eyes: Urban Decay Eyeshadow Primer, Naked Basics Palette, Brow Wiz in Medium Brown, and Brow Gel. 

Lips: MAC Creme De La Femme and Paper Lantern lipglass. 
vivianmakeupartistmintarrowPhotos by Travis J Photography

2017-07-14T15:43:24+00:00 February 9th, 2015|Makeup, Uncategorized|1 Comment

The Contour Up Close

Highlighting and contouring have been around for ages, but it’s recently become more mainstream and a lot more people are implementing it into their daily makeup routines. This combo below is what I have been using a lot on myself and on my clients lately and I love it. vivianmakeupartist_highlight_contour
The little stick titled Lighter Color Foundation is the lighter color you’ll see in the photos below. It’s the Bobbi Brown Face Touch-up stick.  It also comes in a larger size, but I like that the little stick is such a good size to highlight down the center of the nose. However, the larger is a better value. I actually own both sizes in several colors and love them both.

The palette with the 5 colors is Laura Mercier Flawless Contouring Palette.  The palette comes with 3 different shades of contour creams and 2 highlighters (shimmery illuminating creams.) This contour kit is easy to use and comes with instructions built into the kit, which is nice in case you forget. And I like that it’s easy to get (some of the other contour products I use I have to order through weird specialty sites and pay a fortune for shipping.) This one you can just get at Sephora.  My favorite brush to use with it is this blender brush. 
contourIt can be kind of shocking to see the stripes… kind of intriguing though too, right?

The key is to blend. That’s what I use that black tear-drop shaped sponge for you see in the photo. It’s called a beauty blender. You’ll want to get it damp before you use it, it makes it even softer and keeps it from absorbing as much product. I love the solid cleanser to wash it with and also use it to wash my makeup brushes. I also applied the tiniest bit of foundation to help blend the highlight and contour together. I used Teint Miracle  in Buff 6.

I have basically tried to improvise while I’m waiting for Maskcara’s foundation to arrive (I had some samples of it, which I used in a few posts back, but don’t currently have it.)

I hope this is useful info for everyday contouring that looks natural! And just remember, I did a more dramatic contour for the photos so you could see it really well. You can always blend more to make it even more discreet.

The rest of the products used for this look coming soon!

Xoxo

2017-07-14T15:43:24+00:00 February 8th, 2015|Makeup, Uncategorized|0 Comments

Wavy Curly Hair Texture

wavy_hairMust haves:

A 5/8 inch curling iron

Beach Spray

Sometimes when people have naturally wavy/curly hair and they say they hate it, I want to cry a little.  I get it, sometimes the hair is not all the same amount of curly. Sometimes it’s straighter on the top and ringletty on the bottom. You just need to help those lil curls out a little.

My wavy hair to do’s:

-Be careful while towel drying. Opt for a gentle wrap and squeeze rather than a wrap and rub back and forth (that can cause the hair to be more frizzy.)

-Use the right products. On Jessa I used this mousse (I got it when I purchased my Kenra 25 Hairspray.) Here’s an update on my current favorite products for a wavy or curly hair look:

  •  A mouse that’s good for all hair types (straight hair but wanting it to hold curl better or wanting to control curly hair) is this one here from Oribe and the bottle lasts forever! So if you just want to try it out you can also get this travel size one 
  • I spray this Beach Spray before grabbing a few sections of hair to curl (instructions below) Oribe Beach Spray travel size here. I must say, Oribe makes some great products.
  • If you hate the feeling of anything in your hair but want some softness and control I like this whipped creme mousse . I wouldn’t say it’s a must have but that’s because I don’t mind having lots of hair product in my hair 🙂

– After applying some mousse from root to tip, blow dry your hair with a diffuser and flip your head upside down for a little bit more volume. If your hair tends to get frizzy, use a lower setting.

-Wrap sections of hair around a small curling iron to give it a little bit more curl in the areas that need it.  You can just grab random sections, it doesn’t need to be super uniform. It’s fast and will make a big difference.

Jessa’s hair is amazing! I made her come to her appointment with wet hair so I could style it using the previous steps, from start to finish.
Here’s the makeup I used on her.

Complexion: Temptu s/b Foundation in 004 And did you know you can apply this foundation with a brush? I have been using this one a lot and love it with this formula, and it’s cheap! Laura Mercier Secret Concealer in 2.5, theBalm Bronzer

Eyes:  Urban Decay Eyeshadow Primer,  MAC Eyeshadows in Copperplate, Bronze, and Embark, Tarte inner rim liner,  Demi Wispies, Hypnose MascaraBrow Wiz in Taupe and Anastasia Brow Pen in light.

Lips: Urban Decay lip liner in Obsessed (blotted and blended to soften the color) MAC Pro Longwear Lipglass in Patience Please. Similar to MAC Myth 

wavey_hair_jessawavy_hair_curly_beach_waveswavy_curly_hair


2017-07-14T15:43:24+00:00 February 4th, 2015|Hair, Makeup, Uncategorized|31 Comments

Makeup for Maternity photos

This stunning lady is soon to be a mother of 4 and she wanted to go all out for her maternity photos, which I think is so awesome.before_and_after
Sarahn says she LOVES a bold lip and winged liner, which I think looks great on her. She also mentioned that people often tell her she looks way too young to have 3 little ones, so I gave her a polished look but kept it sassy (you should see the shoes she was rocking!) I can’t wait to see how her photos turn out, they’ll be amazing I’m sure of it.

Complexion: Temptu s/b Foundation in 004Laura Mercier Secret Concealer 2.5, theBalm BronzerTarte Cheek Stain in TipsyShadow from Maskcara cosmetics for nose contour. 

Eyes: Urban Decay Eyeshadow PrimerMAC Eyeshadows  in Vanilla, Wedge and Brun, Nars Eye Paint, Demi WispiesBrow Wiz in Soft Brown first, and MAC Brun shadow applied with an angle brush to intensify arch.

Lips: Urban Decay lip liner in 69, Lip Tar in New Wave

Hair: Kenra hairspraySultra 1 inch

xoxo

2017-07-14T15:43:24+00:00 January 30th, 2015|Makeup, Uncategorized|0 Comments